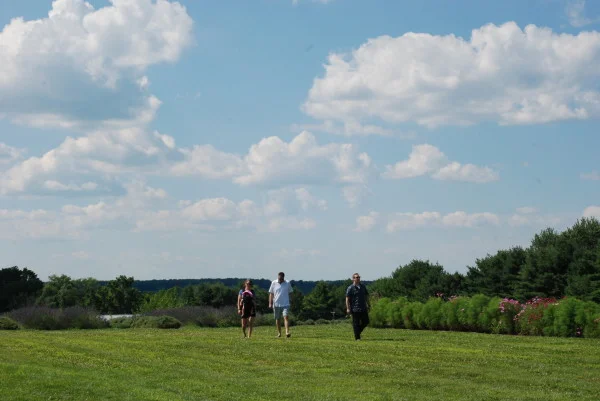
Cook a Duck, Part 2: How to Make Confit

So you've rendered all the fat one duck can pack. You've got a few cups of the stuff in the fridge, and you made yourself a mighty nice salad with some cracklings on top. The breasts, legs, and thighs (not to mention the wings and the carcass!) await their delicious fates. Why yes: it's cook-a-duck week here on NDP. Today's lesson: making duck confit.

Among the many things about duck confit that thrill me are a) that making it was, no joke, a cinch; b) that my house smelled like an honest French bistro as I made it; and c) that the process makes duck taste like someone rubbed its body with butter each day and sang it to sleep every night. There simply is no better treatment for duck legs than a slow, gentle cooking bath of its own fat. If that sounds gross to you, I don't know what to say. If you're salivating right now, step into my office.

As we discussed in Part 1, ducks' skin is incredibly fatty -- so much so that there's usually enough fat on a duck to confit both of its legs, no sweat. This is convenient, because it means you shouldn't need to buy extra fat for the confit process. However, if you're nervous about running out, just ask your local butcher for some extra skin.

Either way, before making your confit, you'll need to butcher the duck. This is a great video tutorial for breaking down a duck -- the first method, separating the breast and leaving leg and thigh intact, is the one I used (though I started with leg and thigh, and I also did a bit of a hack job -- first time, and all that.) Once you've separated your duck into parts, you'll want to strip the skin from the carcass and any parts you don't plan on cooking whole. In my case, I stripped skin from the carcass and from part of the wings, since I knew I would be using both of those parts for stock. I left the skin on the breasts mostly intact, just trimming the edges where there was excess. As you can see in the picture above, I gathered all my skin into a little plastic bag, to be rendered into fat that I'd use for confit (see this tutorial to learn about rendering the skin.) I had plenty of fat for the confit process without the fat from the breasts, but again, if you're worried you won't, ask your butcher for some extra fat.

The uses for duck confit are many. You can eat confit as is, with a nice frisee salad on the side. I'm thinking I might add some stock and mirepoix to the confited meat and serve it over tagliatelle, a dish I've eaten at several local restaurants and always wanted to make.

And with that, we're half-way through the Cook a Duck series. Stay tuned for parts 3 and 4, where I make sure no part of my duck is left un-delicious-ized. You heard me.

How to Confit a Duck Leg/Thigh

note: I used a kosher bird for my confit, which had been salted for a couple hours as part of the kashering process. If you're using a traditional bird, make the cure as instructed. If you're using a kosher bird, halve the amount of salt in the cure recipe below.

2 duck legs about 1 3/4 cups duck fat 1/8 cup kosher salt 1/2 tablespoon light brown sugar 1 bay leaf, broken into pieces 1/2 tablespoon thyme 1 1/2 tablespoons packed flat-leaf parsley

special equipment: oven thermometer

Combine salt and herbs in spice blender and process until well combined. Set aside.

Clean duck legs of any excess fat and skin -- be sure to leave about 1/4-inch overhang of skin on each leg.

Weigh the duck legs so you know how much cure to use: you want 2 tablespoons of herb salt for 1 pound of duck legs. (Each of my legs weighed about 1/2 a pound.) Rub about 1 tablespoon of herb salt over each leg, and put the legs flesh side up in a single layer in a baking dish that holds them comfortably. Cover with plastic wrap and refrigerate for 24 hours.

Preheat the oven to 190 degrees F. You'll need an oven thermometer, because ovens tend to fluctuate -- especially at this low temperature -- you'll want to check and calibrate the temperature accordingly.

Rinse the duck legs thoroughly (you want to remove as much of the salt as possible so the legs aren't overly salty when cooked), dry thoroughly, and place them in an ovenproof pot with a lid. Add enough melted duck fat to cover the legs, and heat over medium heat just until fat is warmed.

Cover the pot, transfer to the oven, and cook for 8-10 hours. Check a duck leg for doneness at 8 hours by carefully lifting it and piercing it with a knife. The meat should be meltingly tender. If needed, continue cooking for up to 2 more hours, being careful not to overcook them.

Carefully remove the legs from the fat and transfer to a storage container. Cover with plastic wrap and transfer to the refrigerator.

Cool the fat in a separate container. Once the fat has cooled (at least overnight in the fridge), use a spoon to carefully scrape the fat off the juices, which will have jelled. The jelled duck juice makes the most fabulous base for sauces and soups, so save it! Once the fat has been separated from the juice, add the fat to the container with the duck legs, smooth the fat so it surrounds the legs, and refrigerate. Duck legs will keep for at least a month. Keller says 6, but I'm not capable of leaving duck confit uneaten in the fridge that long.

Cook a Duck, Part 1: How to Render Duck Fat

Among my mildest marital disputes is a debate over poultry of choice. She likes chicken; I like duck. I suppose that's not surprising, since m'lady loves straightforward food that doesn't keep me in the kitchen for long hours, and I...well, I love long hours in the kitchen. For months, I've been all talk about making duck. Not least because it's on my kitchen resolutions list, I thought it'd finally be nice to learn how to make duck confit, which I love; duck fat, which makes french fries sing; duck cracklings, which transform a salad or a lazy afternoon; and duck prosciutto, which remains on my list of to-dos, but will have to wait for another time.

A few stars aligned that pushed me to do this, and do it now. First, my friend Cathy has launched Charcutepalooza, and I had to join the fun. Be sure to check it out. Second, the kind folks at KOL Foods sent over a beautiful, pasture-raised duck, so I knew it was time to put my knife skills where my mouth is.

That's when the fear set in. What if I mess up? What if all the wonderful duck meat and fat and skin and bones don't wind up in all sorts of deliciousness? I needed to start small.

They say start with the outside and work your way in. So that's exactly what I did. I started on the outside -- literally: with the skin.

The deal with skin is simple. It's part fat, part solids, part water. Apply heat, and all the parts separate. Fat renders, solids crisp up, water evaporates.

There are two different ways to render skin. One is to just drop the pieces of skin into the pan, let them sizzle away, and be ready with a spoon to scoop that fat off the heat as soon as it liquefies. Sounds annoying, doesn't it? That's why we used method number 2, rendering the skin in water. Adding a bit of water to the pan ensures the surface temperature can't rise above 212 degrees, so the fat renders gradually and doesn't burn. If you do it right, the water evaporates completely just in time for the fat to all have rendered and the cracklings to crisp up. It's a pretty magical process.

Having done this twice, I'm now the proud mama of 2 cups of duck fat, and those cracklings were effin' amazing. If you stay tuned for Cook a Duck Part 2, you'll see just what I did with that duck fat. I can promise it won't disappoint.

And not to get ahead of myself, but Duck Part 3 is already in the works. Let's just say I wouldn't be surprised if the mild marital dispute I mentioned earlier was put to rest, forever. And yours truly was crowned the winner.

How to Render Duck Fat

Note: the timing of this recipe depends entirely on the size of your pan. I used a little saucepan, but if you use a wider shallower pan, it'll take less time. Up to you.

1 pound of skin 1/4 cup water

Add skin and water to a pan and set over medium heat. When water is simmering, reduce heat to medium-low. Maintain a low simmer, and watch the fat slowly render and the water slowly evaporate. The whole process takes about an hour, maybe a bit more.

Keep an eye on it in the beginning to make sure the simmer isn't too rapid, and be sure to have a splatter screen or a tinfoil tent ready toward the end, because it may splatter once there are only a few drops of water left.

When the splattering subsides, the cracklings are brown, and the fat is clear and liquid, you're done. Scoop out the cracklings with a slotted spoon and transfer to a paper towel-lined plate. Sprinkle with salt and eat. Strain the fat through a cheese cloth-lined strainer (in a pinch, a fine mesh strainer alone will do). Chilled fat will keep in an airtight container for months in the fridge.