Laura Goodenough's Apple Coffee Cake

There comes a time each winter when I open the fruit drawer in search of a snack, and find an endless supply of just apples. First I'm surprised. I get that dead of winter on the east coast means berries and stone fruit are, at best, in the freezer, but where are my shipped-from-California meyer lemons? Aren't there any pears? Then, sad: apples are boring. If I have to eat another bowl of apple butter, I may move to Florida.

When the whining subsides, I drag my derriere out of apple fatigue and get cooking. Sometimes I make this apple crisp, which is totally worth getting out of bed for. Other times, it's pancakes I'm after. Last weekend, what called my name was this tall, crusty apple cake.

This recipe hails from the New York Times Cookbook, yet another success from my favorite cookbook of 2010. While I've no idea who Laura Goodenough is, her apple coffee cake really hit the spot. Unlike my regular apple cake recipe, which is baked in a 9x13 and is thus pretty stout, this here is a lofty cake with quite a presence. Baked in a bundt, it slices into nice tall wedges, pretty when served. The cinnamon is prominent in this cake, which I love; mixed with the apples, it forms a sort of syrup that keeps the cake moist and perfumed. There's something comforting about apple cakes where the apples and the batter are folded together; not so with this version, where the apples and batter are layered into the pan separately. While the layers blend somewhat during cooking, the layers of cinnamon-cloaked apples tucked into a slice of this cake are a most pleasant surprise. I'm still eager for spring to come, but in the meantime, this apple cake is more than goodenough.

Laura Goodenough's Apple Coffee Cake adapted from the New York Times Essential Cookbook

note: as I said above, this is a very tall cake. You'll need a pretty big mixing bowl to make it. Don't be shy -- the results are worthwhile. Also, cinnamon features prominently here. If you want a less aggressive cinnamon flavor, cut 5 teaspoons to 3.

3-5 apples, cored and sliced 1/8-inch thick (about 4 cups) 2 cups plus 5 tablespoons sugar 5 teaspoons cinnamon 3 cups all-purpose flour 1 tablespoon baking powder 1 teaspoon salt 1 cup vegetable oil 4 large eggs, slightly beaten 1/4 cup orange juice 1 tablespoon vanilla extract whipped cream for serving, optional

Heat oven to 375. Grease a 10-inch bundt or other tube pan. In a medium bowl, combine apples, 5 tablespoons sugar, and cinnamon. Set aside.

In a large bowl, combine flour, 2 cups sugar, baking powder, and salt into a bowl. Make a well in the center and pour in the oil, eggs, orange juice, and vanilla. Use a large fork or wooden spoon to mix until combined.

Pour 1/3 of cake batter into pan. Layer 1/2 the apples, drained of excess moisture, on top. Add another third of the batter, followed by the rest of the apples, and finally the remaining batter.

Bake about 60 minutes, until a toothpick inserted into the thickest part of the cake comes out clean. Cover with foil if it begins to overbrown.

Allow cake to cool to lukewarm in the pan, then turn onto a serving plate. Serve warm, with unsweetened whipped cream.
Arugula Fennel Salad with Pears, Pecans, and Pecorino

I think it was last Sunday that our heat first stopped working. We'd just gotten back from out of town, and we had house guests. D had made their bed, I was making dinner, and as I passed through the hallway to check on the mujaddara, I noticed that our vents were pumping bitter cold air. No problem; I cranked the target temperature up to 77, hoping the heat would kick in. Two hours later, no dice. I was standing over the oven warming my hands, our guests were asking for extra layers, and the needle on the thermostat was slowly sinking below 60.

Faced with a cold apartment and a dearth of natural insulation, I did what any sane person does, the only logical thing to do, if you ask me. I made a salad.

Ladies and gents, I present "Salad on a Heatless Winter Evening," cut from the same cloth as "Ice Cream in February" (a brilliant marketing ploy by the manufacturers of the cold stuff that's garnered mass appeal). I loved this salad so much the first time I made it that I've eaten it on three heatless nights since then. Inexplicably, eating a cold salad in cold weather takes the edge off that chill. Maybe it's the whole "if you can't beat'em, join'em" thing.

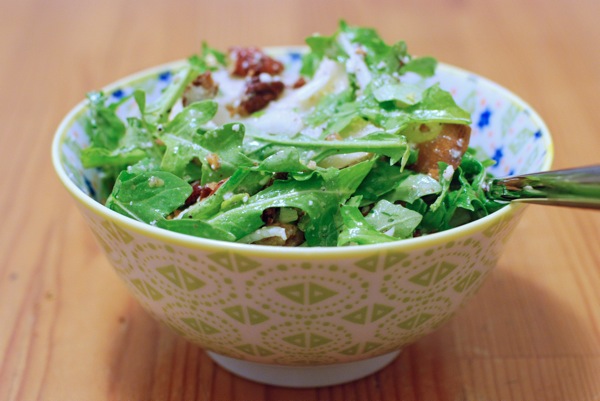
There may be nothing warm or comforting about this salad, but boy is it good. The fennel is crunchy and refreshing, offset by bitter arugula. Sweet pear slices, buttery toasted pecans, and salty pecorino (my new favorite ingredient) round out the salad. The combination is of the addictive, can't-stop-eating variety. Especially now that the heat's back on.

Arugula Fennel Salad with Pears, Pecans, and Pecorino serves 4, or 2 as an entree

1 bulb fennel, stems removed, fronds reserved 4 cups arugula 1 pear 1/2 cup pecans, roughly chopped 1/2 cup pecorino cheese (can substitute parmesan)

For the dressing: 1 tablespoon whole-grain mustard 1/2 tablespoon honey 3 tablespoons champagne vinegar 1/4 cup plus 2 tablespoons olive oil salt and pepper

Preheat the oven to 350 degrees. Spread pecans onto a baking sheet in a single layer, and bake for 7-10 minutes, until slightly darkened and very fragrant but not burned. Set pecans aside to cool.

Halve fennel, and make a v-shaped slice into the heart of each half to remove the core and stem. Using a mandoline or a very sharp chef's knife, slice fennel into rings about 1/8-inch thick. Slice pears into 1/8-inch slices as well.

Combine all dressing ingredients in a bowl or jar, and whisk or shake to combine.

In a large salad bowl, combine arugula, fennel, pear, pecans, and pecorino. Drizzle most of dressing over salad, taste, and add more dressing if desired. Serve immediately.

Za'atar Flatbread

Behold the strangeness of za’atar.

Za’atar is an herb. Sorry – it’s not a specific herb, but one of any number of herbs in the hyssop family. Scratch that: it’s a combination of herbs. But wait, sometimes there are sesame seeds. Actually, it’s a paste made with some type or type of herbs, sesame seeds, and lots of olive oil.

Confused? Join the club.

In reality, za’atar is all of these things. There is a bush that grows in the deserts of Israel known as za’atar. The bush is most likely a member of the hyssop family, though some call it savory or wild oregano. Za’atar leaves are small and somewhat rough, and their flavor is a fusion of wild oregano and thyme. 

The za’atar you buy in the supermarket is most likely a blend of different herbs. According to Lior Lev Sercarz, owner and spice blender behind the New York-based spice shop La Boîte à Epice, the most traditional elements of a za’atar blend are za’atar leaves, sumac, sesame seeds, and thyme. The color of these blends varies from forest green to dark, deep red-brown, and the flavor ranges from woodsy and deep to tangy and a bit nutty. It all depends on the balance of herbs in the blend, and every country -- nay, every spice blender -- makes it a bit differently.

Za’atar has many uses. Food carts and hole-in-the-wall lunch joints use it as flavoring for labneh, a thick sheep’s milk yogurt. In Lebanon, the traditional salad of tomatoes and ripped pita called fattoush is topped with a dusting of za’atar. The Druze, a community living primarily in the north of Israel, use za’atar in a salad of red onions, lemon, and olive oil. But in countries across the Middle East, from Israel to Egypt to Syria and Lebanon, za’atar’s most common application is as seasoning for bread. If you order a “laffa im za’atar” from one of the stalls in the Israeli shuk (open-air market), the stout man behind the counter will hand you a hot, floppy flatbread shmeared with a layer of za’atar paste, made of crushed herbs, sesame seeds, salt, and plenty of olive oil – an addictive combination.

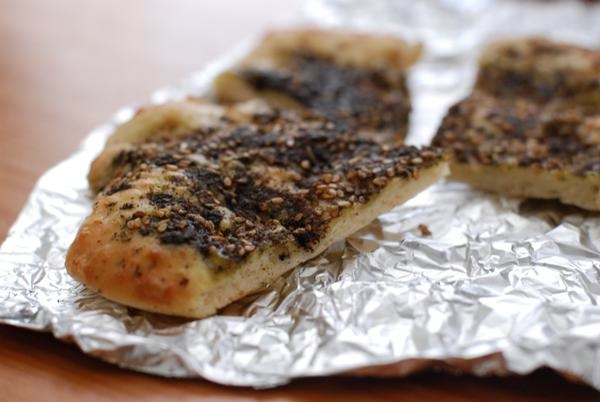
Here's the irony: pinning down the origins and uses for this mysterious herb was actually more complicated than making that delicious flatbread. Laffa im za'atar is a snap to make, no two ways about it. If you can't find a za'atar blend at a specialty or Middle East grocer, I've provided a recipe for homemade za'atar, which is my take on the Israeli za’atar blend I ate regularly during my time in Jerusalem. The restis simple: make flatbread dough, stretch it on a sheet pan, drizzle it with olive oil and sprinkle with za'atar, and bake in a piping hot oven until bubbly and browned. If you're staying really traditional, you'll let the thing cool and eat it as an on-the- go snack. That's if you can resist a bite of za'atar-coated bread right out of the oven, which I cannot.

Laffa Im Za'atar (Flatbread with Za'atar)

Za'atar blend:

3 tablespoons sesame seeds, toasted 2 tablespoons dried thyme 1 tablespoon dried oregano 1 tablespoon sumac 1 tablespoon sea salt

For the Flatbread:

1 ½ cups all-purpose flour ½ teaspoon instant yeast ¾ teaspoon salt ¾ cup water

Olive oil, for drizzling

In a large bowl, mix flour, yeast, and salt. Add water and stir until blended. The dough will be quite sticky. Cover the bowl with plastic wrap and let rest in a warm place for about 2 ½ hours. 

Preheat oven to 500.

Spread 1 tablespoon olive oil on each of 2 rimmed baking sheets. Separate risen dough into 2 pieces, and using a light touch, start to spread dough into circles on baking sheets.  When the dough balls have been spread into circles about 8 inches wide, sprinkle 1 1/5 tablespoons of za'atar onto each. Drizzle 1 tablespoon olive oil overtop.

Bake flatbreads for 10-12 minutes, until browned and crisp. Serve warm or at room temperature.

Cook a Duck, Part 2: How to Make Confit

So you've rendered all the fat one duck can pack. You've got a few cups of the stuff in the fridge, and you made yourself a mighty nice salad with some cracklings on top. The breasts, legs, and thighs (not to mention the wings and the carcass!) await their delicious fates. Why yes: it's cook-a-duck week here on NDP. Today's lesson: making duck confit.

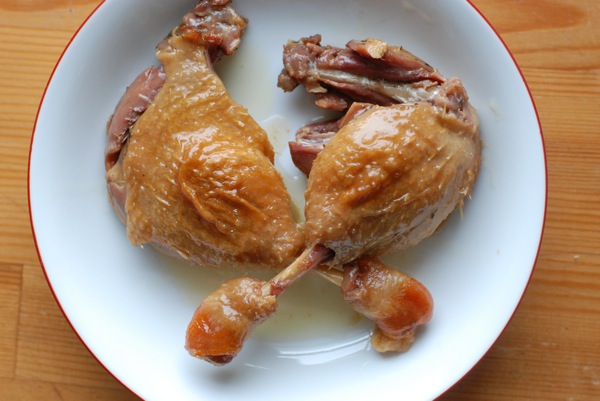
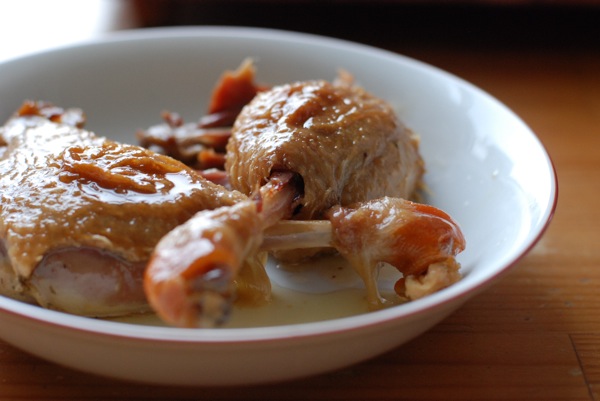
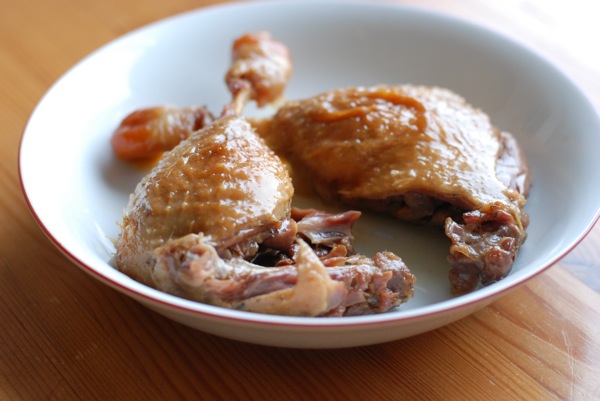
Among the many things about duck confit that thrill me are a) that making it was, no joke, a cinch; b) that my house smelled like an honest French bistro as I made it; and c) that the process makes duck taste like someone rubbed its body with butter each day and sang it to sleep every night. There simply is no better treatment for duck legs than a slow, gentle cooking bath of its own fat. If that sounds gross to you, I don't know what to say. If you're salivating right now, step into my office.

As we discussed in Part 1, ducks' skin is incredibly fatty -- so much so that there's usually enough fat on a duck to confit both of its legs, no sweat. This is convenient, because it means you shouldn't need to buy extra fat for the confit process. However, if you're nervous about running out, just ask your local butcher for some extra skin.

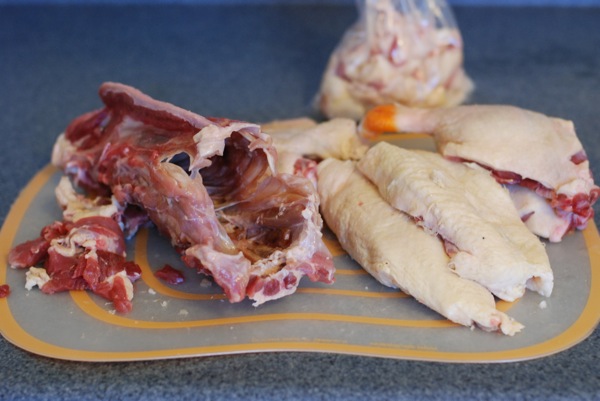
Either way, before making your confit, you'll need to butcher the duck. This is a great video tutorial for breaking down a duck -- the first method, separating the breast and leaving leg and thigh intact, is the one I used (though I started with leg and thigh, and I also did a bit of a hack job -- first time, and all that.) Once you've separated your duck into parts, you'll want to strip the skin from the carcass and any parts you don't plan on cooking whole. In my case, I stripped skin from the carcass and from part of the wings, since I knew I would be using both of those parts for stock. I left the skin on the breasts mostly intact, just trimming the edges where there was excess. As you can see in the picture above, I gathered all my skin into a little plastic bag, to be rendered into fat that I'd use for confit (see this tutorial to learn about rendering the skin.) I had plenty of fat for the confit process without the fat from the breasts, but again, if you're worried you won't, ask your butcher for some extra fat.

The uses for duck confit are many. You can eat confit as is, with a nice frisee salad on the side. I'm thinking I might add some stock and mirepoix to the confited meat and serve it over tagliatelle, a dish I've eaten at several local restaurants and always wanted to make.

And with that, we're half-way through the Cook a Duck series. Stay tuned for parts 3 and 4, where I make sure no part of my duck is left un-delicious-ized. You heard me.

How to Confit a Duck Leg/Thigh

note: I used a kosher bird for my confit, which had been salted for a couple hours as part of the kashering process. If you're using a traditional bird, make the cure as instructed. If you're using a kosher bird, halve the amount of salt in the cure recipe below.

2 duck legs about 1 3/4 cups duck fat 1/8 cup kosher salt 1/2 tablespoon light brown sugar 1 bay leaf, broken into pieces 1/2 tablespoon thyme 1 1/2 tablespoons packed flat-leaf parsley

special equipment: oven thermometer

Combine salt and herbs in spice blender and process until well combined. Set aside.

Clean duck legs of any excess fat and skin -- be sure to leave about 1/4-inch overhang of skin on each leg.

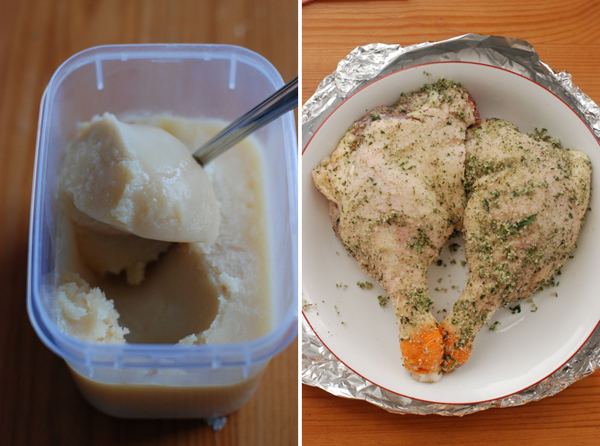
Weigh the duck legs so you know how much cure to use: you want 2 tablespoons of herb salt for 1 pound of duck legs. (Each of my legs weighed about 1/2 a pound.) Rub about 1 tablespoon of herb salt over each leg, and put the legs flesh side up in a single layer in a baking dish that holds them comfortably. Cover with plastic wrap and refrigerate for 24 hours.

Preheat the oven to 190 degrees F. You'll need an oven thermometer, because ovens tend to fluctuate -- especially at this low temperature -- you'll want to check and calibrate the temperature accordingly.

Rinse the duck legs thoroughly (you want to remove as much of the salt as possible so the legs aren't overly salty when cooked), dry thoroughly, and place them in an ovenproof pot with a lid. Add enough melted duck fat to cover the legs, and heat over medium heat just until fat is warmed.

Cover the pot, transfer to the oven, and cook for 8-10 hours. Check a duck leg for doneness at 8 hours by carefully lifting it and piercing it with a knife. The meat should be meltingly tender. If needed, continue cooking for up to 2 more hours, being careful not to overcook them.

Carefully remove the legs from the fat and transfer to a storage container. Cover with plastic wrap and transfer to the refrigerator.

Cool the fat in a separate container. Once the fat has cooled (at least overnight in the fridge), use a spoon to carefully scrape the fat off the juices, which will have jelled. The jelled duck juice makes the most fabulous base for sauces and soups, so save it! Once the fat has been separated from the juice, add the fat to the container with the duck legs, smooth the fat so it surrounds the legs, and refrigerate. Duck legs will keep for at least a month. Keller says 6, but I'm not capable of leaving duck confit uneaten in the fridge that long.