Cook a Duck, Part 1: How to Render Duck Fat

Among my mildest marital disputes is a debate over poultry of choice. She likes chicken; I like duck. I suppose that's not surprising, since m'lady loves straightforward food that doesn't keep me in the kitchen for long hours, and I...well, I love long hours in the kitchen. For months, I've been all talk about making duck. Not least because it's on my kitchen resolutions list, I thought it'd finally be nice to learn how to make duck confit, which I love; duck fat, which makes french fries sing; duck cracklings, which transform a salad or a lazy afternoon; and duck prosciutto, which remains on my list of to-dos, but will have to wait for another time.

A few stars aligned that pushed me to do this, and do it now. First, my friend Cathy has launched Charcutepalooza, and I had to join the fun. Be sure to check it out. Second, the kind folks at KOL Foods sent over a beautiful, pasture-raised duck, so I knew it was time to put my knife skills where my mouth is.

That's when the fear set in. What if I mess up? What if all the wonderful duck meat and fat and skin and bones don't wind up in all sorts of deliciousness? I needed to start small.

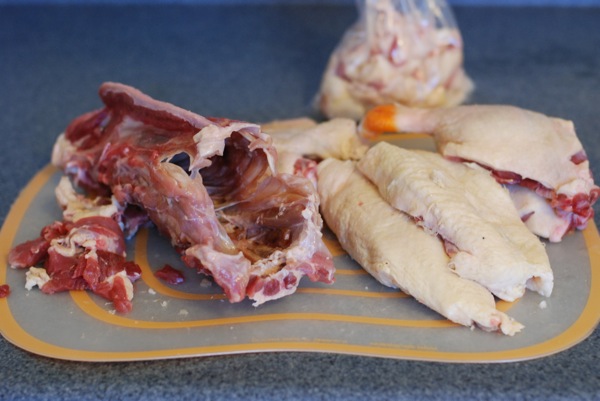
They say start with the outside and work your way in. So that's exactly what I did. I started on the outside -- literally: with the skin.

The deal with skin is simple. It's part fat, part solids, part water. Apply heat, and all the parts separate. Fat renders, solids crisp up, water evaporates.

There are two different ways to render skin. One is to just drop the pieces of skin into the pan, let them sizzle away, and be ready with a spoon to scoop that fat off the heat as soon as it liquefies. Sounds annoying, doesn't it? That's why we used method number 2, rendering the skin in water. Adding a bit of water to the pan ensures the surface temperature can't rise above 212 degrees, so the fat renders gradually and doesn't burn. If you do it right, the water evaporates completely just in time for the fat to all have rendered and the cracklings to crisp up. It's a pretty magical process.

Having done this twice, I'm now the proud mama of 2 cups of duck fat, and those cracklings were effin' amazing. If you stay tuned for Cook a Duck Part 2, you'll see just what I did with that duck fat. I can promise it won't disappoint.

And not to get ahead of myself, but Duck Part 3 is already in the works. Let's just say I wouldn't be surprised if the mild marital dispute I mentioned earlier was put to rest, forever. And yours truly was crowned the winner.

How to Render Duck Fat

Note: the timing of this recipe depends entirely on the size of your pan. I used a little saucepan, but if you use a wider shallower pan, it'll take less time. Up to you.

1 pound of skin 1/4 cup water

Add skin and water to a pan and set over medium heat. When water is simmering, reduce heat to medium-low. Maintain a low simmer, and watch the fat slowly render and the water slowly evaporate. The whole process takes about an hour, maybe a bit more.

Keep an eye on it in the beginning to make sure the simmer isn't too rapid, and be sure to have a splatter screen or a tinfoil tent ready toward the end, because it may splatter once there are only a few drops of water left.

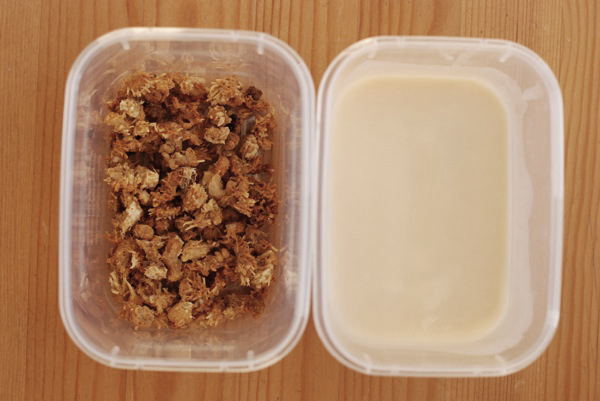
When the splattering subsides, the cracklings are brown, and the fat is clear and liquid, you're done. Scoop out the cracklings with a slotted spoon and transfer to a paper towel-lined plate. Sprinkle with salt and eat. Strain the fat through a cheese cloth-lined strainer (in a pinch, a fine mesh strainer alone will do). Chilled fat will keep in an airtight container for months in the fridge.
A Resolution About Resolutions. And Some Cake.

It's a new year: resolutions abound. Taking my friends at their word, 2011 will see the end of lateness, the renewal of grammar anal-retentiveness, and loads of meat. I won't complain about any of that. But I admit, I'm overwhelmed. So many promises! So much good intention! So much...pressure! That's no way to start the new year.
When I posted about my kitchen resolutions last September, I was fired up. I figured that publicizing my goals would make them real, make me most likely to achieve them. Now, I take a peek at those resolutions hovering in the corner of this space, and struggle not to cower in their presence.

That duck prosciutto, for instance. No time like now for duck prosciutto; my friend Cathy has teemed up with Kim Forster, aka the Yummy Mummy, to launch Charcutepalooza, a celebration of home-curing. First up? Duck prosciutto, of course. And were it not for the fact that I'm working minimum 60-hour weeks, lacking any curing space (no yard, no garage, no wine fridge), and trying to keep up this blog in the meantime, I'd totally take the plunge.

Alas, duck prosciutto will have to wait. It's still a resolution, and I do hope to do it, but today just isn't that day. Perhaps this will be the year in which I finally learn to say no.

That's the thing about resolutions. When they're motivators, they're great. When they're threats, I lose interest.

Not to fear, though -- I haven't abandoned my duck ambitions entirely. I've got a full bird thawing in the fridge right now, and I rendered two pounds of skin this past week. Stay tuned for instructions on how to render that fat, how to use the cracklings, and -- finally -- how to confit the legs. One resolution: check.

For now, amid the crazy talk of more time at the gym and less food in the stomach and other bloated promises, I'm dreaming of simpler things. Like cake.

Cake! This here loaf is a total winner. For shock points, I'll tell you that it's from Food52. (Seriously, ya'll should start taking bets on how many recipes I'll make that aren't from that site.) It's a browned butter and butternut loaf whose modest appearance belies its complexity. The brown-butter icing, which I skipped for simplicity's sake, would elevate this cake from plain jane to star of the show, and I think it makes the perfect host gift. I've got one on the counter for tomorrow, one in the freezer for another time, and I've already resolved to stick this recipe in my regular rotation. That's a promise I'm likely to keep.

Brown Butter and Butternut Squash Loaf adapted slightly from fiveandspice via Food52

2 cups pureed roasted butternut squash 1 cup unsalted butter 3 large eggs 1 1/2 cup sugar 1/2 cup packed light brown sugar 3 cups all purpose flour 2 teaspoons baking powder 2 teaspoons baking soda 1 teaspoon salt 1/2 teaspoon ground nutmeg (preferrably freshly ground) 1/4 teaspoon ground cloves

Glaze (optional): 5 tablespoons salted butter 1 teaspoon vanilla extract 1 1/2 cup or so of confectioner's sugar

Preheat your oven to 350 degrees, and grease two (9 inch) loaf pans.

In a medium saucepan, heat the butter over medium-high heat. It will melt first, and then start to foam. Turn the heat down to medium. As the butter browns, the dairy solids will start to stick to the bottom of the pan. Scrape these browned bits back into the butter from time to time. After about 7 minutes, the butter will have turned a nice brown color will smell rich and nutty; remove it from the heat and allow to cool for about 10 minutes.

In the bowl of a stand mixer fitted with the paddle attachment, beat eggs and sugars on high speed for several minutes, until the color has lightened. Scrape in the browned butter and beat for another couple of minutes, starting on low and raising speed to medium-high, until the mixture is smooth.

Add the pureed squash to the wet ingredients and beat until smooth and uniformly mixed in.

In a small bowl, combine the flour, salt, baking powder, baking soda, nutmeg, and cloves. Add dry ingredients to wet ingredients, and mix on low until fully incorporated. Do not overmix.

Divide the batter evenly into the 2 prepared loaf pans and bake for about 50 minutes, until a tester comes out clean. Take the bread out of the loaf pans and allow to cool completely.

To make the optional glaze, brown and cool butter as described above (it will take shorter since there is less). Add cooled butter to a mixing bowl. Whisk vanilla into butter.

Sift the confectioner's sugar to remove lumps and whisk it into the butter mixture until the glaze is spreadable.

Spread the icing onto the loaves, and allow to set for about 30 minutes before slicing.

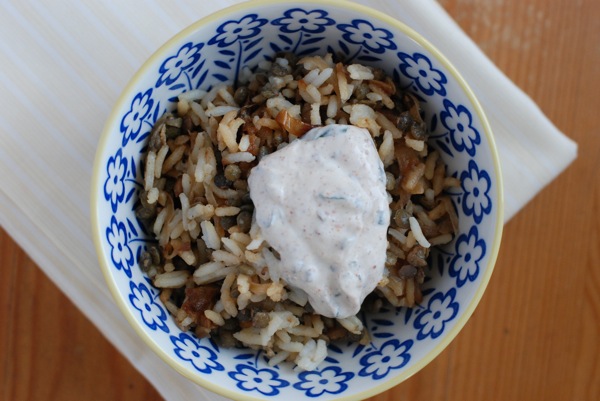
Mujaddara with Yogurt Sauce

Happy New Year!

In anticipation of my first post in 2011, I looked back at my last posts in 2009 and my first in 2010, to jolt my memory about where I was and what I was doing the last time I rang in a new year. Turns out, I was in Israel. Lucky me. I'm stateside this year, which, if you factor in the 12 hours I won't spend on a flight to get there, ain't half bad. We brought in 2011 with cocktails (lychee martinis, bourbon gingerale, the fancy stuff!) and appetizers (all sorts of delicious: we're talking lahmajoun, deli sliders, chicken wontons, coconut corn fritters, the works). I'm chasing the debauchery and excess of December 31st with a healthy, wholesome 1/1/11. This here is a recipe even the most stern-faced New Years resolution-makers will be able to enjoy.

Appropriately enough, my journey to the perfect mujaddara started with my two years in Israel. While I lived in Jerusalem, one of my favorite restaurants was an unassuming cafe attached to a small museum near the Old City. A sort of precursor farm-to-table eating, it specialized in local and organic food, but quietly and unpretentiously so. Nowhere on its menu did it say the restaurant was organic, but if you asked, you'd find out that the milk was from a local farmer, the eggs sometimes laid the same day they were eaten, and so forth. I don't know what it's like these days, but back then, it was a charming restaurant.

The restaurant's menu put modern spins on traditional dishes. I most adored their mujaddara, a Middle Eastern dish of long-grain rice and lentils with loads of caramelized onions. Though not particularly traditional, the restaurant's version included a bit of chutney and this amazing cumin-spiked yogurt. Try as I might to diversify my orders, once I had tried the mujaddara, I found it difficult to order much else. With yogurt, the mujaddara headed the way of great Indian buffet food. A little of this, a little of that, some chutney and raita, all mixed together on the plate. Perfection.

While my yogurt is slightly different in flavor than theirs -- more cinnamon, more citrus, no saffron -- it's addictive in its own right. Mujaddara is a minimalist's dish: it has no added spices. The lentils and rice, when adequately salted, need little more than soft, caramelized onions. But I find this yogurt adds just the right amount of tang to contrast the sweetness of the onions and prevents mujaddara from seeming too heavy. Plus, yogurt plops this dish squarely in healthfood territory. It's the perfect nightcap to this delicious, delightful year.

Update: I just learned that my Mujaddara has been selected as a finalist for the Food52 "best lentils" contest -- huzzah! To view the entry and vote, click over to Food52: www.food52.com.

Mujaddara with Spiced Yogurt

For the Mujaddara:

2 tablespoons butter 3 tablespoons olive oil 6 cups onions (about 3 medium onions), halved and thinly sliced 1 cup jasmine rice 3/4 cups puy lentils (aka French lentils, the tiny dark brown ones) 1 teaspoon salt, divided

For the yogurt:

1/2 cup greek yogurt 1/2 teaspoon cinnamon 1/2 teaspoon cumin (freshly ground, if possible) 1/2 teaspoon coriander (freshly ground) 1/2 teaspoon spicy paprika or aleppo pepper 3 tablespoons chopped fresh mint juice and zest of on half a lemon 1/4 teaspoon salt

Preheat the oven to 400 degrees.

Put lentils, 1/2 teaspoon salt, and 4 cups water in a large pot and bring to a boil. Reduce heat and simmer lentils until soft but not mushy, about 20 minutes. Drain lentils and set aside. Rinse pot.

Add rice, 1/2 teaspoon salt, and 1 1/2 cups water to the pot, set over medium heat, and bring to a boil. When water begins to boil, cover pot, transfer to oven, and cook for 17 minutes (the tried-and-true Amanda Hesser method!) until perfectly cooked. Remove from oven, uncover, and fluff with a fork. Set aside.

While rice cooks, set a wide, deep saute pan over medium-low heat and add butter and 2 tablespoons olive oil. When butter has mostly melted, add onions and toss to incorporate with butter and oil.

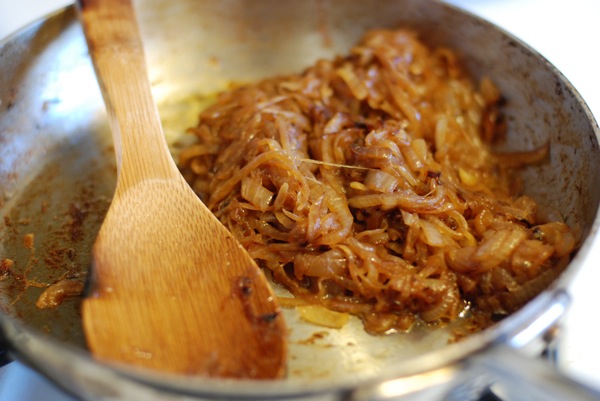
After 5 minutes, onions will have softened slightly and started to release their liquid. Raise heat to medium and cook about 10-12 minutes more, until onions are very soft and browned. Add water by the tablespoon if pan gets too dry or if onions start to stick. When onions are well browned, add last tablespoon of olive oil and raise heat to high. Cook another 3-4 minutes, until bottom layer of onions has charred and crisped; try not to stir too much, or onions won't crisp up.

Combine rice, lentils, and most of the onions in large serving bowl and let sit for at least 15 minutes, to marry the flavors together. (Truth be told, this dish improves with age.) Taste, and add more onions if desired. Meanwhile, make the yogurt: mix all ingredients together in a small bowl. (Yes, it's really that simple.)

If mujaddara has cooled significantly, reheat in a low oven or even in the microwave for a couple minutes. To serve, plate a big scoop of mujaddara and top with a dollop of yogurt.

Marcella Hazan's Pasta with Eggplant Sauce

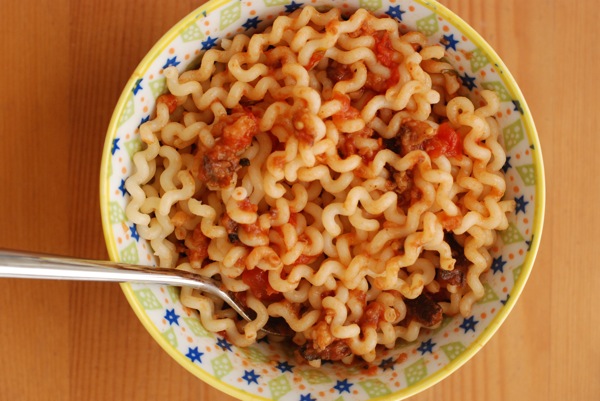
For most of you, this weekend was chock full of great food. I may not have had Christmas dinner, but I had a southern feast of fried chicken, pulled smoked beef, and collards that rivals the best Chinese takeout of my storied Jewish-Christmas past. Still, as I think back on the past couple weeks of eating, I tell you this with little hesitation: long fusilli with Marcella Hazan's Tomato-Eggplant sauce is the single best food item I've eaten in weeks.
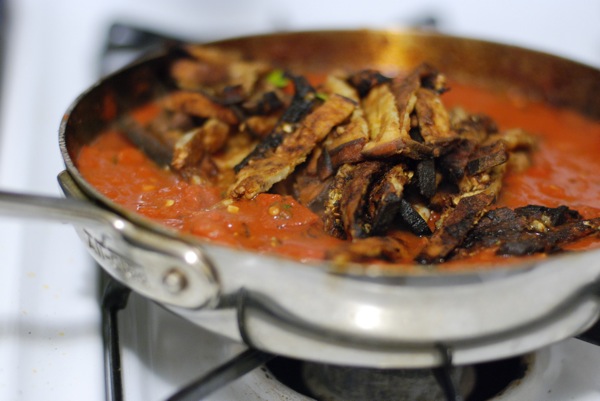
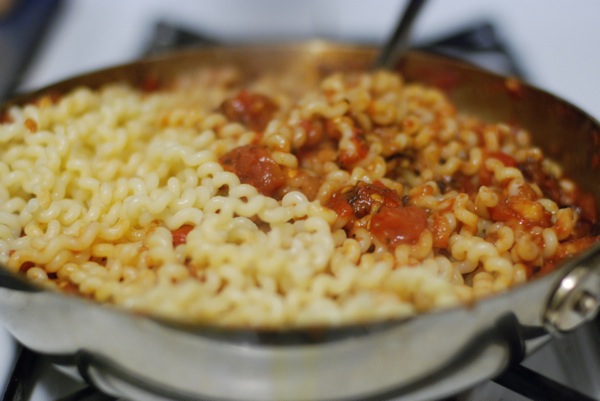
Rewinding a bit, here's a confession that may come as a surprise, given my new obsession: I don't much like eggplant parmesan. If the casserole goes from the oven to my plate without passing go, I can get into the soft eggplant, the pool of sauce, the bubbling cheese. But as it cools, the eggplant firms up, the cheese congeals, and I'm pretty much done.

Everything bad about eggplant parm disappears in this sauce: no hardened melted cheese, no unappealing eggplant texture. What you're left with is eggplant, lightly breaded and fried, then cut into strips and folded into a clean, bright tomato sauce. The eggplant strips thicken the sauce and give it body; more than simply coating the pasta, it clings in big chunks and little bits, the texture somewhat uneven in the best way. For you by-the-book types, Marcella recommends spaghettini; I find this sauce is the perfect foil to those long fusilli that I love so much.

Since by now surely you know I'm not the best at following instructions, I can confess that I read this recipe wrong and floured my eggplant before frying. I'm here to tell you that flouring the eggplant is something you do for the recipe below this one in the book which, ironically?, is eggplant parmesan. Ignore my pictures; don't flour your eggplant.

Some people like mac'n'cheese, others go for matzah ball soup; this is my version of comfort food, and I could eat it for nights on end without a complaint. Here's hoping you like it as much as I do.

Marcella Hazan's Eggplant Sauce with Tomato and Red Chili Pepper serves 4 for Italian-style primi portions, 2 plus leftovers for a main course

1 large eggplant (about 1 pound) salt vegetable oil for frying

3 tablespoons extra virgin olive oil 1 1/2 teaspoons chopped garlic 2 tablespoons chopped parsley 1 3/4 cups good quality (Marcella says Italian!) canned tomatoes, cut up, with their juice chopped hot red chili pepper, to taste (can sub dried chili flakes) 1 pound pasta

Trim ends off eggplant and peel it. Slice into 1/2-inch slices.

Set a colander in the kitchen sink or in a large bowl. Stand one layer of eggplant slices upright against the inside of the colander and sprinkle (not too generously, but not timidly either) with salt. Stand another layer of slices against the first layer, sprinkle that layer with salt, and continue until all eggplant has been salted. Let salted eggplant stand for 30 minutes.

After 30 minutes, blot eggplant slices thoroughly dry with paper or cloth towels.

Set a large frying pan with sides at least 2 1/2 inches high over high heat. Add enough vegetable oil to come 1 1/2 inches up the sides of the pan. Line a large plate with paper towels.

Test the oil by dipping one slice of dried eggplant into the oil. If it sizzles, the oil is ready for frying. Slip as many slices of eggplant into the pan as will fit in a single layer. Cook to a golden brown on one side, then turn them and cook the second side. When both sides are golden, use a slotted spoon or spatula to transfer them to the towel-lined plate. Repeat until all eggplant is done. If the oil becomes so hot that the eggplant starts to burn, reduce it slightly.

When all eggplant has been cooked and is cooling on the plate, drain the pan and wipe it clean. Add olive oil and garlic to pan, and turn heat to medium. Cook and stir the garlic until it colors lightly. Add parsley, tomatoes, chili (start with a little, add to taste) and a pinch or two of salt, and stir thoroughly. Adjust heat so that the sauce simmers gently, and cook about 25 minutes, until oil separates from sauce and floats free.

Cut eggplant into strips about 1/2 an inch wide. Add to the sauce, cook another 2-3 minutes, and stir once or twice to incorporate. Taste and correct for salt and heat.

Advance prep: Sauce and eggplant can be made up to 4 days in advance. Keep eggplant separate from sauce. Reheat sauce while pasta cooks, and add eggplant just before combining sauce and pasta.

Cook pasta 1 minute less than package directions. Drain and add to sauce. Use tongs to incorporate. Serve immediately.