How to Use: Chives

Yesterday, I got three emails from three friends, all with the same CSA. "I got quinces in my CSA: what should I make?" "My CSA gave us quince this week. They smell great but what do I do?"

Of the emails I get from readers, most of them begin, "what can I make with...?"

I'm introducing a new feature today. "How to Use" will share five(ish) creative uses for an ingredient. No accident, this feature was born of your many curious emails: "I got quince in my CSA - what can I do with it?" "there's 8/9 of a bottle of molasses in my cupboard - how can I use it up?" or my favorite and possibly most-often received, "the grocery store shelves have beets and kale, beets and kale, and nothing else. Please make my dinner menu!" Well, friends, starting today, I'll be building an archive of good recipes by ingredient. When you've got 6 green tomatoes and you don't know how to use 'em up, "How to Use" will be your new friend and cooking companion. And for those of you with most of a bunch of chives sitting in the fridge door, well, today's your lucky day.

Chives are, in my opinion, the most underrated herb. Basil pops up in everything from pasta to ice cream, and thyme is as popular in beef stew and chicken soup as it is atop ricotta crostini. But chives sit unnoticed, and it's quite a shame. Chives are a member of the onion family, but unlike regular onions, they're fresh-tasting and quite mild. Raw onions go great with heady flavors like lox, but chives won't overpower even milder bagel toppings, like cream cheese. They have the effect of making whatever they join taste somehow fresher, lighter, greener. In experimenting, I haven't found a dish that doesn't benefit from a sprinkling of chives. Here, then, are five good uses for the lovely herb.

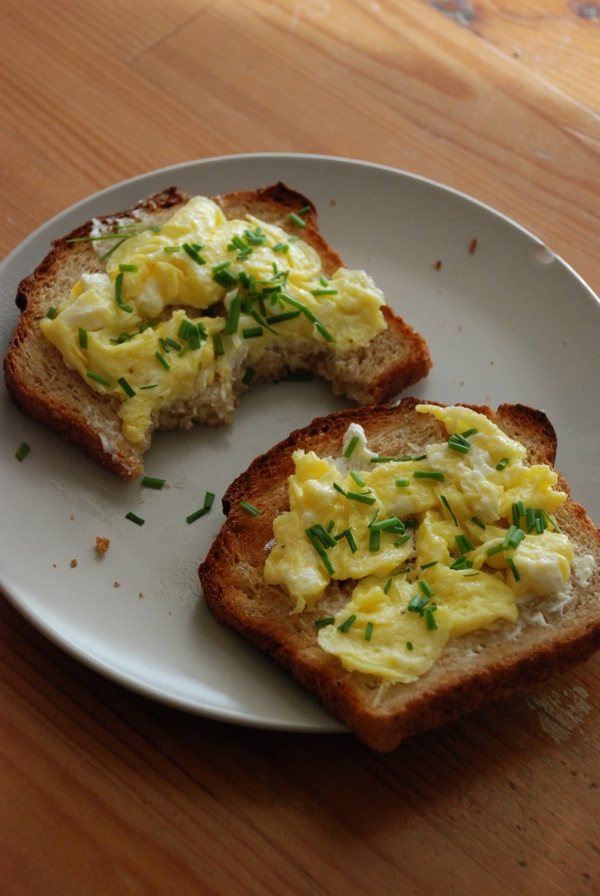
1. On eggs.

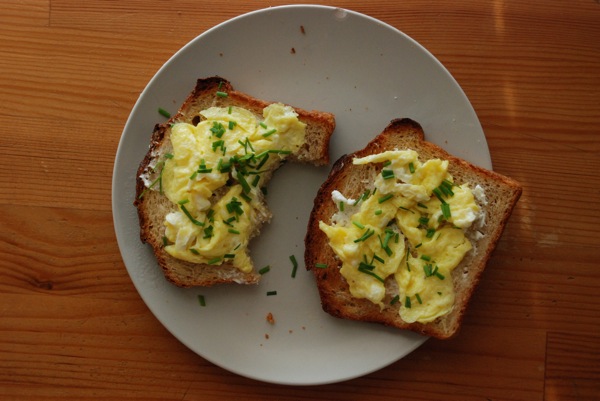
Few things are more delicious than crisp toast spread with real fresh chevre, piled with soft scrambled eggs and topped with chives. The combination is addictive: once I discovered it, I stopped making pretty much anything else for breakfast.

But don't limit yourself to chive-topped scrambled eggs -- that's just the beginning. Fold some of the chopped herb into eggs before cooking them, tuck them inside omelets, even fry some chives in butter and use them to top a souffle. Most any savory dish prominently featuring eggs will benefit from a sprinkle of chives before serving.

2. Atop a beet salad.

Beets and chives is a classic combination in Russian cuisine. The pair matches up nicely with sour cream -- no surprise -- or with an ingredient more common in my fridge these days, creme fraiche. Here's what I did last night: I steamed a bunch of red and golden beets until a knife easily inserted sliced through them. I cut them into 1-inch pieces, separating the red from the golden. I piled the beat cubes into a shallow serving dish, first red, then golden in a small pile on top. I drizzled a mustard-laden vinaigrette over the beets, dropped a dollop of creme fraiche in the center of the beets, and sprinkled the chives over everything. At the table, when we dug into the beets, the creme fraiche and chives mixed unevenly into the vinaigrette to great effect.

3. In vinaigrette.

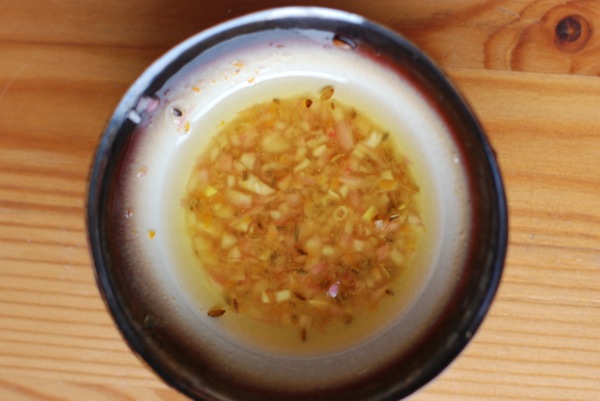
Much as you might add other herbs to perk up salad dressing, chives work wonderfully in vinaigrettes. For these purposes, consider them as a greener, fresher shallot. I've used chives to dress anything from little gem lettuces to cabbage slaw. They give an unexpected punch to the salad, and your guests will ask you what that great, unidentifiable flavor is.

4. Mixed into butter or oil.

Chives make one of the world's best add-ins to compound butter. Making chive butter is as easy as chopping up some chives, tossing chives and butter into a bowl or the bowl of a stand mixer, and mixing away until everything is evenly distributed. I like to roll my butter in a sheet of parchment paper into a log, then slice it in to coins and freeze it this way, so that it's accessible in individual servings and keeps much (much!) longer.

Chive butter is awesome on warm biscuits, and it gives baked tomatoes a luxurious finish. But chives are also wonderful in olive oil; chop them up, add them to a cup of olive oil, and blend either in a blender or with an immersion blender. Chive oil makes a great drizzle on the plate of simple roast chicken, an add-in to steamed rice, and a lovely topping for white-fleshed fish.

5. On soup.

I'm keen on garnishes for soup; they provide textural and color contrast, and they're an opportunity to add a punch of flavor just before serving. Chives often find their way into my soups. Raw, they'll be sprinkled on roasted tomato soup or be swirled into potato leek soup. Fried in butter and generously salted, they'll join creme fraiche and be swirled into butternut squash soup. The possibilities are endless.

So, friends, now you have 5 uses for chives. There're so many more where those came from -- chives are so versatile! -- but hopefully this post will save all those withering chives in your fridge from going to waste.

I need your help! what ingredient should be next on "how to use?" Weigh in with your preferred mystery ingredient in the comments.
Mojito Cookies

...and just like that, I'm a married lady. Craziness.

It's hard to believe an event that took nearly a year to plan could come and go in the span of a few hours. Before the wedding, as we were making dinner or reading the New Yorker or watching Tina Fey be awesome on 30Rock, D and I would turn to each other and ask, "can we just be married already?" We were serious. Marriage was what this was all about for us, and we wanted to just be there already. That's why the night of the wedding, after all the guests had left and we had taken every last bobby pin out of our hair, we were about as happy as two people can get. You see, not only did we have the most wonderful, joyous, hilarious, fun, exhausting day of our lives, but we were finally married. Everything felt so right.

We've spent the past couple weeks checking our our friends' awesome pictures on facebook and absentmindedly playing with our wedding rings, all the while trying to adjust back to reality. I'm just starting to get back in the kitchen, but I've got a few recipes up my sleeve from before the big day that I'm excited to share.

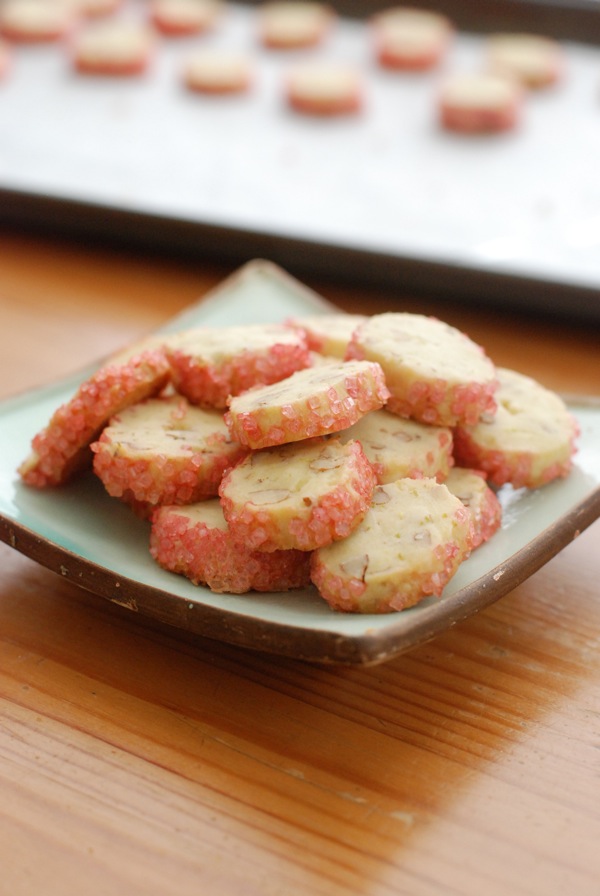
Today's cookies came about when I craved a proper mojito but didn't have quite enough rum. I went digging on the interwebs, and found a recipe from the lovely Deb of Smitten Kitchen fame to save the day. Deb had gone to Mexico, and when she got back, she invented "margarita cookies" to take the edge off having to leave. It was the perfect solution: Mojito cookies!

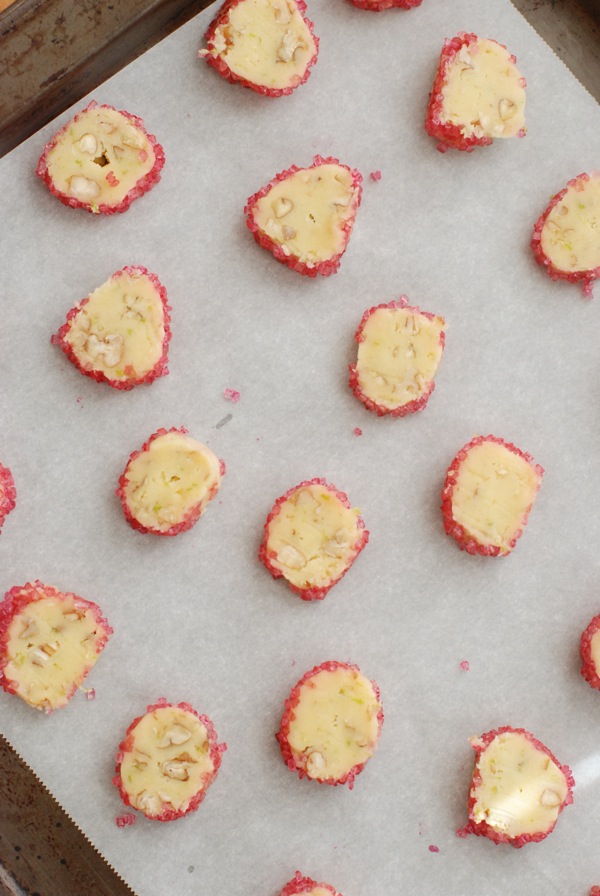
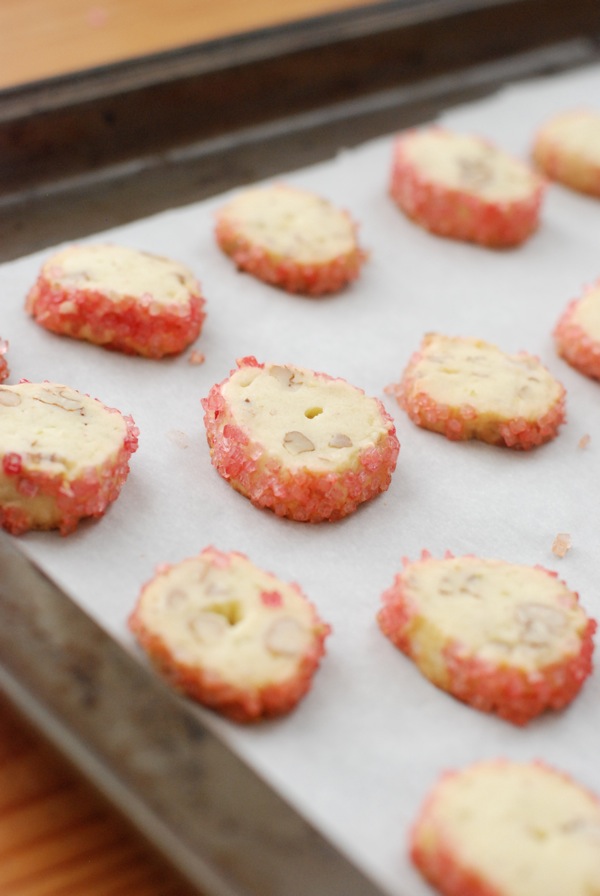
Okay people, I know what you're thinking: "she wants a drink and she makes cookies instead?" Yes, I get that that makes me one of the crazies. But seriously, once you try these cookies, you'll see why they fit the bill. They're eensy little guys -- just an inch or so wide -- but they pack plenty of rum, mint, lime zest, and pecans for crunch. Oh, and of course, they wouldn't be mojito cookies if they weren't coated with some sanding sugar. (Woulda used green, but I had pink. Call'em Girly Mojito Cookies.) Think of this recipe as the antidote to the no-drinking-at-work rule. We all need a little kick to our day, right?

I'll be back after the weekend with more savories to share. I've got a mean squash soup in the fridge coming your way. Stay tuned.

Mojito Cookies adapted from Deb of Smitten Kitchen, who adapted it from Dorie Greenspan's Sables au Citron Makes about 50 cookies

2 sticks (8 ounces; 230 grams) unsalted butter, at room temperature 2/3 cup (70 grams) confectioners’ sugar, sifted 2 large egg yolks, at room temperature Pinch of flaky salt 2 tablespoons white rum Grated zest of 2 limes 1 tablespoon chopped fresh mint 1/4 cup chopped pecans 2 cups (280 grams) all-purpose flour

Coating: Approximately 1/2 cup sanding or other coarse sugar (clear is just fine)

In the bowl of a stand mixer fitted with the paddle attachment, beat butter on medium speed until smooth. Add confectioners' sugar and mix on medium speed again until smooth and silky. Add one of the egg yolks, followed by the rum, lime zest, and mint. Reduce speed to low and add flour, mixing just until flour mostly disappears. Add pecans, and mix on low just until they are relatively evenly distributed throughout the mixture.

Have two pieces of plastic wrap lying flat on a clean surface. Divide the dough in half, and transfer each half to a sheet of plastic wrap. Use the edges of the plastic to coax the dough into a disk shape, then cover completely with plastic and refrigerate about 30 minutes.

Transfer one of the refrigerated disks to working surface, unwrap, and roll into a log about 1-1/2 inches thick. If log breaks, don't worry about it -- you're slicing these into little coins anyway. Once both disks have been rolled into logs, wrap logs in plastic and return to refrigerator for about 2 hours to firm up.

Preheat the oven to 350º. Line two baking sheets with parchment paper. While the oven is preheating, whisk the remaining egg yolk in a small bowl until very smooth. Remove logs from refrigerator, and brush lightly with remaining egg yolk. Pour sanding sugar onto long, wide sheet of parchment paper, and carefully roll logs on sugar-covered parchment to coat with the sugar. If sugar doesn't stick, gently press the parchment paper into the logs to secure the sugar.

Slice sugar-coated logs into cookies about 1/4-inch thick. Transfer cookies onto baking sheet leaving about 1/2 inch of space between each cookie. Bake for 12-14 minutes, until set but not browned. Transfer cookies to racks to cool.

Cookies will keep in an airtight container for up to 1 week. If you plan to freeze the logs, do so before coating them with egg yolk and sugar.

Oven-Dried Tomatoes

Hi friends! Long time no see. I'm taking some time to let marriage soak in, and that means less time to blog. While I'm away, my friend Jeremy Brosowsky is sharing his method for preserving the last of summer's bounty. And DC folks -- Jeremy has a fantastic new company called Compost Cab, the perfect solution for us urban folk who want to compost but don't have a garden. Check it out.

Gather ye rosebuds, my friends. And by rosebuds, I mean tomatoes. We'll likely get another head-fake day or two, when the warm air makes it feel like summer even though the quality of the light is glaringly fall. But make no mistake: summer's over. Last-gasp time, folks.

For the next week, maybe two, you're going to see sad, lonely crates of tomatoes looking out of place among the hardened bounty of early fall at your local farmers' market. No, they're not as good as their mid-summer cousins, the ones so vibrant you want to bite into them like they're apples. These fall tomatoes need to be coaxed out. But, oh, is it worth it.

For much of the past couple of weeks, I've been plowing through 100 pounds of tomatoes -- that's two bushels, if you're keeping score at home. Most got sauced. But some 25 lucky pounds got oven-dried. It's the apotheosis of the fall tomato. And it couldn't be much easier.

The ingredient list is mercifully short. Tomatoes. Olive oil. Salt.

Tomatoes shrivel as they dry, so don't get caught up in looks -- seconds work just fine. You can use any kind of tomato you want -- it's a free country! But you're looking for sugar here, and plum tomatoes are the classic for a reason. When the February doldrums roll around and I'm aching for a taste of summer, I pop one of these suckers in my mouth, grin a stupid grin, and mumble something about how f**king happy I am that I made these oven-dried tomatoes way back before Halloween.

(I also make oven-dried grape tomatoes, which are awesome, too. Same process as below, but I leave them whole with a little burst of juice left inside.)

Most people use a baking sheet, but I've discovered that the tomatoes dry more quickly and uniformly when I cook them on a cooling rack. Another benefit of the rack is that you avoid any pooling of oil. I line a baking sheet with foil, place the rack on the sheet, and brush or spray the rack with oil.

I sort the plums by size to maximize the chance of each batch drying consistently. I wash and dry them. Then, working along the length of the tomato, I quarter the larger ones, and cut the smaller ones in half or thirds. Use your judgment. Place them on the rack as close together as possible without touching.

You're going to use precious little olive oil, just enough for an ultra-thin coating -- almost a sheen -- on the tomatoes. Because we use so little, and because the taste of the finished product is so straightforward and pure, I break out the good stuff from McEvoy Ranch (http://www.mcevoyranch.com/html/oil_vars.html). But whatever you have on hand will work fine. Use a brush.

I like kosher salt, but if all you have is table salt, that's cool. Either way, sprinkle evenly and judiciously.

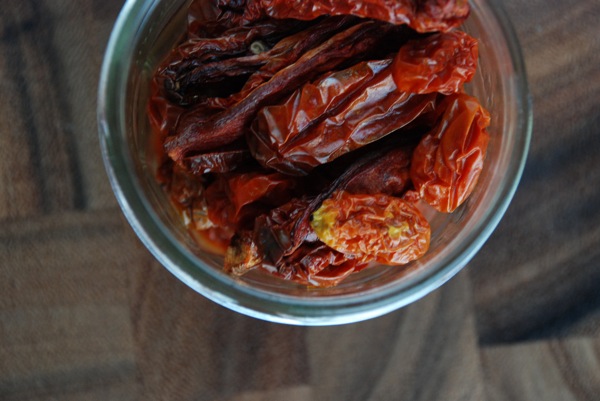
Some people tell you to set your oven at the lowest possible setting, usually 170F or so. Others say you can go as high as 200F. I split the difference, set my oven to 185F, and don't worry about it. Put your tomatoes in the oven, and leave them be for six hours. At that point, start checking in on them. I aim for just on this side of leathery, which usually takes 10-12 hours. Remove them from the heat when they're what your looking for. And please, please, please don't forget about them -- it's just so sad when a batch morphs from candy-sweet to metallic-burnt because you fell asleep on the couch.

Once these little beauties cool, put them in a jar in the fridge and they'll keep for months. Little bites of summer. Love it. You will, too.

Taking the Plunge

Wonderful readers: many of you have been reading since the very beginning, over three years ago, when I took the plunge into this public space. You're great, and perhaps a little crazy, for keeping on reading all this time. Sometimes I ramble, other times I disappear unexpectedly, and yet, you stick around to see what comes next. You're great like that; thank you.

Today's a day for thanks of another sort. Today I've got a ring on my finger, a wonderful wife, and a weekend full of amazing memories to carry me. D and I are the luckiest people on earth.

Yesterday was an absolutely, positively magical day. If you live in DC, you know that the weather yesterday was as perfect as DC gets. Not a cloud in the sky. Our friends are the most spirited, funny, loving bunch, and we continue to feel about as blessed as two ladies can get. Now, we're married, and we are simply filled to the brim with joy and blessing.

I guess it just proves some risks are worth taking.

photo by my amazingly talented friend Gaby Schoenfeld.

In my day-plus as a married lady, I've learned that part of the game is heeding your wife's requests. I won't be posting pictures of D. That said, I hope you enjoy the photos I do post, which hopefully will give a taste of how beautiful the day was.

(For all you curious folks out there, I promise more pictures once we have them.)