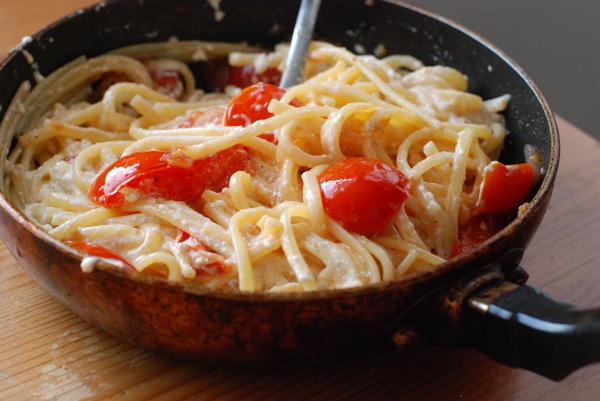
Pasta with Fresh Tomato Sauce

Where we live, time is running out to make this sauce. Tomatoes are on their last legs here in the Northeast, and I've been alternating between panic and panicking on and off for the past three weeks about their impending disappearance.

By now, you've seen posts on cream of roasted tomato soup and sundried tomatoes. Everyone's trying to squeeze the last little bit out of summer's tomato bounty, and really, who can blame them? I'll be doing the same -- there are many jars of oven-roasted tomatoes in my future -- but for now, I'm chopping the last of those tomatoes raw into my bowls of pasta and enjoying them in their juicy, fresh state while I still can.

This may not be the first you've heard of fresh tomato sauce: Mark Bittman wrote about it recently for the New York Times. When he did, I breathed a sigh of relief, realizing suddenly that I, like Bittman, have been making this sauce for years, and only now had it occurred to me that it might actually be a recipe worth sharing. Truth be told, that's not 100% accurate. I've actually been taking pictures of bowls of pasta with fresh tomato sauce for two years now -- whether its just the tomatoes, tomatoes with a pillow of ricotta or mozzarella mixed in, or with some other vegetables (zucchini, mushrooms) added in. This dish is a staple of my diet, and I'm appreciative to Bittman for making me realize just how post-able it is.

The beauties of fresh tomato sauce are many. While long-simmered sauce makes an ideal accompaniment to a deep bowl of noodles in January, fresh tomato sauce on a handful of spaghetti reminds you that, yes, there was a summer season and no, it wasn't so long ago. Fall brings a tendency to slip prematurely into hibernation; fresh tomato sauce holds us back.

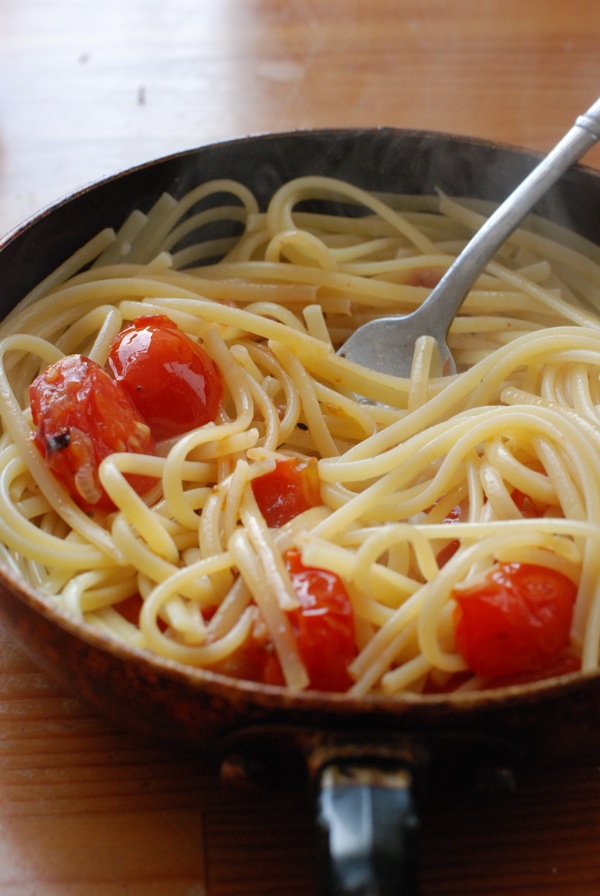
The method couldn't be simpler. A shallot and some butter or olive oil mingle over the heat. Pieces of chopped fresh tomato -- any tomato really, though don't use heirlooms here; I've had success with everything from big red beefstakes to baby yellow cherries -- and are added, along with some salt, and the heat is raised slightly. The pan is shaken enough to get everything distributed, and before you know it, the pasta is just shy of al dente, and it's heading for those tomatoes to finish cooking. The whole mess is topped with either a shower of finely grated parmesan or a spoonful (or several) of fresh ricotta cheese. Mixed. Plated. Consumed.

The recipe I provide below serves 4, but I make this meal most frequently to serve just one. It's the ideal food for those evenings you're alone in the apartment, ready to curl up on the couch and indulge in something comforting. And, in case I wasn't super clear, this is a sauce to be made now. Get cookin'.

Pasta with Fresh Tomato Sauce serves 4

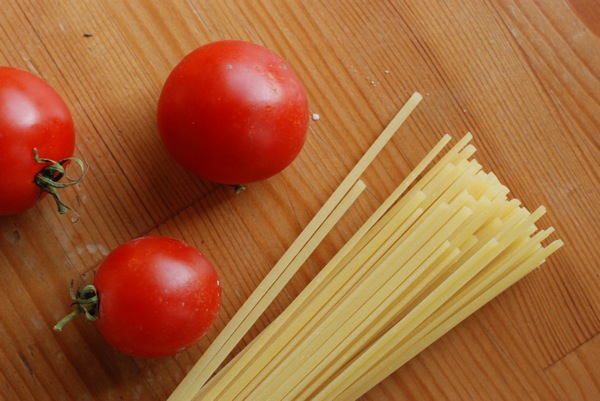
1 pound long pasta: spaghetti, vermicelli, and linguini are all great 1 shallot, chopped 3 tablespoons butter or olive oil 1 1/2 pounds fresh red or yellow tomatoes (no need to use heirlooms here; their nuance will be lost in the sauce) salt and pepper finishing flourishes, including a handful of ripped basil leaves, a generous grating of parmesan, a scoop full of fresh, milky ricotta, or anything else you want

Bring plenty of salted water to a boil in a large pot. When at a rolling boil, add pasta, stir to separate noodles, and return to a boil. Cook until just shy of al dente.

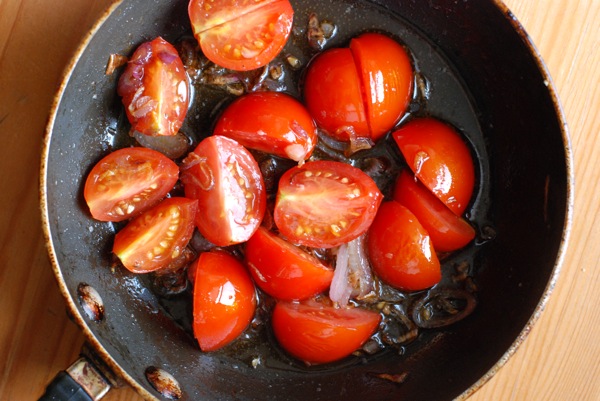
Meanwhile, heat butter or olive oil in a wide shallow pan over medium. When butter foams or oil shimmers, add chopped shallot. Shallot should sizzle. 30 seconds later, add tomatoes. Turn heat to low. Cook 5-7 minutes, until tomatoes have softened and smoothed together somewhat. You're not looking for a completely smooth sauce; you just want the tomatoes to break up, to absorb the butter, and to mix in with the shallots. When this happens, you're golden.

By now, your pasta should be not-quite al dente. Drain, and transfer into pan with sauce. Toss to incorporate, and cook a scant additional minute. Add cheese and/or basil, transfer to platter, and serve.
Pickled [Anything!]

Yes, yes, yes. I love pickles. Pickle anything, and I'll eat it. Cucumbers. Tomatoes. Green beans. Grapes. Cherries. Watermelon rind. Cauliflower. Beets. Eggplant. Are you bored yet? I could keep going.

If you ask my fiancee how she feels about pickles, she'll tell you she's crazy for the sweet bread-and-butter variety, that she slaps 'em on every burger or dog she eats. She'll also tell you that I've gone mad, and that our house is turning into one big canning jar. Really. And you know what? She's kind of right. I have gone a bit nuts. We've got five quarts of pickles so far, and I'm not done yet. How could I be, when only cucs have been bottled? I've got three green tomatoes waiting to meet a similar fate, and two heads of cauliflower, some beets, and a bag of baby eggplants aren't far behind. Think this process too complicated or confusing? I'm here to set you straight.

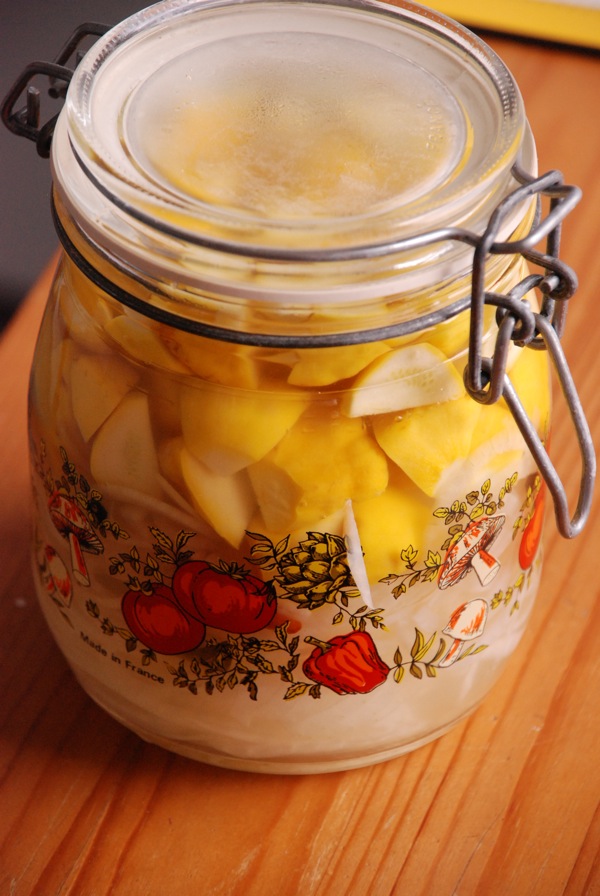
All the pickles I'm jarring this year -- all 8 (gulp!) quarts of them -- will use one of two brines. To my taste, these brines are perfect: not too vinegary, not too salty. The first is my basic brine, in which I pickle just about everything. It has plenty (but not too much) dill and a double dose of kick from raw garlic and chile. The other is a brine I've taken from the Zuni Cafe Cookbook, a favorite of mine. From a recipe called "Carol's Pickled Onions," this brine is slightly sweeter, with intriguing notes from bay leaves and black peppercorns. I use it for onions, of course, but also for zucchini -- both large zucchinis, which I slice into coins, and the smaller "pattypan" variety, which I simply quarter. The zucchini and onions together make a great addition to a first course of breads and spreads.

In each of these recipes, the ratio of vinegar to water to salt needs to stay as is, so the vegetables will pickle properly. That said, feel free to alter the spices and seasonings as you wish. If you like a sweet pickle, add a couple tablespoons of sugar to the basic brine, no problem.

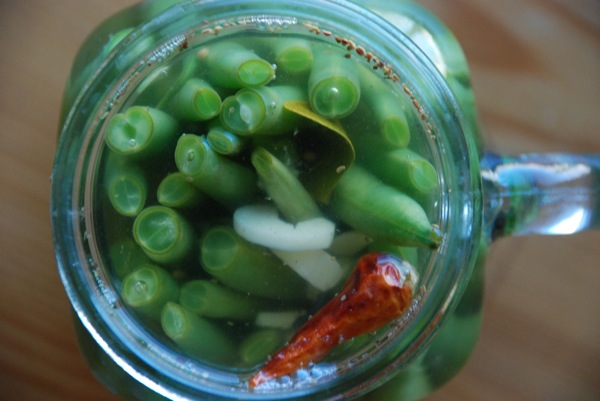
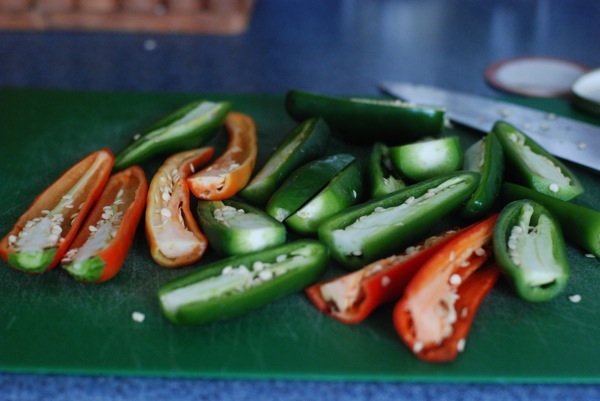
This year, I went bold -- I pickled some chilies in my basic brine. Haven't opened them yet, but they'd make a perfect accompaniment to vietnamese pho or any kind of kabob.

Basic Brine adapted from a recipe by Tara of Tea and Cookies

1 pound vegetables: green tomatoes, cucumbers, green beans, beets, and cauliflower are all great 2 quarts water 1 cup white vinegar 1/2 cup kosher salt 2 teaspoons celery seed 1 teaspoon dill weed or fresh dill 3 cloves minced garlic 2 small dried chilies 3-4 quart-size glass containers for pickling

Sterilize your jars, bands, and lids either by submerging them in water and bringing to a boil for 10 minutes, or by running through a full dishwasher cycle. Set sterilized jars, bands, and lids on clean towel while you prepare the brine and vegetables.

Combine water, vinegar, and salt in medium saucepan over medium-low heat, and allow salt to fully dissolve. Meanwhile, slice vegetables to desired size, and transfer to prepared jars. Distribute spices evenly among jars.

When brine comes to a boil and salt is no longer visible, turn off heat, and carefully and slowly pour brine over vegetables, leaving a 1/2-inch of "headspace" (space between the top of the liquid and the lip of the jar). Wipe rims of jars with damp towel or napkin, center lids on jars, and screw bands onto jars just until snug (not too tight).

If storing in the refrigerator, you're done -- just let the pickles develop flavor for a few days before eating them.

Instructions for processing jars for shelf storage:

In a large stockpot or canner, heat enough water to cover the jars by 1/2 an inch. When water is at a rolling boil, add jars and process for 10 minutes. Turn off heat, let water bath cool for about 5 minutes, and remove jars to countertop. Leave jars alone, and as they cool, their lids will pop into place. Wait 18 hours before checking to make sure the lids sealed; do this by removing the band and lifting the jar up by its lid. If the lid stays on the jar, the seal is strong. Pickles are shelf-stable and will keep for up to one year.

Carol's Onion Brine adapted from the Zuni Cafe Cookbook

headnote: This pickling recipe has not been tested for shelf stability, so I can these in small batches and store them in the refrigerator. While the jars take up valuable fridge space, they have the added benefit of not needing to be processed in a hot water bath like the pickles above.

12 ounces firm yellow onions, zucchini, or a mix 1 1/4 cups Champagne vinegar or white wine vinegar 1 1/4 cups water 2 tablespoons sugar 2 bay leaves 1-2 small dried chilies a few whole black peppercorns 2 teaspoons salt

Thoroughly clean 2 quart-sized jars or 1 larger jar.

Peel and slice onions into rings about 1/8 inch thick, discarding ends. If you have a mandoline, now's the time to use it. Discard any pieces that have discolored.

Combine vinegar, water, sugar, bay leaves, chilies, peppercorns, and salt in small saucepan. Bring to a simmer over medium-low heat, then turn heat up to medium and add onion rings and/or zucchini. Stir the crowded pan and let it return to a simmer. Simmer for just under 1 minute, then remove from heat.

Pour hot pickles and brine directly into jars (you may need a funnel for this). Cover and store in the refrigerator. Pickles will be ready in just about 24 hours, and get better as they sit. They'll keep in the brine for several months.

Back-to-School Raspberry Bars

It's true, I haven't been in school in five years. A working girl doesn't know from summer vacation, and there's no annual school supplies shopping spree at Staples anymore. I miss summer break, and, like any school supplies nerd, I miss those colored sticky tabs I used to use to mark key pages in my textbooks. After five years in the workforce, I've somehow managed to wean myself off the small thrills of being a student (even the discounts at JCrew, which I'd love just about now). But there's one school-time habit that's still going strong, one that I imagine will continue for years to come. At the profession-steeped age of 27, I'm still making myself back-to-school snacks.

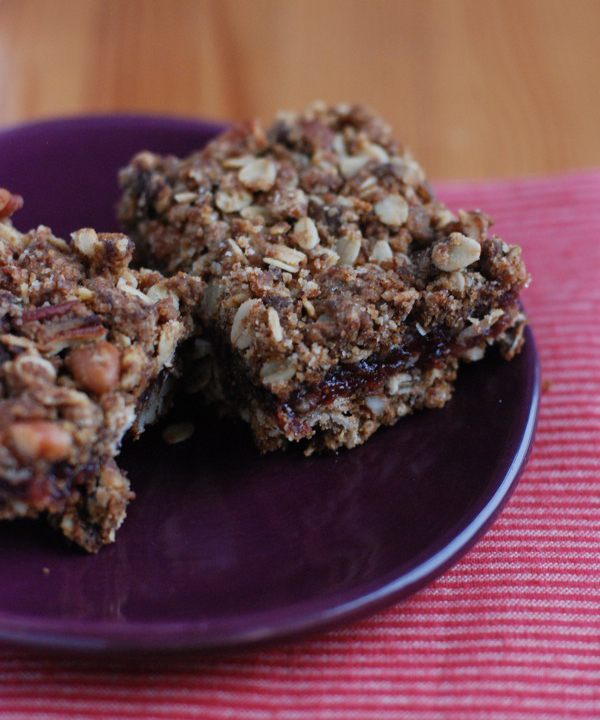
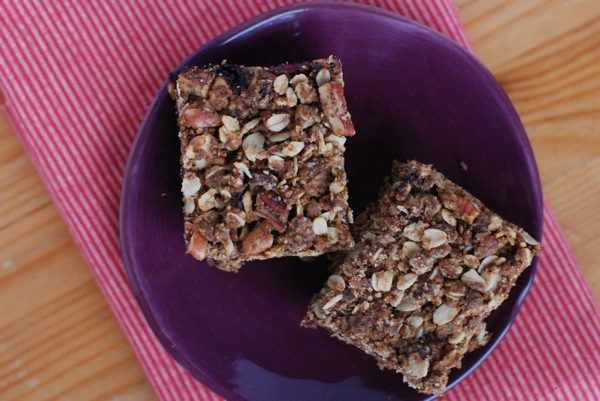
Yes, friends. I may have replaced my classroom desk with a cubicle (glamorous, I know), but that doesn't mean my weakness for school snacks has suddenly disappeared. A good fruit bar or a handful of tamari almonds or a fruit bar makes the day go by faster. When the fruit bar consists of toasty oats, pecans, and homemade jam? All the better.

I feel like I say this every week, but I have Karen DeMasco to thank for this recipe. Her book, The Craft of Baking, is the force behind many of the great things I've baked this year -- from those cheesy scones to that lovely blueberry tart and the strawberry tart, too. These raspberry bars were yet another hit. They've got loads of that oat-nut-butter-sugar combo that makes crumbles and crisps so good. Only here, the stuff is on bottom and top, sandwiching a thick layer of raspberry jam. Am I saying they're good for you? No, I'm not. Not all snacks need be healthy. Or, if you must, call it a casual, unfussy dessert. It's really good, and it's been the bright spot of the last 5 or 6 days at the office.

If you've gone back to school, make a batch of these for the next week of classes. If you're back at the daily grind, make a batch of these for those dreary moments at work. If you're hangin' out with the kids, working from home or on location, or whatever, make a batch of these, or three. They're great, always. All the time.

Back-to-School Raspberry Bars

1 cup pecans, coarsely chopped 1 1/2 cups all-purpose flour 1 1/4 cups old-fashioned rolled oats 1/3 cup granulated sugar 1/3 cup packed dark brown sugar 1 teaspoon kosher salt 1/2 teaspoon baking soda 1 1/2 sticks unsalted butter, melted, plus more for greasing the pan 1 cup raspberry preserves

Preheat the oven to 350°. Butter an 8-inch square baking pan and line the bottom and sides with parchment paper. Spread the chopped pecans in a pie plate and toast for about 5 minutes, until lightly browned and fragrant. Let cool.

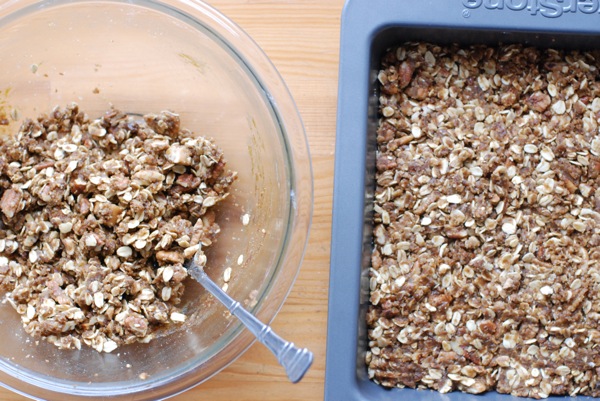
In a large bowl, whisk the flour with the rolled oats, granulated sugar, brown sugar, salt, baking soda and pecans. Using a wooden spoon, stir in the melted butter until the oat mixture is thoroughly combined.

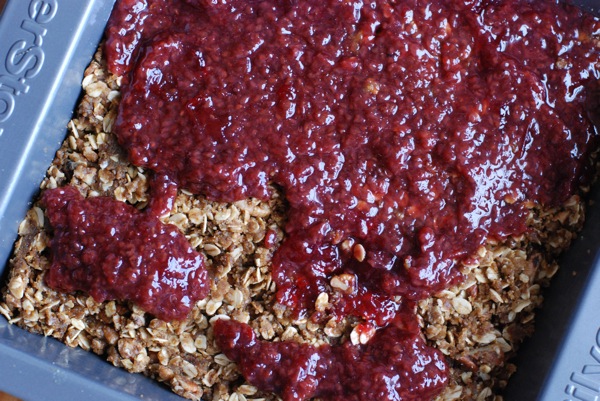
Press two-thirds of the oat mixture in an even layer on the bottom of the prepared baking pan and top with the raspberry preserves. Sprinkle the preserves with the remaining oat mixture.

Bake the bars for about 45 minutes, rotating the pan halfway through baking, until the top is golden brown. Transfer the pan to a wire rack and let the granola bars cool completely, about 3 hours. Cut into squares and serve.

Soy-Glazed Baby Eggplant

First of all, can I just say? Your comments on my last post were awesome. I am so on board for knife-sharpening, pie crust, roast chicken, and everything in between. I simply can't wait to get started with our kitchen resolutions. Huzzah!

This past Sunday, bubbling with excitement about your responses, I went to the farmers' market, drumming up some crazy ideas for things to make. Sometimes, when I'm at the farmers' market, I try to channel Alice Waters. I think about what her trips to the market must be like -- lifting fruit close to her face, sniffing for freshness, really getting her nose in there to find that peach that's just bursting with sweetness, and deciding after her trip what's on the menu for that night, for the rest of the week. My trips aren't always as whimsical. Yes, I pick what's freshest and plan a meal around my purchases -- but I'd be lying if I said I hadn't made the same pearl couscous-mushroom-zucchini-goat cheese dish three weeks in a row. Once I hit a routine that works, I tend to stick with it for a while.

But then it became September. (Um, when? What? I'm getting married in under three weeks. Whoa.) Newly freed from the shackles of nights and weekends at the office, I suddenly realized that tomatoes! and peaches! and corn! are just shy of done for the year. Eek! Better get cookin'.

It's not all about peaches and tomatoes. There are other, less-used fruits and vegetables that I haven't eaten enough this summer. Faced with an imminent season change, I set out to the market last week determined to snag some more exotic summer produce. Among the haul: some beautiful baby eggplants.

I love cooking with eggplants. I'll broil them down to a pulp, scrape out the smoky, softened flesh, mix it with tahini or yogurt and some lemon, and serve with toasted pita. The whole mess is even better drizzled with a bit of pomegranate syrup. But when I get my hands on the baby eggplants -- the ones with the funky colors and the beautifully taut skins -- I prefer to keep them intact, the more to showcase their shape when serving.

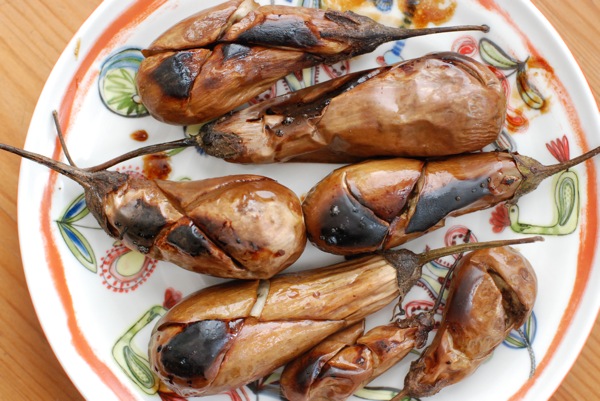
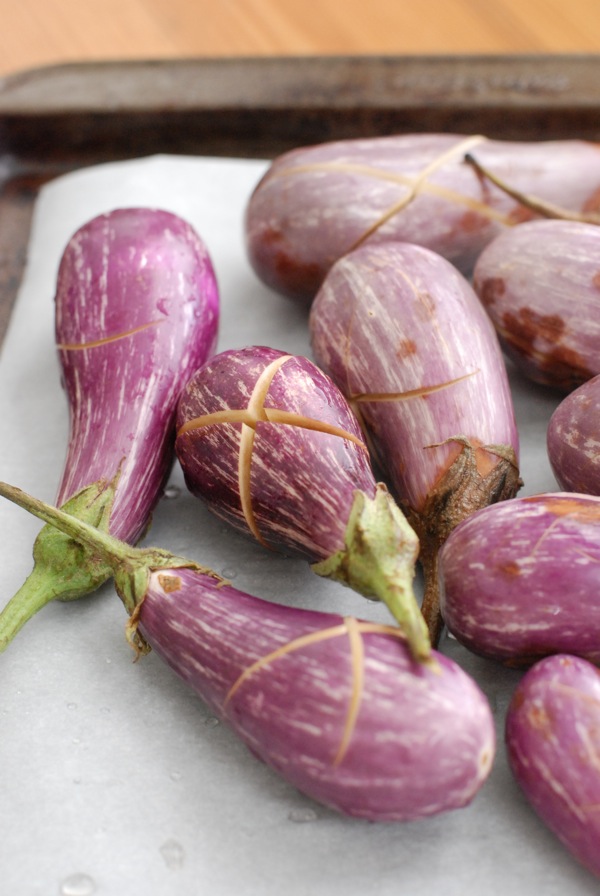
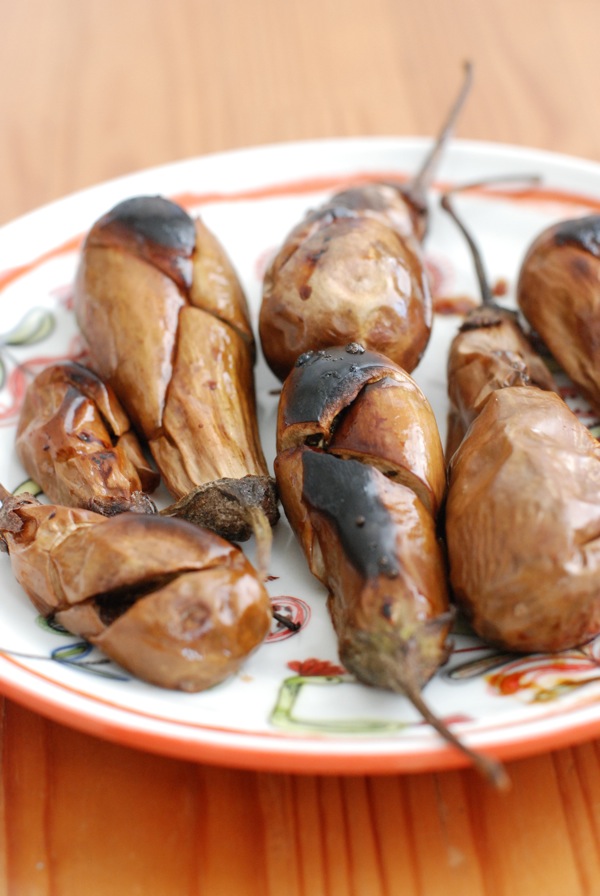
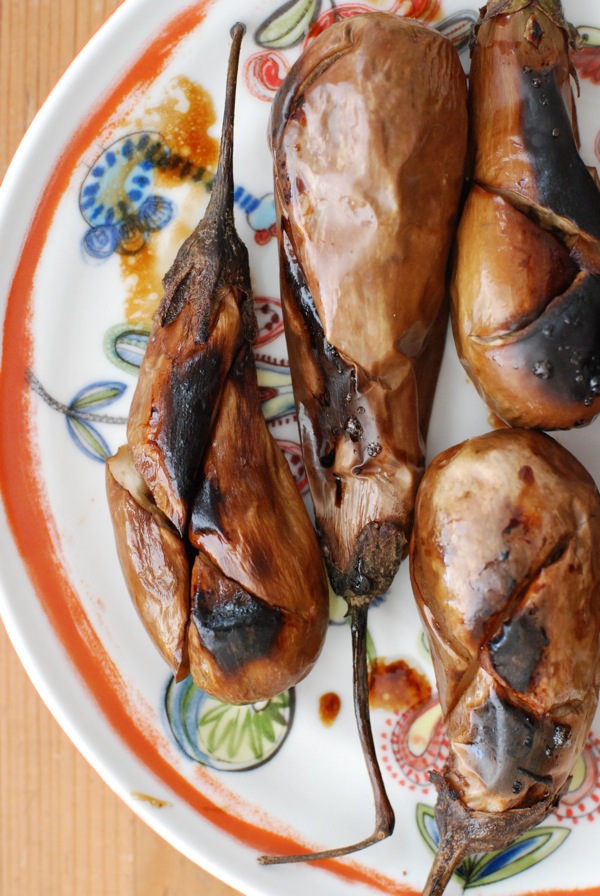
On a whim, I pulled out the nearly-depleted tub of butter, some soy sauce, and -- heck, why not? -- some honey. I cut an "x" in each of the eggplants, dotted the slit with plenty of butter, and painted on a soy-honey glaze. Then I broiled them for 15 or 20 minutes -- just long enough that their skins had charred and their flesh had really softened. Depending on the size of your baby eggplant, they'll soften in anywhere from 10-20 minutes. The result is soft, smoky, and sweet eggplant with no bitterness. You'll want to snatch them up by the stem and pop 'em in your mouth just like that.

And when, after making 20 of these eggplants, you end up with a measly 5 left to serve your guests, just don't say I didn't warn you.

Soy-Glazed Japanese Eggplant

20 Japanese (long skinny) or round baby eggplants 4 tablespoons butter 4 tablespoons soy sauce 8 tablespoons honey

Preheat broiler.

Rinse and dry eggplants. Set on a rimmed baking sheet lined with parchment paper.

Cut an "x"-shaped slit in each of the eggplants, about 3/4 the length of the eggplant and about half way deep into the eggplant. Dot each of the slits with plenty of butter. Really use your fingers to mash that butter into the slit. When it melts, it'll make the finished eggplants silky and tender.

Mix honey and soy sauce in small bowl until fully combined. Brush mixture onto eggplants, using all of glaze.

Broil eggplants for anywhere from 10-20 minutes, until skins are charred and flesh is fully soft. Check at 10, 15, and 20 minutes to make sure eggplants are fully cooked but not overly burned.

Serve hot or at room temperature.