Tamarind Puree

tamarind11 The single best thing (the single good thing, actually) about pulling late nights at work is ordering Indian on the firm's tab. The office coordinates with one of those online delivery systems where you can order dinner and have the bill automatically charged to the company, but frankly, the pickins are slim and they charge you a delivery fee which really cuts into your allotted budget. I almost never order off the site, opting instead to be my own middle man. A bunch of us go in on a big order from Heritage India up the street, and I usually volunteer to take care of ordering and submitting receipts for reimbursement. My colleagues seem to think it's because I embody the spirit of generosity; the truth? I like to ask for lots of extra tamarind chutney.

You'll rarely find my fridge without tamarind concentrate. Tamarind is slightly sweet, but it's the zippy tang that elevates the flavor of meats, pad thai, and even tomato sauce. It's used in many Indian and Thai dishes, and you'll often get some as a dipping sauce for samosa. Perhaps lesser known, tamarind is a key ingredient in Syrian cuisine. Ever since snagging an invite to a dinner party at a Syrian friend's place while I was in college, I've been fascinated by Syrian food. For starters, there's so damn much of it! I ate until I was stuffed at that dinner, and just as the food coma set in, out came the main course. But beyond the copious quantities, I just can't get enough of the interplay between sour and sweet that's fundamental to Syrian cooking. We're talking tamarind-laced tomato sauce, or meatballs cooked in a sweet-tart cherry sauce. It's some pretty good stuff.
tamarind2

I bought my first jar of tamarind concentrate at an Indian grocer near my old office, and it lasted me for nearly a year. It was good, but its texture was similar to pomegranate syrup, and its flavor was somewhat harsher than the tamarind chutney I'm used to eating with my samosas. I thought to get more, but since I no longer work out in the boonies and also don't have a car, Indian groceries aren't exactly accessible. So this fearless blogger decided to make her own.
tamarind3

I didn't go it alone, though: I took on tamarind puree armed with Aromas of Aleppo, one of my new favorite cookbooks to read and ogle over. It's a tall, heavy book, written by a woman named Poopa Dweck (Poopa! What a name!), and it's all about the food of the Syrian Jews. (The book really is stunning, and would make an amazing gift - Julia, who lent it to me, got it for her wedding.) The emphasis is on meat, and when I say emphasis, I mean there is nary a recipe for vegetables on their own; every last one is stuffed with the classic Syrian meat-and-rice filling. Not that I'm complaining. In addition to meat, every single recipe calls for tamarind puree. I've been planning to make something from the cookbook for a while, but until last week, I hadn't gotten past the ogling stage. They just all look very complicated. So imagine my surprise, when I finally bit the bullet and made my own tamarind puree, that the process was really much more painless than I'd anticipated.
tamarind1

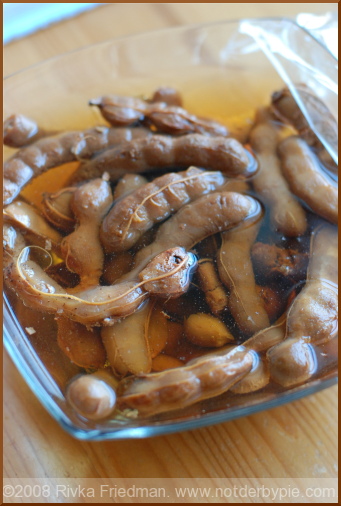
Tamarind is relatively hard when it's dry, the pulp having gathered and solidified around those smooth, center seeds -- but let it soak in water overnight, and it becomes as soft as applesauce. At that point, you can easily separate out the seeds and fibrous membranes from the pulp. After a good strain or two through some cheesecloth, all you need to do is boil the puree down and add some sugar, and that's it. Plus, once the puree is made, it'll keep in a jar at room temperature for upto a year. If it lasts that long.

Tamarind Puree Adapted from Aromas of Aleppo

3 pounds tamarind or tamarind pulp (sold in a hard block) 1 1/2 pounds sugar 1 1/2 tablespoons freshly-squeezed lemon juice 2 Tbsp. citric acid

If using whole tamarind, peel the hard outer shell away. Submerge tamarind (or tamarind pulp block) in about 6 cups of water, and let sit about 8 hours, until pulp has the texture of applesauce and is easily separated from seeds and membranes.

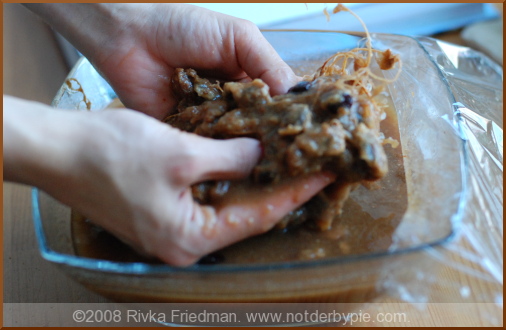
Line a colander with cheesecloth, and set over a large mixing bowl. Pour tamarind mixture into colander, and press firmly against the sides of the colander to extract the tamarind liquid and leave behind the seeds and membranes, as well as any pieces of shell.

Transfer the strained pulp from the colander into a clean mixing bowl, and submerge in more fresh water (about 3 cups). Work to pull it apart again, releasing any remaining pulp, then strain again and transfer the extracted liquid into the bowl that holds the liquid from the first straining.

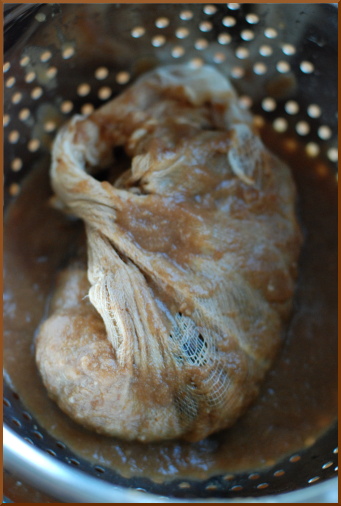
Pour the reserved liquid through the cheese cloth one last time, wringing out cheesecloth to extract as much liquid as possible.

Pour the tamarind liquid into a large saucepan and bring to a boil over high heat. Reduce heat to low and simmer liquid until reduced by half. Then add sugar, lemon juice, and sour salt to the tamarind liquid.

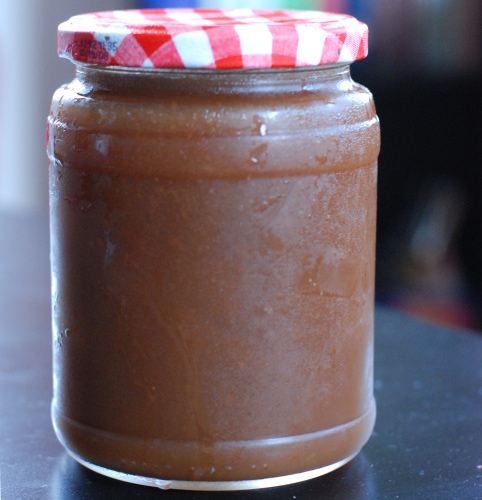
Increase heat to medium and boil slowly until the mixture develops a silky, almost shiny consistency. Let the mixture cool some, then transfer to a large glass jar. Puree will keep several months -- refrigerate after opening.
Wisdom: How to Build a Cheeseplate

cheeseplate1 When summer rolls around, the heat in Washington DC can be rather prohibitive. Almost nothing is worth touching that oven dial, especially in our loft apartment that gets a whole lot of hot air and nary a breeze. Dinner most frequently comprises an easy salad like this broccoli slaw or this Mediterranean orzo salad, or maybe even a cold soup like this quick-and-easy zucchini number I made last summer. Tie that all together with some crusty bread and I've got an easy supper.
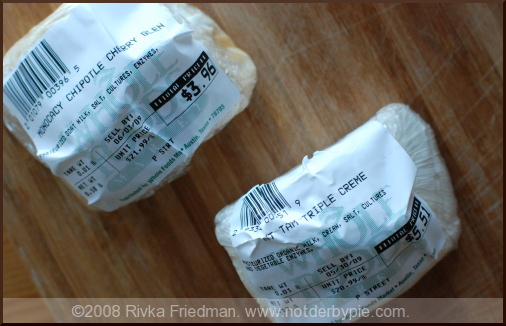
Salads and cold soups are definitely an antidote to the heat and humidity, but when the weather is so debilitating that I want to just crash when I get home, a cheeseplate is really the way to go. Cheeseplates are easy to assemble but elegant enough for company, and while people seem to think they go best with red wine, I've found (and had more authoritative sources corroborate) that a chilled (but not too chilled) glass of white wine makes even better company.

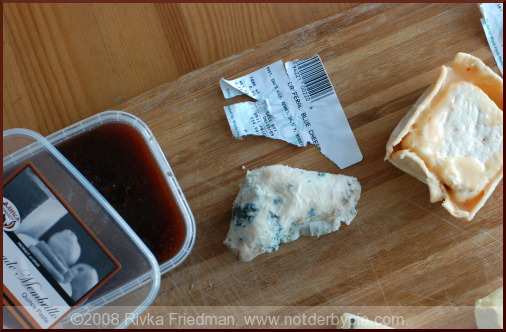
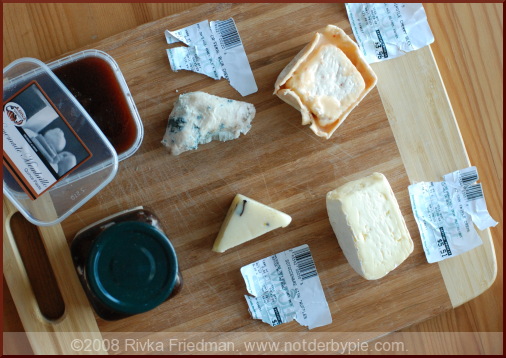
Recently, I was reading a great post from Mr. Amateur Gourmet, Adam Roberts, about his trip to the famed Murray's Cheese in Greenwich Village and his quest for the perfect cheese plate. He asked the man behind the counter for help selecting his cheeses, and the man gave him a mild but interesting goat cheese, a sharper cow-and-sheep cheese, and a stinky washed rind cheese. Lost yet? Don't despair. You can do as Adam did -- and as I often do -- and ask the advice of the person behind the counter. My favorite cheese spots here in DC are the wonderful Cowgirl Creamery, where cheese nerds come to play, and Calvert Woodley, which has a great selection and some really helpful folks behind the counter. That said, even the folks at Whole Foods can help steer you in the right direction. Meanwhile, whether you're enlisting a team of advisers or going at this alone, there are a few basic things that are helpful to know before embarking on your cheeseplate expedition. This post will shed some light on how to build a cheese plate, how to cut and serve each of the cheeses, and what sorts of breads and spreads make the best vehicles and complements for enjoying the cheese. cheeseplate2

CHOOSING YOUR CHEESE When building a cheese plate, one good guiding principle is that the plate should reflect a range of funk, hardness and origins. There's nothing wrong with a plate composed entirely of cow's milk cheese, but having a variety is a good place to start.

I usually like to have at least one goat cheese on the plate. Sometimes I pick something spreadable, perhaps with herbs. Other times, I choose a harder, semi-aged goat cheese, like Bucheron, or one of my all-time favorite goat milk cheeses, Humboldt Fog. Humboldt Fog is made by Cypress Grove Chevre, and it's got a beautiful layer of ash running through the middle of the cheese. It's also got three distinct layers: the cakey interior, the creamier outer layer, and the rind. It's a wonderful cheese.

I'm not a big sheep milk cheese person, but I really enjoy Manchego and Idiazabal, both Spanish sheeps' milk cheese. Manchego is salty and robust; Idiazabal is grassier, but really complex. Both are good options, and both will be harder than most goats' milk cheeses.

Other types of Cheese:

Blue Cheese, which is cheese laced with (delicious) bluish mold. Blue cheeses are pungent, sometimes even a bit spicy, and strong. Some are quite salty, others on the sweeter side. A couple of my favorites are Fourme D'Ambert, which is creamy and rich, and Rogue Creamery Rogue River Blue, which is wrapped in grape leaves and is uber smoky and delicious.

Bloomy cheeses, which are covered in a white, slightly damp rind. Bloomy rinded cheese tends to be soft, and ranges from the chalky goat-cheese consistency to the unbeatable richness of triple cream cheese.

Washed rinds, which are, as the name suggest, washed in any number of liquids including but not limited to water. Washed rind cheese can be quite funky. One of my favorite washed rind cheeses is Epoisses, which is salty and pretty runny, but also has a sort of funky sweet-smokiness to it. I find it absolutely addictive.

One last shout-out to one of my other favorite cheeses, Cowgirl Creamery Mt. Tam. It's a triple cream cheese that's got a thick, creamy texture and an endless array of wonderful aromas. It's won lots of awards, and it's truly a phenomenal cheese.

If even after trying them you're hesitant to invest in a big hunk, try the "cheese treasures" section. They tend to have sections like it at Whole Foods as well as major cheese stores (and I know that the Calvery Woodley here in DC has one, too). Usually buried somewhere in the corner of the display case (as all treasures should be), there'll be a pile of cheese nubs, usually the bits of whatever cheese was killed that day. It's a great place to experiment, and at only a couple of bucks per piece, it's hard to go too far astray.

cheeseplate3

PLATING AND SERVING YOUR CHEESE

Plate your cheese in order from mildest to most stinky. Theoretically, you should eat the cheeses in this order as well, though after trying an initial round of bites in the correct succession, I tend to take bites of this or that in no particular order, using a glass of wine as a palate cleanser.

For hard cheeses, use a slicer that'll take off shavings of the cheese. If you have a big hunk of hard cheese, you won't enjoy it nearly as much as when your slice of baguette cushions several paper-thin slices.

Serve softer cheeses with cheese knives -- those blunt-bladed stubby ones that can spread just about anything. Also put out some spoons for any accompanying chutneys, jams, or pastes.

TO ACCOMPANY YOUR CHEESE

Most people seem to serve cheese plates with crackers, since they're easy to serve, easy to eat one-handed, and come in a variety of flavors. However, most cheese experts say that a classic baguette is actually the way to go; its flavor, while pronounced, is more neutral than crackers, and thus serves as a prime vehicle for tasting the true flavor of the cheese. I eat cheese most often on baguette, but every once in a while, I enjoy a crispy cracker (especially those rainforest crisps from Whole Foods -- they're like biscotti, with bits of dried figs or cranberries and some nuts too). Best solution? Serve both. See for yourself which goes first.

In terms of condiments, everyone's got their favorites, and I'm no exception. For Manchego or Idiazabal, I like a nice hunk of Membrillo, the delightfully sweet-tart and thicker-than-jam quince paste. Mitica is my favorite brand: it's homemade and fresh-tasting. It might look like a lot for just a cheese plate, but buy yourself some and I guarantee you'll find ways to use it. Plus, it lasts in the fridge for months.

For creamy, runny, nosey cheeses, I like a jam or compote that can stand up. Fig jam is my standby, but I'll settle for something else in a pinch. Nothing too fruity though -- strawberry jam will kill the cheese with its overpowering sweetness.

Goat cheese goes well with any number of things, from sweet to savory. Tomatoes, capers, olives, and pesto are all good savory choices; for something sweet, try a tomato or pepper jam, a chutney, or even a drizzle of date honey.

I hope this list is a good beginner's guide, but please don't let it be restrictive. The last time I was at Cowgirl, one of the women behind the counter was helping me out, slicing tastes of this or that as I poked around. Suddenly, she had some sort of lightbulb moment and ran to the back of the shop. She came back carrying a massive (think a yard wide) half-wheel of what she described as the best cheese she's ever had. It was a Basque cheese, handmade by a husband-and-wife team, and wrapped in all sorts of fresh and dried herbs, including bay leaves and various peppercorns. The cheese was firm, pale whitish yellow, and looked pretty ordinary inside -- but the flavors, WOW, the flavors! It felt creamy and rich, but then it started to open up, and I got herbs, wood, some barnyard-y aromas, then sweetness, a punch of salt, and who even knows what else. I asked for two or three more tries and took home a big hunk with me. The cheese didn't even have a name, so I can't recommend it, but it was really earth-shattering. I'm willing to bet your local cheese shop has something in stock that one of the folks behind the counter is really excited to share. Be sure to take them up on it.

On limiting waste

leftover-components-1 I dunno about you, but I'm feeling more and more compelled to get a composter. It seems ridiculous that I throw away several pounds of biodegradable stems, peelings, cores, pits, seeds, skins, and rinds, when I could compost them instead. I know that composting in urban environments can be challenging: living as we do in the heart of DC, our access to yard space is limited nonexistent, and we aren't exactly teeming with the space (or money, for that matter) to install one of those large, expensive all-in-one electric composters. That said, the amount of waste that my one household -- a household of two -- can produce in one week is kind of mindblowing. So I'm considering getting a compost tub, just a little guy for the house. One of the biggest lobbyists for this purchase is our friend Matt, who lives with his wife Bryce around the corner from us, and has kindly volunteered to take our compost if we'll drop it off (right, Matt?). I figure, I've got someone to take the stuff, and I've definitely got room for a little bin in my kitchen: now is as good a time as any to stop wasting and start composting. Huzzah!
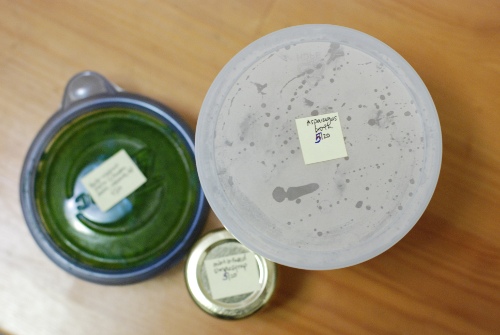
Composter in hand, I'll stop throwing away the bits of produce that I tend not to use in cooking. But there's another way to think about limiting waste, one that's near and dear to me as a food blogger, and that's making sure to extract as much flavor as possible from the ingredients we buy. Not only is this best practice for maximizing use of the food we buy, it's also a way to ensure that we make the most of our purchases, which in turn can save all of us a little hard-earned dough.

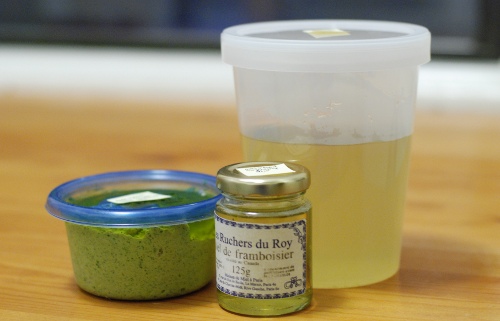
Within the past two days, I've made broth out of the stems of asparagus, cooked a mint-infused simple syrup with the stems and some leaves of a massive mint harvest that the Masseys gave me as a gift, and made an herb pesto with leftover walnuts, going-going-cilantro, and -- you guessed right -- more of those mint leaves. What'll I do with each of these things? I'm not 100% sure, but if you hear that I served herb-encrusted salmon and mint spritzers for Friday night dinner, don't be surprised.

leftover-components-2

When I make these types of basic components, I store them -- in either the fridge or the freezer -- well-sealed and labeled. I usually note the item, its components, and the date I made it. That way, when I open up my freezer and see frozen rugalach dough from March, I know what to make for weekend dessert. And when I see frozen Bolognese sauce from January, I know what we'll be having for dinner, like, pronto.

Below, I've included the methods for each of the three components I made this week. As you can imagine, the possibilities here are too many to count: switch up the herbs for the ones you've got in your fridge, toss some lemon or lemon zest into the simple syrup for extra zing, and add any and all vegetable scrapings into your stock to make it more complex (and resourceful!). These are truly just a few of the infinite number of possibilities, many of which were noted in Mark Bittman's insightful column about using your freezer as a pantry.

Asparagus Broth

1 lb. Asparagus stems 6 cups water 1 tsp. salt

Bring water and salt to a boil. Add stems (and tips, if blanching for use in another recipe; I actually blanched the parts I was using in a separate batch of water (3 cups), strained them and reserved that water, and then boiled another 3 cups of salted water for the stems. where was I...) and boil for approximately 10-12 minutes, until water is a pale green and stems can be pierced with fork. Strain stems over a large bowl, reserving cooking water. Allow to cool half an hour, then package in tall plastic container and make sure to label with name, ingredients, amount of salt, and date.

Mint-Infused Simple Syrup 1/2 cup sugar 1/2 cup water large handful mint stems and leaves

Bring the water to a boil. Add sugar, and swirl around to dissolve completely. Add mint; remove from heat, and allow to steep at least 30 minutes, preferably overnight. Discard or compost mint, package syrup in small sealable container with clear label. Will keep for several weeks.

Herb Pesto

3-4 heaping cups herb leaves; I used mint and cilantro, but feel free to add parsley, basil, sage, tarragon, marjoram, or any other herb 1/2 cup chopped or whole walnuts large pinch salt, to taste Parmesan or other hard, dry cheese, optional (I didn't use any) 1/2 a lemon, optional (I had one leftover) 3 Tbsp. water olive oil

In a blender, combine herbs, walnuts, salt, lemon juice if using, and water. Blend on medium speed until herbs are chopped into small bits. With the mixer on, pour oil in a steady stream until mixture begins to come together. Stop pouring oil, continuing to blend until the pesto is as emulsified or as chunky as you like it. Taste, and adjust salt if necessary. Store in a sealable container: be sure to leave 1/2 an inch at the top of the container to fill with oil. This will ensure that your pesto stays fresh as long as possible.

Meringues (Finally)

meringue2 For all those anticipating Passover, these meringues are the perfect Passover dessert. They require no flour or leavening, but actually taste good. I simply can't go the week without them.
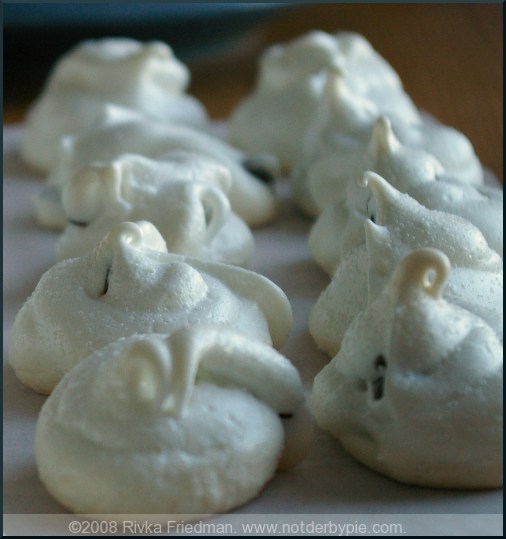
I was looking through my archived photos today and discovered something utterly shocking: I've had a website for...how long now? a year and a half?...and somehow escaped until today without posting a recipe for one of my most reliable, fool-proof, standby, can't-live-without desserts. I make them all all all the time, especially when I have leftover egg whites. On top of being nearly effortless to make, they achieve one of the rare feat of being both non-dairy and delicious. Like I said, rare.

Meringues, my friends, meringues. They are a fundamental part of my dessert repertoire, and the basis for many other desserts (including, among others, this crazy buche de noel, and the ultimate meringue-based dessert, Macarons.

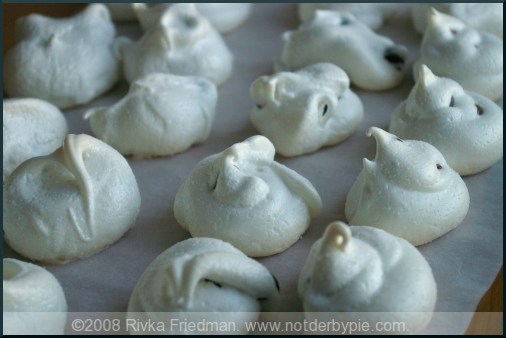
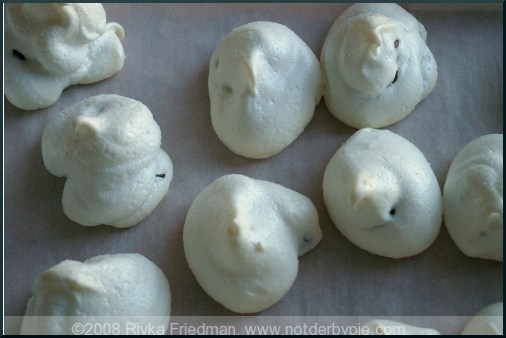
meringue1 Before I get knee-deep in apologizing, I'll be out with the recipe. As I said, they're great on their own, or with any number of additions, including extracts (vanilla, almond if that's your thing), spices (cinnamon, cocoa, etc) and other add-ins (nuts or chocolate chips, pictured).
A few tips on making good meringue:

  • Make sure your mixing bowl is bone-dry: any liquid will kill your meringue's ability to foam up. Along these lines, add any extracts only after the meringue is made.
  • Egg whites will whip up much more easily if at room temperature. Leave them out for a couple hours before beating, if possible.
  • The standard egg:sugar ratio for meringue is 1 egg white per quarter-cup of sugar. I usually double this for a batch of meringues.
  • Cream of tartar is an acid that helps increase the volume of, and stabilize, whipped egg whites. You only need a teeny bit -- about 1/4 tsp. for 6 egg whites, so a scant pinch for my recipe.
  • Traditionally, the egg whites are whipped until soft peaks form, and only then is sugar added. There's nothing wrong with adding sugar earlier in the process -- promise, I've done it by accident many times -- but your eggs will take longer to foam up if there's sugar in them.
  • There are two methods for baking meringues: some bake them for a couple hours in a low oven. Others bake them overnight in an oven that was preheated and then turned off. Either works; I prefer the former.

Keep these things in mind, and meringue will be your friend. Have any great uses for meringue? I'm already thinking of making a pavlova (big pillow of meringue topped with fruit and whipped cream) this weekend -- leave other great ideas in the comments.

meringue3

2 large egg whites, at room temperature a scant pinch teaspoon cream of tartar a pinch kosher salt 1/2 cups granulated sugar, divided 1/4 teaspoon pure vanilla extract 1/2 cup high-quality chocolate chips, optional

Preheat the oven to 200 degrees F. Line 2 baking sheets with parchment paper.

In the bowl of an electric mixer fitted with the whisk, beat the egg whites, cream of tartar, and a pinch of salt on medium speed until very soft peaks develop. Add 1/4 cup sugar and increase the speed to high until the egg whites form very stiff peaks. Whisk in the vanilla. Carefully fold the remaining 1/4 cup of sugar into the meringue. Either pipe the meringues onto the baking sheets using a pastry bag (or plastic bag with a bit cut off the end), or spoon them onto the sheets, au natural.

Bake for 2 hours, or until the meringues are dry and crisp but not browned. Turn off the heat and allow the meringues to sit in the oven for about half an hour**, then set on the counter to dry out completely.

**Meringues do not keep very well; they're best within a day of when they're made. However, if you do want to keep them, and it's not terribly humid outside, let them dry out in the oven overnight, or until the oven is completely cool and the meringues are really dry. They'll keep better this way. I stack them in tupperware between layers of parchment paper, and hope for the best.