Chocolate Raspberry Muffins

Yes, I love chocolate. Just as much as the next person. I used to be the type that couldn't resist a chocolate dessert. If chocolate cake/mousse/torte/souffle was on the menu, I'd kiss all else goodbye, turning my back on rhubarb crisp and panna cotta without a second thought. These days -- especially these hot summer days -- big chocolate desserts have taken a back seat. Back in May, at 2Amys, I had a flawless rhubarb-almond tart to chase the sardine, broccoli rabe, and tomato pizza I'd had for dinner. Two weeks ago, dining with old friends at Jaleo, we chose soft, tender flan and rich, vanilla-spiked basque cake to finish our meal.

Blame it on the heat, but not entirely on the heat: these days, it's rare that I enjoy a chocolate dessert as much as I savor the clean snap of a piece of chocolate itself. Chocolate pudding is still a regular work snack, and I made a feathery, simple chocolate cake for a friend's bachelorette party last week, but as a general rule, I'm just more excited by peach cake and sour cherry torte.

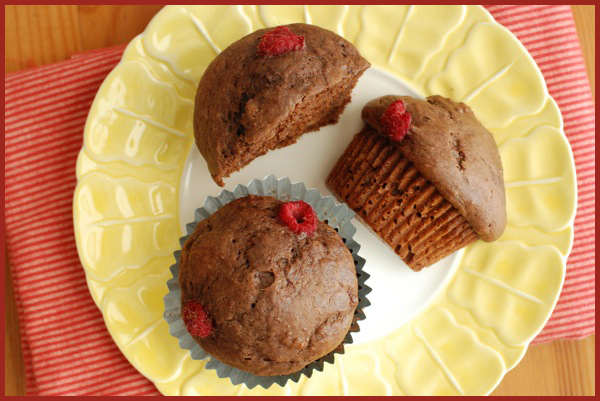
I haven't written off chocolate altogether, though; I'm just incorporating it into baked goods in moderation. These muffins are an example. They don't hit you over the head with chocolate, but good quality cocoa and (if you'd like) little bits of chocolate perfume and flavor the muffins just the right amount. "Just the right amount" = enough to eat chocolate for breakfast and not feel the least bit guilty about it.

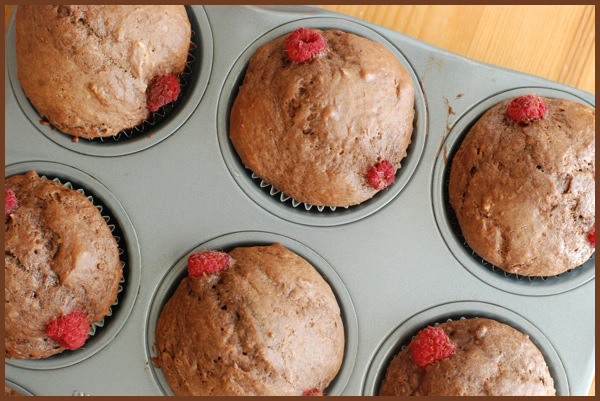
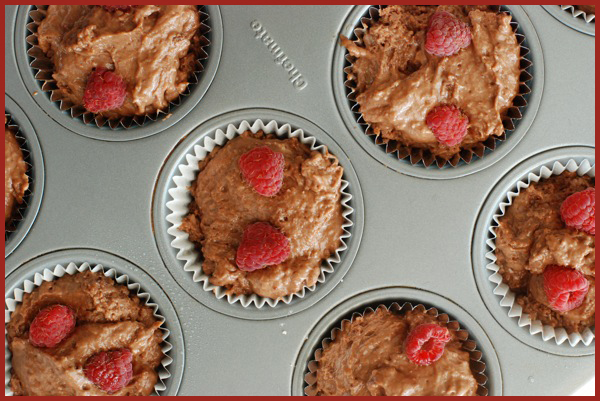
As if the chocolate weren't enough of a draw, I swirled homemade raspberry jam through the batter and topped each muffin with a couple fresh raspberries. Cherries or strawberries would also be great, and they're easier to fold into the batter. If you have your heart set on raspberries and want them in the muffins instead of just on top, you can freeze them -- that way they'll be firm enough to incorporate without turning to mush.

Not that I'd complain about a chocolate muffin laced with raspberry jam and smushed raspberries...

Chocolate Raspberry Muffins adapted from Dorie Greenspan's Baking from My Home to Yours Makes 12 muffins

3/4 of a stick (6 tablespoons) unsalted butter 4 ounces bittersweet chocolate, coarsely chopped; 2 ounces if you don't want chunks in the muffins 2 cups all-purpose flour 2/3 cup sugar 1/3 cup unsweetened cocoa powder, sifted 1 tablespoon baking powder 1/2 teaspoon baking soda 1/2 teaspoon salt 1 1/4 cups buttermilk; can substitute milk with squeeze of lemon 1 large egg 2 teaspoon pure vanilla extract 3 tablespoons raspberry jam 1 pint raspberries, fresh if using to top muffins, frozen (not thawed) if you plan to fold them into the batter

Preheat oven to 375 degrees. Line muffin tin with paper liners sprayed with nonstick spray, or with silicon liners. If using fre

Melt butter and half the chocolate in microwave or over low heat on stove, just until uniformly incorporated. Set aside.

In large bowl, combine flour, sugar, cocoa, baking powder, baking soda, and salt. In another large bowl, whisk buttermilk, eggs, and vanilla until combined. Pour wet ingredients and chocolate-butter mixture into dry ingredients and mix with rubber spatula just until dry ingredients disappear. Fold in remaining chopped chocolate, if using, and raspberries, if folding into batter. Drop three tablespoons jam into batter in different spots, and use a knife to swirl into batter.

Transfer batter into muffin tin, filling each cup about 3/4 full. If using fresh raspberries, top each muffin with 3 or 4, pressing them into batter if desired. Bake 20 minutes. Remove muffin tin from oven and transfer to cooling rack. When tin is cool enough to touch, remove muffins, in liners, to cool directly on rack.
Pear Muffins with Pecan Streusel

Faced with the choice of a bells-and-whistles breakfast or more sleep, I'll take the former, any day. (See "under-eye bags.") On work days, I opt for something simple: eggs and toast, yogurt and granola, perhaps some fresh berries and a sprinkle of sugar. I save the real fuss for the weekends. But some weekends, after 5 early mornings at the gym, 5 full days at work, and 5 evenings rushing about all week long checking hundreds of things off my to-do list, I face a choice of epic weight between making something fancy and, um, doing nothing. You can see where this is going.

My laziness aside, I can't let this empty belly go hungry. Also, I can't completely neglect cooking, 'cause then what would I tell you about on Sunday night? Caught between the rock and the hard place of weekend breakfast that doesn't kill the weekend, I often turn to muffins like these.

It's a simple thing, really. Once you have a muffin recipe whose proportions are as perfect as this one, the fussing sort of falls away. Don't have pears? Add apples. or fresh berries. Or even a spoonful of jam into the center of each. Short on time? Skip the streusel. They're just great without. If you've got 20 minutes on a Sunday, make a batch. That way, when you're running out the door Monday morning with mascara on one eye and the keys buried in the depths of that Mary Poppins bag (who, me?), at least you won't go hungry.

Pear Muffins with Pecan Streusel adapted from (who else?) Karen DeMasco's Craft of Baking makes 1 dozen

For the muffins:

1 cup all-purpose flour 1 teaspoon cinnamon 1/4 teaspoon ground ginger, optional 1/2 teaspoon baking soda 1/4 teaspoon kosher salt 1/2 cup buttermilk 1 egg 1/2 teaspoon vanilla 3/4 cup light brown sugar 4 tablespoons (1/2 stick) butter 1 ripe but firm pear, cored and roughly chopped

For the Streusel:

1/2 cup flour 1/3 cup cane (or white) sugar 1/3 cup coarsely chopped pecans 1/2 teaspoon cinnamon 1 pinch salt 4 tablespoons (1/2 stick) butter, softened

Preheat the oven to 350 and line a muffin tin with liners, or butter the tin.

Make the muffin batter: in a medium bowl, sift the dry ingredients together. In a larger bowl, whisk together the buttermilk, eggs, and vanilla.

In the bowl of a stand mixer or in a large mixing bowl using an electric mixer, beat butter and brown sugar together on medium-high until light and fluffy, about 3 minutes. Turn the mixer down to low and begin adding the remaining ingredients: begin with 1/3 of the dry ingredients, then add 1/2 the wet ingredients, then another 1/3 of the dry, followed by the rest of the wet, and finishing with the dry. Be sure to mix after each addition. Add the pears, and mix just until incorporated.

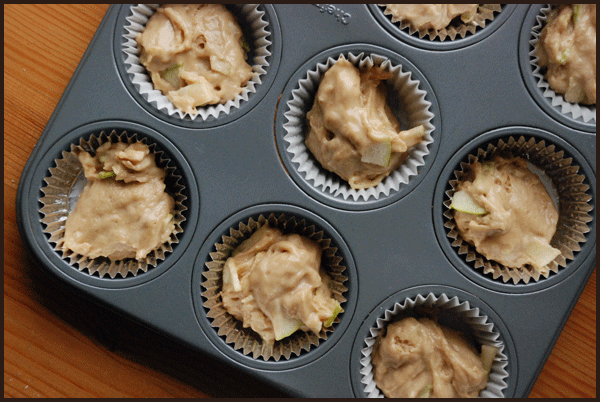
Fill muffin cups equally: I found my normal size ice cream scoop, filled not quite all the way, was the perfect size.

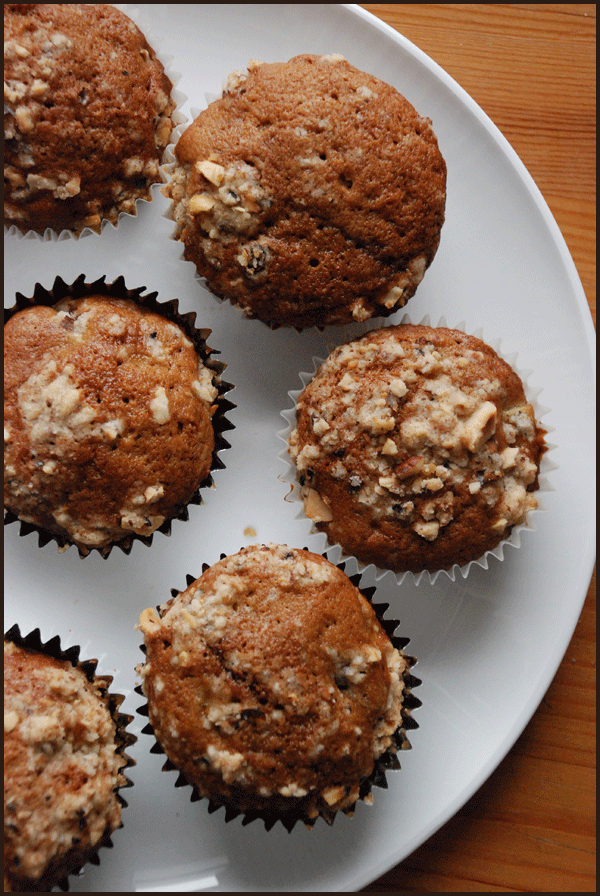
Now, make the streusel: combine all ingredients in a small bowl, and use your fingers to break the butter into the dry ingredients. When mixture has formed some coarse and some fine crumbs, sprinkle it over muffins. Bake 25-30 minutes, until muffins are golden brown. Transfer to a rack to cool completely.

Cheesy Scones with Ramps

Here's a little something about me: I work in healthcare. Food is my hobby, my one love, but it's not, eh, my bread and butter. What actually pays the bills is doing research about healthcare reform. So you can imagine that with the passage of the new law, my professional life has jolted into high gear, and I've been workin' my little tuchus off like never before. Truthfully, work has been amazing lately. It's invigorating and empowering to work on something so relevant, so current, and so important. But it's definitely meant less time for the things and people I love. While I've tried to keep afloat posting new recipes, I probably haven't been as frequent a visitor to this space as I wish I could. I hope my posts haven't been too sparse; hopefully, things will calm down around mid-May, and I'll be back in the kitchen like it's my (dream-)job.

Meanwhile, let's talk about these awesome scones I made this weekend. I'll even share my foolproof trick for making scone dough, because I like y'all so much. That and more, after the jump.

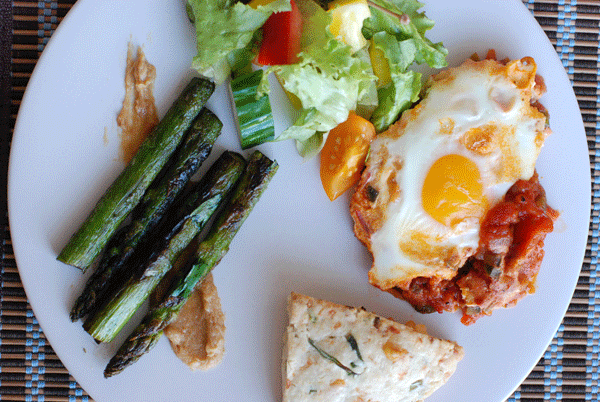
One of the hallmarks of spring on the east coast is the sudden appearance, and almost-as-abrupt disappearance, of ramps. These onion-like greens, which grow wild for about five seconds at the start of the season, are treasured for their vegetal pungency and uber-freshness. They've got a tiny bulb at one end and a thin, delicate stalk at the other. They're fantastic in spring vegetable stir-fry, on crostini or focaccia, or in quiches and omelets. They're also the perfect addition to scones and biscuits, a would-be understudy for scallions that steals the show.

Now, I checked, and this is the first scone recipe I've posted on this site. Know why? Because so many scone recipes boast airy, light, flaky, buttery breakfast fare, but actually yield dense, brick-like concoctions that leave that horrid chalky sensation on the roof of your mouth after eating them. You know what I'm talking about. Why spend time perfecting scones when you can just....make biscuits?

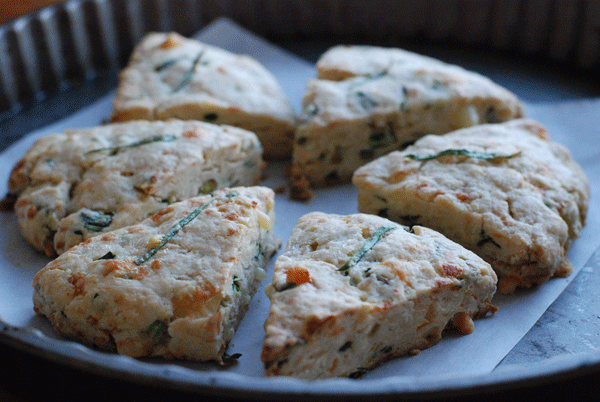
Well, I'm officially a scone convert. Or maybe I'm just a Karen DeMasco convert; DeMasco is the pastry chef at Locanda Verde in New York, and her book, The Craft of Baking, has yet to let me down. (Remember that blueberry tart? Yea.) Here's yet another successful recipe from her book, for scones so buttery, so flaky, so perfectly crunchy on the outside from the browned dough and crispy cheese bits, you'll never need another scone recipe again. With suggested modifications for savory versus sweet scones and explanations about the proportions of each ingredient, this recipe is versatile and thorough. I think, after last weekend, I'll be making scones much more often. I also think I'll be using this recipe every time.

Cheesy Scones with Ramps adapted from Karen DeMasco's The Craft of Baking

As I mentioned above, DeMasco offers modifications and proportions for sweet vs. savory scones, as well as a variety of possible add-ins. Because you really, truly should buy this book, I'm including only the actual recipe that I made. The tips for making other scones are worth the price of the book alone -- and trust me, there's so much more where this came from.

I used mostly cream with just a splash of buttermilk, but the cup of milky liquid can be as much or as little of one or the other as you like. DeMasco calls for 1/2 cup add-ins total, but I cut the salt a bit in order to add extra cheese. Other than that, I pretty much followed her instructions. Have I mentioned the results were delicious?

Finally, my scone dough trick: no, I didn't forget! Keep reading.

1 3/4 cup flour, plus some extra for rolling 1 tablespoon & 1/2 teaspoons of baking powder 2 tablespoons sugar 1/2 teaspoon salt 1/2 teaspoon pepper 6 tablespoons cold butter, cut into small pieces 1/4 cup Appenzeller or other semi-soft Swiss cheese, cut into a small dice 1/4 cup chopped ramps, plus a few slivers to top scones (optional) 3/4 cup heavy cream, plus 2 tablespoons for brushing scones 1/4 cup buttermilk

In the bowl of a stand mixer fitted with the paddle attachment, mix flour, baking powder, sugar, and salt. Add the butter. Put bowl in freezer for 5 minutes to chill the flour. Then beat the mixture on low speed if using a mixer) until the butter is broken up into pebble-sized pieces, about 3 minutes.

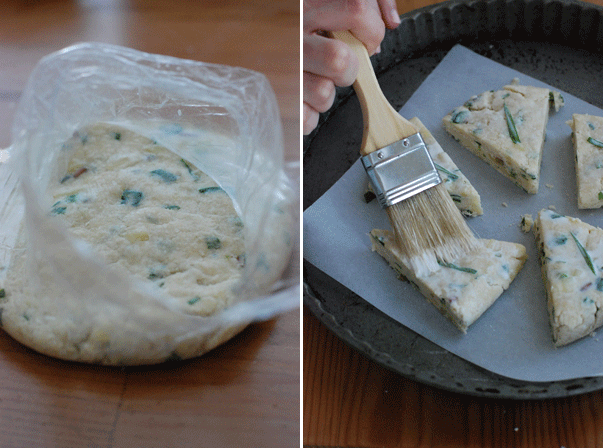
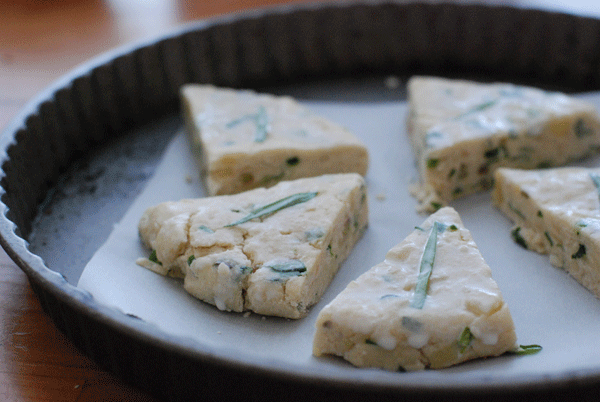
Add the cheese and ramps. Then pour heavy cream and buttermilk into the bowl and mix just until dough comes together. But these are scones, so the dough probably won't just "come together." In that case, (HERE'S MY SCONE TRICK!), empty the contents of the bowl into either 1 quart-sized bag or two sandwich baggies, and press the dough inside the plastic until it actually does come together and stay that way (this has the added benefit of keeping your hands clean!) Mold the dough into one or two disks (I made two, for more equilaterally shaped scones; one disk will yield scones the shape of pie slices) and refrigerate about 2 hours or stick in the freezer for 15 minutes.

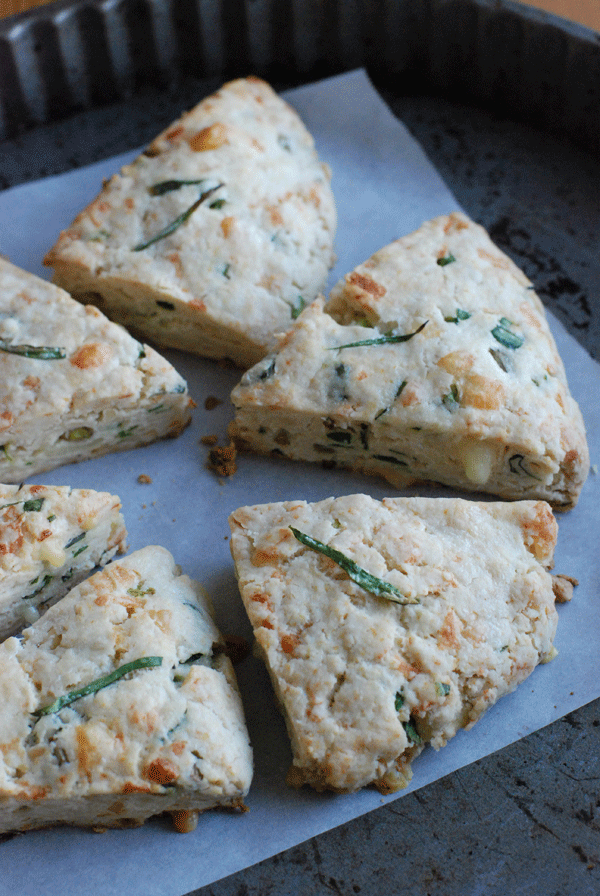
Preheat oven to 375. Roll out disk on lightly floured surface to form one 7-inch round or two 3-4-inch rounds. Cut 12 slices from the large round or 6 wedges from each of the smaller rounds, and arrange on a baking sheet (no need to leave much room between the scones). Lay a sliver of ramp atop each scone, then brush with cream (this will aid the browning process).

Bake about 20 minutes, until golden on top and browned on the bottom. Serve warm, with plenty of butter and perhaps a bit of ramp pesto (yum!)

Chocolate Babka

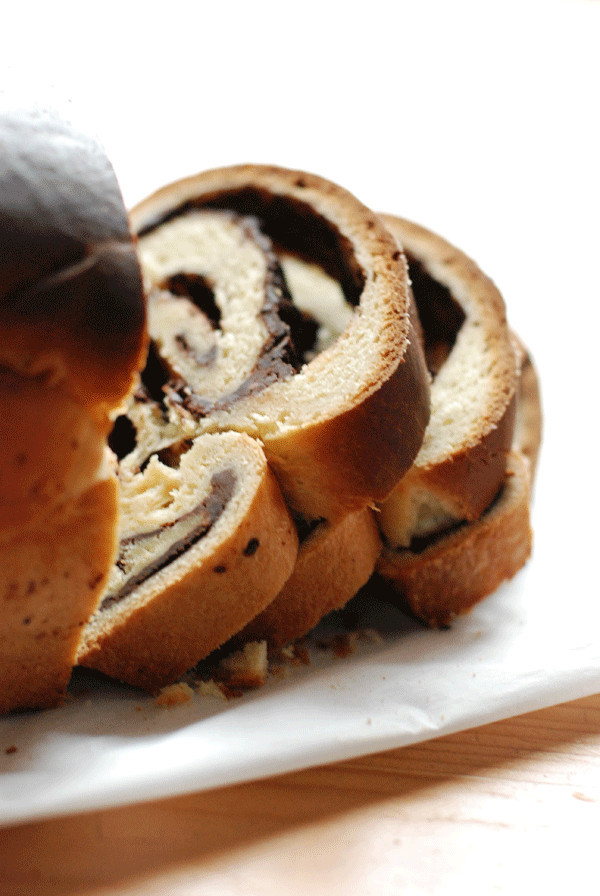
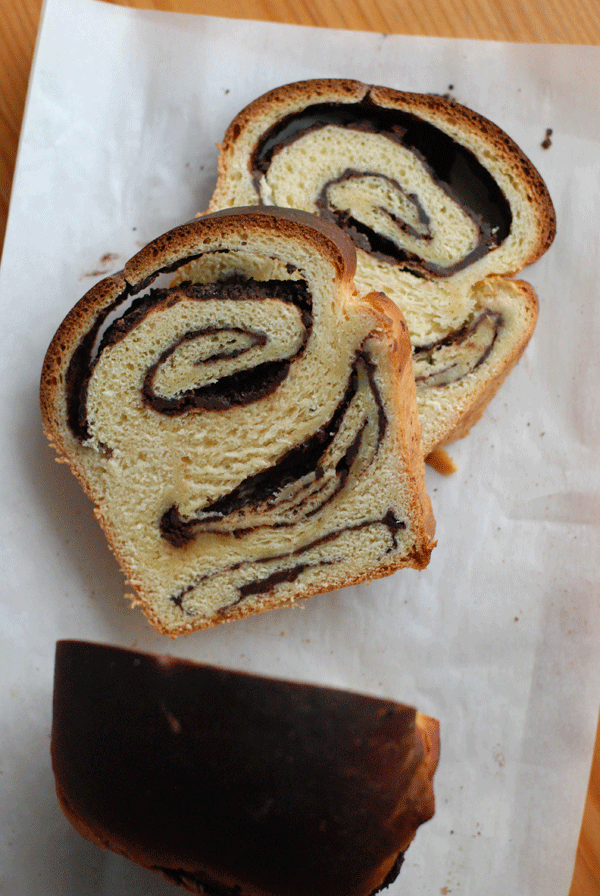
When I was a kid, I couldn't wait for Saturday to come. I'd like to say I loved the break from homework and the chance to spend time outdoors, but really, it was just the Babka. Green's Babka, specifically. The chocolate came in the blue wrapper; if you wanted cinnamon, you went for the green. Inside were many countless sheets of paper-thin dough, folded accordion style as densely as could be, and protectively encasing layers of chocolate. A cross-section had the complex structure of brisket, with all those layers to cut through. I ate mine from the outside in, peeling the layers apart slowly and seeing how thin I could rip each piece. It was quite the treat.

The complex structure of the dessert was etched in my mind. So many layers! And so impossibly thin! However did they do it? For years, I (stupidly) assumed that homemade babka was out of reach. But after a brush with the old-school Green's a couple months back, I was jolted from the romance reminded that Green's is made with wow, so much margarine. And no butter at all. I was convinced that by using the real stuff, I could make an even better version of the childhood classic.

I was right. The babka I made last week, while not really anything like Green's, was delicious. It was less like a croissant and more like a not-so-delicate brioche: soft and buttery, with occasional folds of chocolate and plenty of richness. And seeing as I'm in the middle of a toasting trend, I'll just say it: slices of babka older than a day should be toasted.

This babka comes from Peter Reinhart. Since his pizza dough was such a success, I couldn't resist giving one of his more complex recipes a try. Admittedly, there are a couple rises involved in making this babka, so it's a bit time-consuming and not as hands-off as some of the other baked goods I've been making. That said, the results are sure to elicit oohs and ahhs from your brunch companions. Babka also makes a splendid rustic dessert.

Chocolate Babka adapted from Peter Reinhart

Note: Reinhart suggests a crumb toping that, while traditional, isn't altogether necessary. I omitted it.

2 tablespoons yeast 3/4 cup lukewarm milk 6 tablespoons butter, melted or at room temperature 6 tablespoons sugar 1 teaspoon vanila 4 egg yolks, broken up slightly 3 1/3 cups unbleached all-purpose flour 1 teaspoon salt 1 egg and 1 tablespoon water for egg wash, if using crumb topping

Filling:

1 1/2 cups frozen semisweet chocolate chips or chunks 1 teaspoon cinnamon 1/4 cup cold butter

Streusel Topping:

1/4 cup cold butter 1/2 cup flour 1/2 cup brown sugar pinch salt 1/4 teaspoon cinnamon

In a small bowl, whisk yeast into milk until dissolved and let proof for 5 minutes.

In a large bowl or the bowl of a stand mixer, cream butter and sugar on medium until combined, about 1-2 minutes. Add vanilla to egg yolks, and add to dough in four portions, mixing until combined each time. Once mixed, turn mixer to medium high and continue mixing until uniform and fluffy, scraping down as you go. If using a hand mixer or a spoon, mix as powerfully as possible.

Stop mixing, add flour and salt, and pour in milk mixture. Continue mixing on low until well-incorporated, about 2-3 minutes, until dough is soft and somewhat sticky. If mixer struggles, switch to dough hook or mix by hand.

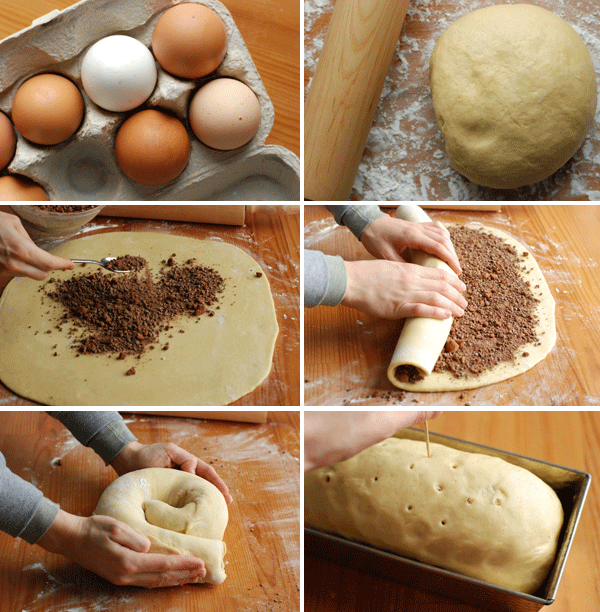
Transfer dough to floured work surface and continue kneading by hand another 2 minutes, until dough is no longer sticky, but still soft and pliable. Form dough into a ball. Place in lightly oiled bowl, cover tightly with plastic wrap, and let rise at room temperature about 2.5 hours. Dough will rise some, but not double in size.

Meanwhile, prepare filling: grind chocolate in food processor, then add cinnamon. Cut butter into small pieces and add to food processor, mixing until butter is evenly dispersed into the chocolate.

Roll risen dough into 15x15 inch square on lightly floured work surface. Dough should be between 1/4 and 1/8 inch thick. Be sure to lift the dough regularly in between rolls and add flour as necessary to prevent sticking.

Sprinkle filling evenly over dough, leaving 1/4-inch border. Roll up dough and place it seam-side down on work surface. Rock dough back and forth gently to extend roll to about 20 inches long.

Wrap dough around itself to form coil shape. Stand coil on its side, compress lightly to form a loaf shape, and transfer to greased loaf pan. Cover loosely with plastic and let rise at room temperature for 2-3 hours until babka fills out the pan. At this point, either bake babka immediately or refrigerate overnight. BE SURE TO BRING TO ROOM TEMPERATURE BEFORE BAKING!

Preheat oven to 350 degrees. Poke a few holes in top of babka.

If using streusel, combine all ingredients in processor or mix in bowl with pastry blender until it is in small bits. Brush top of babka with egg wash, then sprinkle streusel over top. Bake 25 minutes, then rotate pan and bake until top and sides are dark brown and loaf sounds hollow when thumped, about 25 minutes more. Dough will quickly turn brown, but won't burn; don't panic if it's dark, just check the hollowness and the sides for doneness. Total baking time shouldn't be more than 60 minutes (though depending on your oven, I suppose it may be; trust the dough -- if it sounds hollow and looks deep deep brown, it's probably done).

Let cool at least 90 minutes before serving.