Maple Yogurt Pound Cake

I rarely make the same thing twice. If something truly blows me out of the water -- as this did -- I'll make something like it again. Something like it, mind you; never identical. I like recipes, but I don't really like following them. I'd rather just take an old idea and riff on it. That's what I do best. So when I take out my pen, when I actually skip over to the fridge every ten seconds to scribble how much maple syrup I'm pouring into the bowl, you better believe whatever it is I'm making will absolutely knock your socks off.

Such is the case with this cake.

Chalk it up to the weather, but I've been on a serious maple kick recently. I guess it all started two Sundays ago, when I was whacked square across the face with the world's biggest craving for maple syrup. This was no small itch: I'm serious, people. I just wanted to shmear maple syrup all over my face. I could've tipped the jug and drunk it straight. It was that kind of craving.

How did I get from straight-no-chaser to the more subtle, more refined loaf you see here? Well, admittedly there was a middle step that involved hot toast drizzled with the stuff, which calmed me down a bit. Also, while I'm being honest, I also recently discovered this thick, viscous maple butter that's found its way onto more than one piece of challah. So the craving was fed. But still, I really wanted to make a cake. I wanted a loaf that I could slice up, take to work, and enjoy some maple on the road. Since maple goes so well with tart flavors like lemon and apple and berries, I thought I might do well to add it to a yogurt pound cake base. I checked out a few yogurt cake recipes to start; all of them called for sugar, and I was concerned replacing all the sugar with syrup would change the texture of the cake, making it too moist. My maple craving was stronger than this concern, though, so I did it anyway. If you have maple sugar on hand, feel free to use it in place of some of the syrup.

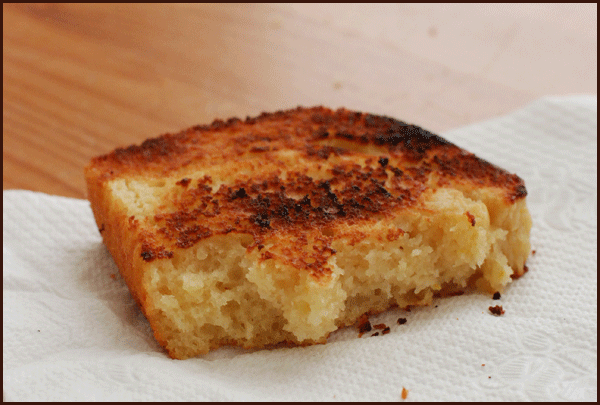
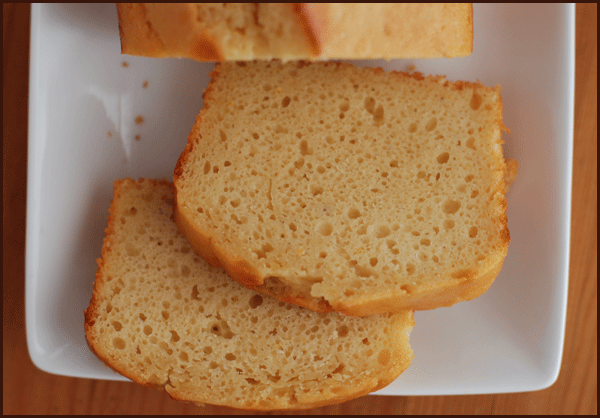
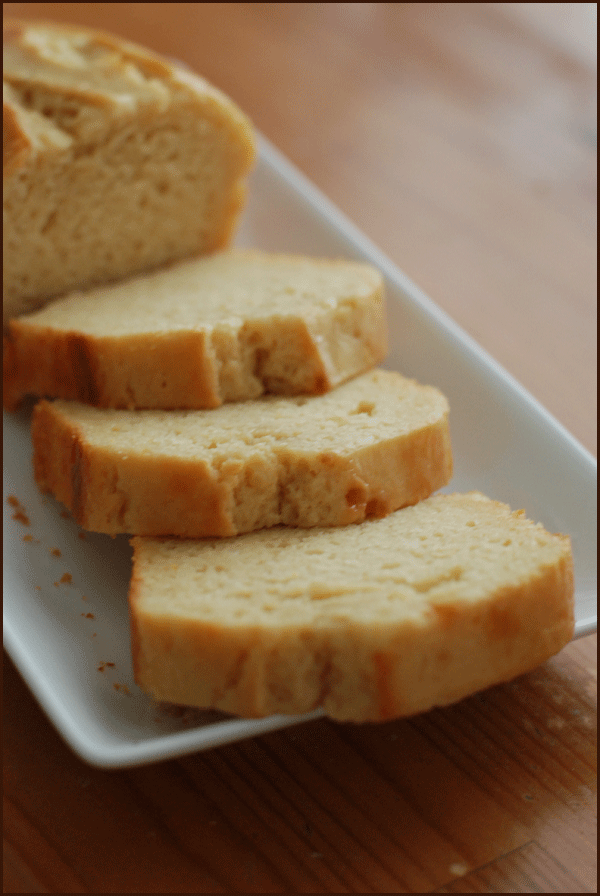
There are distinct upsides to using all syrup, though. First, the woodsy syrup and the tangy yogurt do something absolutely lovely together. But more importantly, they create an ultra-moist cake, a cake so moist it's a bit reminiscent of custard. This custardy texture is even more pronounced if you take a slice of the cake and toast it. Then it's truly crisp on the outside and luscious within. In a subtle, have-a-slice-with-tea kind of way, this cake is perfect.

Maple Yogurt Cake inspired by Bon Appetit

1/2 cup maple syrup, preferably grade B 3/4 cup yogurt 1/4 cup sugar 3 eggs 1 teaspoon vanilla 1 teaspoon lemon zest 1 1/2 cups flour 2 teaspoons baking powder 1/4 teaspoon salt 1/2 cup oil

Position rack in center of oven and preheat to 350°F. Generously butter 8 1/2x4 1/2x2 1/2-inch metal loaf pan.

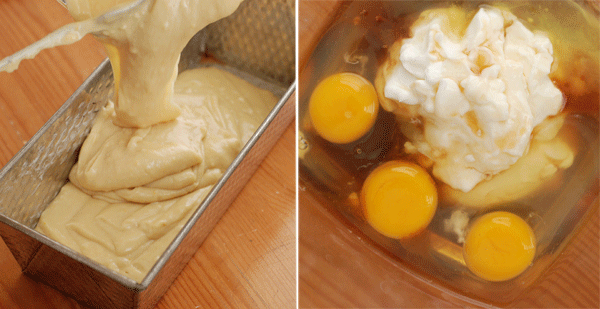
Combine syrup, yogurt, eggs, sugar, vanilla, and lemon zest. Stir or whisk to combine. In a separate bowl, combine flour, baking powder, and salt. Add to wet ingredients and stir to incorporate. Add oil, and fold gradually until oil absorbs into the batter.

Place cake on baking sheet in oven and bake until tester inserted into center comes out clean, about 50 minutes. Cool cake in pan on rack 5 minutes. Cut around pan sides to loosen cake. Turn cake out onto rack. Turn cake upright on rack and cool completely. (Can be made 1 day ahead. Wrap and store at room temperature.)
Raspberry Streusel Coffee Cake

So...yea. It's been pretty snowy here, as you no doubt have heard. It's not the kind of weather that makes you eager to jump off the couch and run to the grocery store. Fortunately, I subjected myself to supermarket hell before last weekend, when the first blizzard was on its way, and fortunately, I'm a typical Jewish woman and totally overshopped, so I've got plenty of food in the fridge.

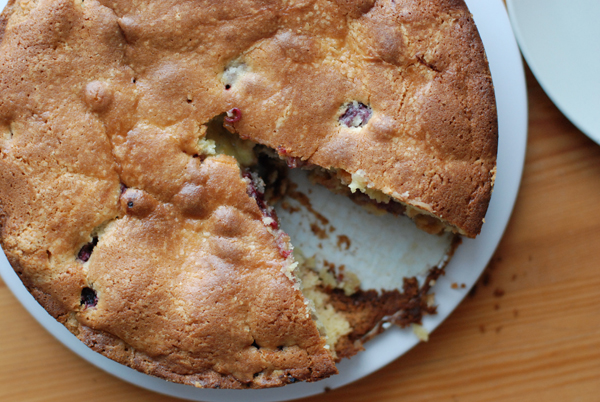
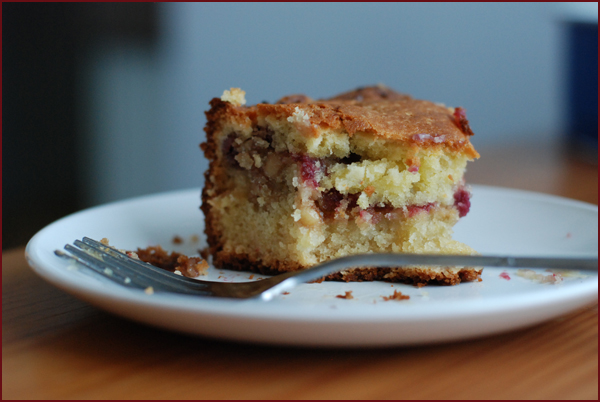
If getting off my lazy derriere to go outside isn't really in the cards, spending copious amounts of time in the kitchen most certainly is. The snow storm(s) provide an opportunity to make something complicated, something with steps, something luxurious, something you otherwise would flip past in favor of baked ziti. Raspberry streusel coffee cake was that thing for me.

I've been eyeing Rose Levy Berenbaum's streusel coffee cake from her fantastic book The Cake Bible for quite some time. It's easy to understand why: she's an expert baker, and she says it's one of her favorite cakes, so I assumed it'd instantly become one of mine. The recipe is a classic sour cream coffee cake that's layered with a walnut streusel. It calls for 2 sticks of butter for the cake, another half stick for the streusel, 4 egg yolks, loads of sugar, and a few other things. Needless to say, this one ain't gettin' tagged "good for you." But delicious? Oh yes.

Knowing myself as well as I do (we're pretty close after all these years), I figured I'd want something tart to offset all the sweetness, so I tossed half a bag of frozen raspberries atop the streusel topping, tucked beneath that top layer of cake batter. Perhaps that's why my cake wouldn't firm up in the center, even after 75 minutes of baking. A little annoying, but certain members of my household don't mind mushy cakes, so all was well. If you add the fruit, definitely either thaw and drain them, or use fresh berries instead. And you're not limited to berries: apples would be splendid here, as would peaches in summer.

If, like me, you're indoors today, and all is white, and the wind is blowing, and there's absolutely nowhere to go but the kitchen, this cake may just be an antidote to your cabin fever.

Raspberry Streusel Coffee Cake adapted from Rose Levy Berenbaum's The Cake Bible

For the streusel:

1/3 cup firmly packed light brown sugar 2 T granulated sugar 1 cup walnuts or pecans (I used pecans) 1 1/2 t cinnamon 1/2 cup (dip and sweep) unsifted cake flour 4 tablespoons (half a stick) softened unsalted butter 1/2 teaspoon vanilla

For the batter:

4 large egg yolks 2/3 c. Sour cream 1 1/2 tsp vannilla 2 c. sifted cake flour 1 c. Sugar 1/2 tsp. Baking powder 1/2 tsp baking soda 1/4 tsp salt 12 T (2 sticks) unsalted butter 2 cups fresh (preferred) or frozen, thawed, and drained raspberries

Prepare a 9 inch springform pan by greasing it, lining the bottom with a circle of parchment paper cut to fit, and then greasing and flouring the over that. Beranbaum suggests something called Magi-Cake Strips to insulate the sides as this cake browns a lot due to the yolk content and a long baking time. Instead I just folded foil over about 4-5 times and wrapped it around the pan, insulating it. Although I think the Magi-Cake Strips may work even better, this solution seemed to work ok as my cake browned but not excessively.

Preheat the oven to 350 F.

Streusel Topping and Filling:

In a food processor with the fitted blade, pulse the sugars, nuts and cinnamon until the nuts are coarsely chopped. Remove 3/4 cup to use as filling. To the remained add the cake flour, butter and vanilla and pulse briefly to form a coarse, crumbly mixture for the topping.

Batter:

In a medium bowl, lightly combine the yolks, vanilla and about 1/4 of the sour cream. Set aside.

In a large mixing bowl (or your mixer) combine the dry ingredients (I included the sugar here) and mix on low speed for 30 seconds to combine. Add the butter and remaining sour cream. Mix on low speed until the dry ingredients have been moistened and then increase to medium speed (high speed if using a hand mixer) and beat for 1 1/2 minutes to aerate the cake’s structure. Scrape down the sides as needed. Gradually add the egg mixture in 3 batches, beating for 20 seconds after each addition and scraping the sides each time. Remove from the mixer and use a spatula to fold the batter a few times, making sure that the very bottom and the sides all incorporate evenly.

Reserve about 1/3 of the batter and scrape the rest into the prepared pan. Smooth the surface with a spatula—this is a thick cake batter and will require smoothing. Sprinkle with the prepared streusel filling and then layer the apple slices over that. Dollop the rest of the batter into blobs over the apples slices and smooth it out with a spatula. Sprinkle the streusel topping over the top of the cake.

Bake for 55-65 minutes or until a cake tester comes out clean. Cover loosely with buttered foil after 45 minutes to prevent overbrowning. The cake should start to shrink back from the sides of the pan only after removing from the oven so that is not a sign that it is done. As I said in my post, my cake took about 75 minutes and still wasn't completely done in the center; blame the frozen raspberries. If you have fresh on hand, use them.

Let the cake cool in its pan on a rack for 10 minutes. Loosen the sides with a small metal spatula and remove the sides of the springform pan. Cool completely before wrapping airtight. Serve at room temperature.

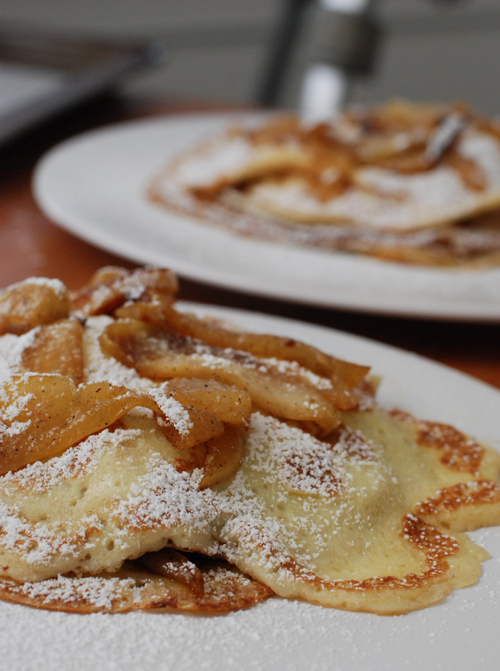
Caramelized Apple Crepes

As I write this, the view outside my window is largely white. It's been snowing for 29 straight hours here in DC, and over 30 inches have piled up on the ground. The sky is blue for the first time in two days, and people are just starting to move about outside, however cautiously. But not me. I was out last night for dinner, and out again early this morning; twice is enough for the time being. I've got oxtail stew cooling in the fridge, my sixth straight loaf of weekly no-knead bread undergoing its first rise, and raspberry streusel coffee cake on the counter. Yep -- I've been cooking up quite a storm in here. But I'll have to tell you about those another time. Right now, I can't get my mind off caramelized apple crepes.

I first made these crepes the morning D and I left for Israel, and I've been dreaming about them ever since. It's well known in these parts that I have a bit of a romance with luxurious breakfasts. From blueberry hotcakes to Dutch babies to stuffed french toast and more, I'm crazy about the kind of edible Sunday morning projects that remind you, no -- you're not at work today. I've often overlooked crepes as an at-home breakfast option, but I won't be doing that anymore.

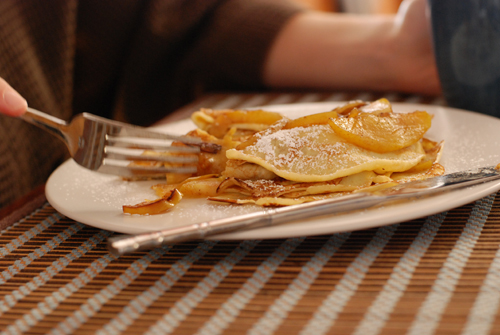
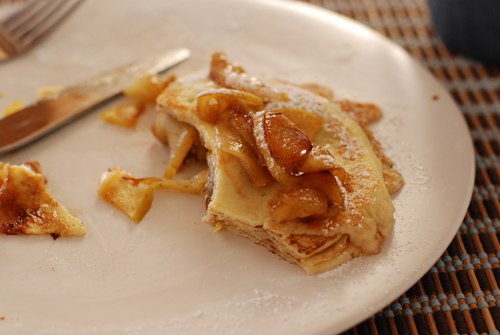
I first made these crepes the day D and I left for Israel. I knew I wanted to use up some a couple of older apples, and I had just enough milk for a crepe batter. Inspired by the "perfect pancakes" posted by sweet enough on Food52, I decided to caramelized the apples in some butter and maple syrup, then layer them between thin, floppy, crispy-edged crepes. The result? Well, it's probably obvious: delicious as all hell.

If you don't have apples, feel free to substitute pears or some other fruit. Just make sure to adjust the quantity of sugar if the fruit you use is sweet (as with pears). And maybe toss in some lemon juice along with the zest.

Caramelized Apple Crepes serves 4-5 inspired by Food52 and Alton Brown

For the apples: 2 tablespoons butter 2 tablespoons maple syrup 2-3 apples, cored, peeled, and thinly sliced

For the crepes: 2 large eggs 3/4 cup milk 1/2 cup water 1 cup flour 3 tablespoons melted butter Butter, for coating the pan

Preheat oven to 200 degrees and put a rimmed baking sheet on an oven rack.

Heat pan over medium heat and add butter. When it starts to bubble, add apples and cook until softened. Add maple syrup and cook 3-5 minutes, until fully soft and coated in butter and syrup. (Yum.)

Meanwhile, blend all ingredients for crepes in blender until well mixed. Heat small non-stick pan (or crepe pan, if you have one) and add just enough butter to coat. Using a small ladle, spoon about 1 oz of batter into pan and swirl to spread evenly. Cook about 30 seconds, then flip and cook about 10-20 seconds more. Transfer finished crepes to baking sheet in oven. Continue until batter has been used up.

To serve layer crepes with apples and top with a sprinkling of powdered sugar and a drizzle of maple syrup.

Granola with Tahini

tahinigranola1 Ahh lovely readers, I've missed you! I've been posting sporadically at best for the past month, because work has been absolutely insane and I haven't had time to even enter the kitchen, let alone write about it. That last post on zucchini soup was my lame attempt to give you reading material while I was at work, so as not to abandon you completely -- but I unwittingly passed along a post from last year, just before my Alaska cruise, and let you all think I was headed on a fabulous vacation. Not so! I spent Labor Day.....well, laboring. At the office. Until very late. But now all that should be behind me because we signed off on our research yesterday, and all that's left to do is write the accompanying speech. I'm hoping today is the beginning of my re-entry into my favorite room of the apartment. Cross your fingers for me, will you?
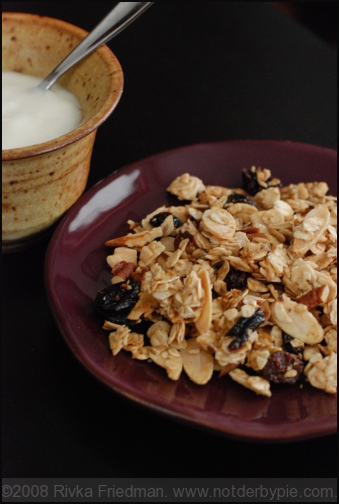
Busy times at the office need to end with something restorative. Sometimes it's a big bowl of pho, with its etherial broth and slurp-tastic noodles. Other times it's a piece of good toast with some homemade jam. This morning, the first in a month that I haven't had to start a 15-hour day at 8:30 am, I made my own granola.

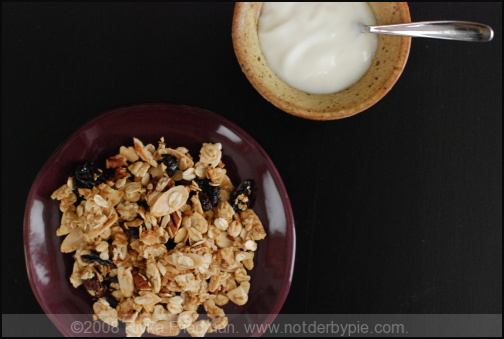
I once was in the habit of making granola every week. It's a good thing to have around for breakfast in the morning, and it pairs great with that super-tart yogurt in the fridge. But lately there's been no time for such simple pleasures, and breakfast has consisted mostly of whatever I grabbed the night before at Trader Joe's. Needless to say, I was more than ready to put my own labor hours back into the food I eat.

tahinigranola2

My usual granola has almond butter, which I find creates clumps better than water or oil and whose flavor doubles down on the granola's nutty flavor. This morning, though, I was out of almond butter, so I went with tahini (sesame butter), which has a similar texture, instead. To balance the flavor of tahini, which can be overwhelming if not used sparingly, I added a splash of walnut oil, as well as a bit of chopped crystallized ginger, which paired well with the sesame flavor and gave a little punch. A generous pinch of cinnamon and a whisper of cloves brought the granola squarely into fall's territory, which I suppose is appropriate, given that the weather is dreary and it's dark when I wake up these days.

I was still concerned that the tahini might overwhelm, but it totally doesn't: because the granola cooks until golden, the other flavors in there -- almonds, oats, ginger, cherries, raisins -- get a chance to toast and intensify, bringing the sesame flavor into balance. I LOVE this batch and plan on making another one, some other not-super-early morning.

Hope you all had great weekends, and I look forward to seeing you around here more regularly!

Granola with Tahini

2 1/2 cups oats 1/3 cup maple syrup 1/4 cup tahini 1 Tbsp walnut oil, optional 2/3 cup pepitas (pumpkin seeds), either salted or unsalted, depending on preference 2/3 cup sliced almonds 2/3 cup chopped pecans 2/3 cup raisins, cranberries, or other dried berry (I like half raisins, half cherries) 2 Tbsp chopped crystallized ginger 1/2 tsp salt 1 teaspoon cinnamon 1/8 teaspoon cloves

Preheat oven to 325.

In a small bowl, mix syrup, tahini, oil if using, salt, and cinnamon until incorporated. In a large bowl, mix all remaining ingredients until well-distributed. Drizzle the syrup-tahini mixture overtop, stirring with a fork until all dry bits are at least slightly wet and clumps have started to form.

Spread granola on a large rimmed baking sheet in a thin layer and bake at 325 for 10-12 minutes. Remove from oven, stir with a fork to move pieces from edge to center and from top to bottom. Make sure pieces that have started to brown are in the center and well-surrounded. Return to oven and bake 10-12 more minutes, until golden brown throughout. Granola will not be crunchy when it leaves the oven; don't worry -- it'll crisp up as it cools. Once cool, transfer to air-tight container; granola will keep this way for up to 1 month.