Za'atar Flatbread

Behold the strangeness of za’atar.

Za’atar is an herb. Sorry – it’s not a specific herb, but one of any number of herbs in the hyssop family. Scratch that: it’s a combination of herbs. But wait, sometimes there are sesame seeds. Actually, it’s a paste made with some type or type of herbs, sesame seeds, and lots of olive oil.

Confused? Join the club.

In reality, za’atar is all of these things. There is a bush that grows in the deserts of Israel known as za’atar. The bush is most likely a member of the hyssop family, though some call it savory or wild oregano. Za’atar leaves are small and somewhat rough, and their flavor is a fusion of wild oregano and thyme. 

The za’atar you buy in the supermarket is most likely a blend of different herbs. According to Lior Lev Sercarz, owner and spice blender behind the New York-based spice shop La Boîte à Epice, the most traditional elements of a za’atar blend are za’atar leaves, sumac, sesame seeds, and thyme. The color of these blends varies from forest green to dark, deep red-brown, and the flavor ranges from woodsy and deep to tangy and a bit nutty. It all depends on the balance of herbs in the blend, and every country -- nay, every spice blender -- makes it a bit differently.

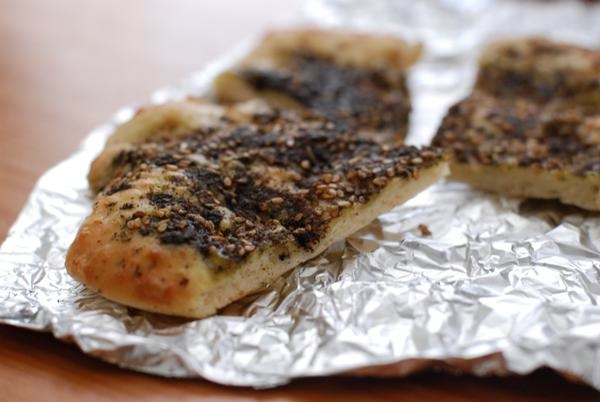
Za’atar has many uses. Food carts and hole-in-the-wall lunch joints use it as flavoring for labneh, a thick sheep’s milk yogurt. In Lebanon, the traditional salad of tomatoes and ripped pita called fattoush is topped with a dusting of za’atar. The Druze, a community living primarily in the north of Israel, use za’atar in a salad of red onions, lemon, and olive oil. But in countries across the Middle East, from Israel to Egypt to Syria and Lebanon, za’atar’s most common application is as seasoning for bread. If you order a “laffa im za’atar” from one of the stalls in the Israeli shuk (open-air market), the stout man behind the counter will hand you a hot, floppy flatbread shmeared with a layer of za’atar paste, made of crushed herbs, sesame seeds, salt, and plenty of olive oil – an addictive combination.

Here's the irony: pinning down the origins and uses for this mysterious herb was actually more complicated than making that delicious flatbread. Laffa im za'atar is a snap to make, no two ways about it. If you can't find a za'atar blend at a specialty or Middle East grocer, I've provided a recipe for homemade za'atar, which is my take on the Israeli za’atar blend I ate regularly during my time in Jerusalem. The restis simple: make flatbread dough, stretch it on a sheet pan, drizzle it with olive oil and sprinkle with za'atar, and bake in a piping hot oven until bubbly and browned. If you're staying really traditional, you'll let the thing cool and eat it as an on-the- go snack. That's if you can resist a bite of za'atar-coated bread right out of the oven, which I cannot.

Laffa Im Za'atar (Flatbread with Za'atar)

Za'atar blend:

3 tablespoons sesame seeds, toasted 2 tablespoons dried thyme 1 tablespoon dried oregano 1 tablespoon sumac 1 tablespoon sea salt

For the Flatbread:

1 ½ cups all-purpose flour ½ teaspoon instant yeast ¾ teaspoon salt ¾ cup water

Olive oil, for drizzling

In a large bowl, mix flour, yeast, and salt. Add water and stir until blended. The dough will be quite sticky. Cover the bowl with plastic wrap and let rest in a warm place for about 2 ½ hours. 

Preheat oven to 500.

Spread 1 tablespoon olive oil on each of 2 rimmed baking sheets. Separate risen dough into 2 pieces, and using a light touch, start to spread dough into circles on baking sheets.  When the dough balls have been spread into circles about 8 inches wide, sprinkle 1 1/5 tablespoons of za'atar onto each. Drizzle 1 tablespoon olive oil overtop.

Bake flatbreads for 10-12 minutes, until browned and crisp. Serve warm or at room temperature.
Hearty Struan Bread

The Dupont Circle farmers' market has a bread stand. They make all sorts of bread, from tangy sourdough to crusty boule to grainy raisin walnut and beyond. The line to buy bread at the market starts forming around 8:30, and by 9am, it's pretty darn long. People spend 30 minutes just waiting in that line. I think it's kind of crazy.

Don't get me wrong, the bread is good. And in summer, when our apartment is about 100 degrees hotter than the temperature outdoors, I want my oven blasting on 450 for a couple hours about as much as I'd like to climb inside and sit for a while. But pretty much every week of fall, winter, and spring, I make my own bread. I really don't understand why, when there's perfectly good flour in my pantry and fine water flowing from the tap, I'd give up the pleasure of making my own bread dough. It's tacky, stretchy, sticky, and smells alive. I love dough.

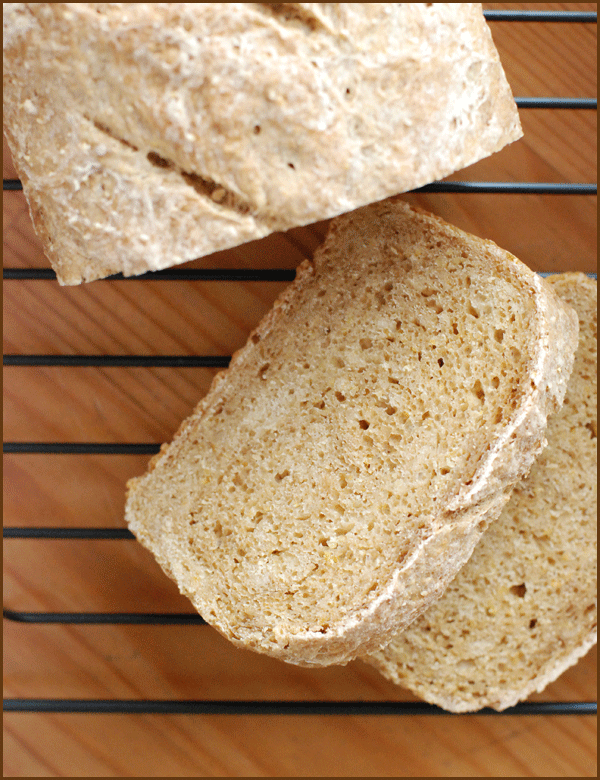
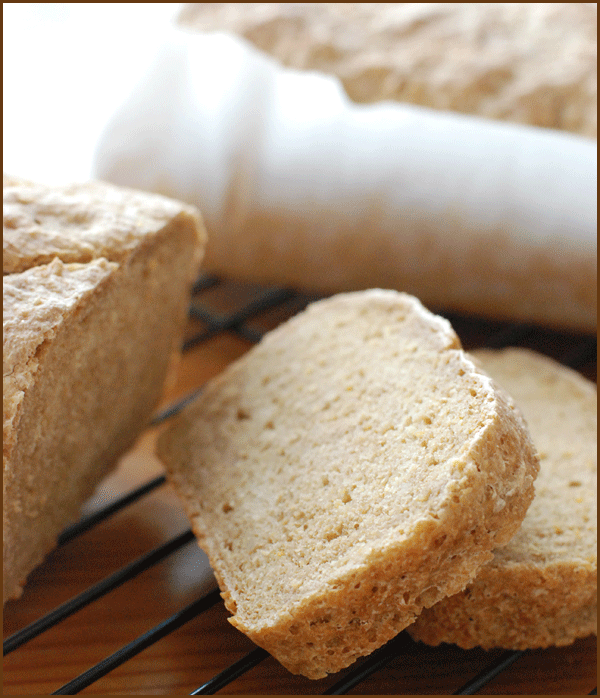
Take, for instance, this struan, a seemingly modest loaf that's got as much other stuff (cornmeal, oats, yogurt, molasses) as it's got flour and water. Struan is happy bread. It somehow manages to be rich and still wholesome. And it makes what quite simply is the best piece of toast I've ever had.

The recipe comes from Peter Reinhart's book, Artisan Breads Every Day. This book is awesome -- it's where I found that amazing babka recipe. Who knows what else I'll find in this book? For now, I'm sticking to this struan. You might want to give it a try, too.

Struan Bread Adapted from Peter Reinhart's Artisan Breads Every Day Makes 2 loaves

5 cups unbleached bread flour 1/2 cup coarse cornmeal or polenta 1/2 cup oats 3 tablespoons wheat or oat bran 1/4 cup brown sugar 2.5 teaspoons salt 2 tablespoons yeast 1.5 tablespoons molasses (Reinhart calls for honey or agave, which I'm sure also work -- I like the stronger flavor of molasses) 1.5 cups lukewarm water 1/2 cup buttermilk, milk, or yogurt (I used half yogurt and half buttermilk)

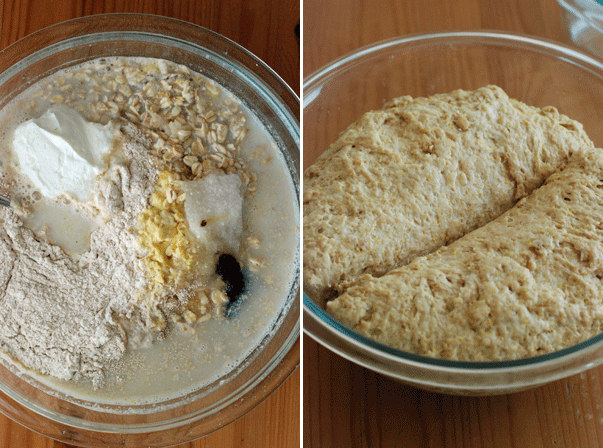
In a large mixing bowl or stand mixer bowl, combine everything. (How easy is that?) Use the paddle attachment on low speed for about 2 minutes until everything is well-combined. Let the dough sit for 5 minutes to fully hydrate the flour.

Mix again with the paddle attachment for about 2 more minutes, then let rest again. Transfer onto surface sprinkled liberally with flour, and begin to knead for 2-3 minutes total, adding water as needed, until dough is firm but still tacky.

Oil a large bowl, to be used for rising. Take dough, stretch, and fold back over itself. Repeat in the other direction. Form into a ball. Roll dough in oil to coat, rest in bowl, and let sit covered for 10 minutes. Repeat stretch-fold-rest process twice more. When dough has been stretched and folded three times, set in bowl, cover, and let rise in about 2 hours on the counter or overnight in the fridge.

If refrigerating, remove 2 hours before baking. Butter two loaf pans. Divide dough in half. Take one half, and roll into an 8x5 rectangle. Roll along the 5-inch side into a log, pinch seam, and let proof in loaf pan about 1.5 hours, until doubled in size. Repeat with other half. Meanwhile, preheat oven to 350.

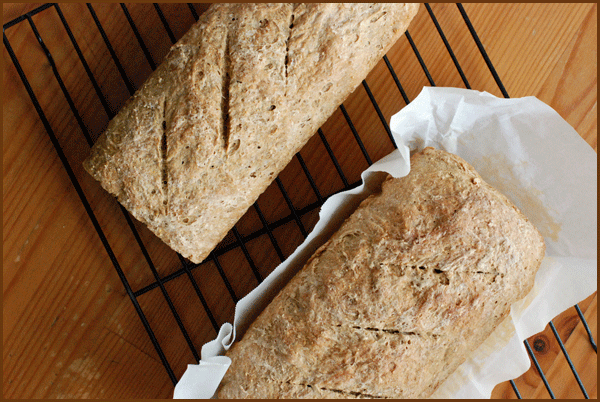
Bake loaves for 60 minutes total, rotating pans halfway through, and cool completely before cutting (about 1 hour).

Chocolate Babka

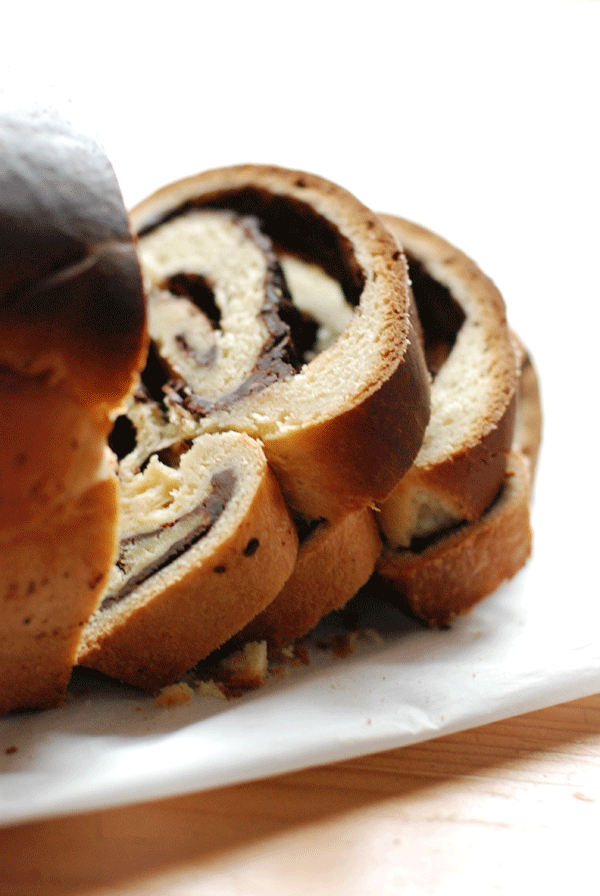
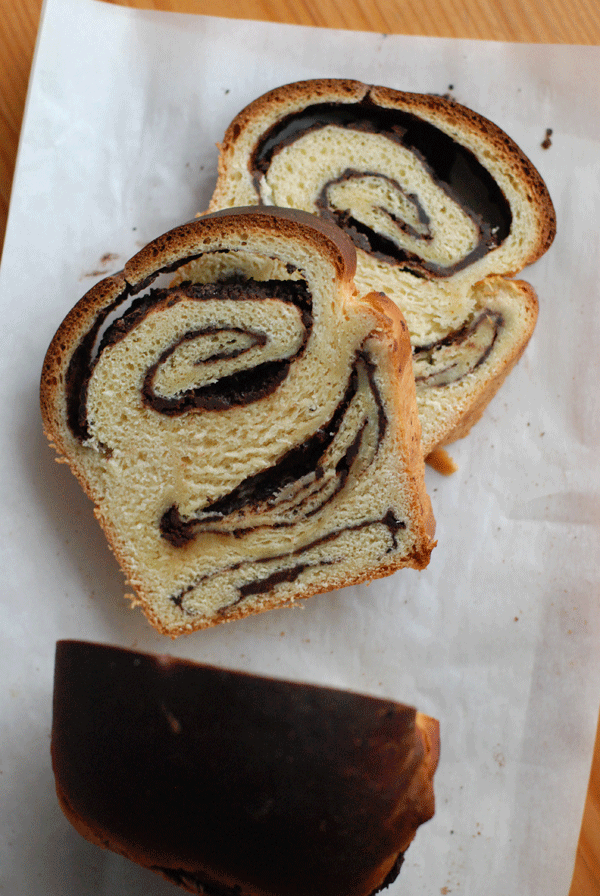
When I was a kid, I couldn't wait for Saturday to come. I'd like to say I loved the break from homework and the chance to spend time outdoors, but really, it was just the Babka. Green's Babka, specifically. The chocolate came in the blue wrapper; if you wanted cinnamon, you went for the green. Inside were many countless sheets of paper-thin dough, folded accordion style as densely as could be, and protectively encasing layers of chocolate. A cross-section had the complex structure of brisket, with all those layers to cut through. I ate mine from the outside in, peeling the layers apart slowly and seeing how thin I could rip each piece. It was quite the treat.

The complex structure of the dessert was etched in my mind. So many layers! And so impossibly thin! However did they do it? For years, I (stupidly) assumed that homemade babka was out of reach. But after a brush with the old-school Green's a couple months back, I was jolted from the romance reminded that Green's is made with wow, so much margarine. And no butter at all. I was convinced that by using the real stuff, I could make an even better version of the childhood classic.

I was right. The babka I made last week, while not really anything like Green's, was delicious. It was less like a croissant and more like a not-so-delicate brioche: soft and buttery, with occasional folds of chocolate and plenty of richness. And seeing as I'm in the middle of a toasting trend, I'll just say it: slices of babka older than a day should be toasted.

This babka comes from Peter Reinhart. Since his pizza dough was such a success, I couldn't resist giving one of his more complex recipes a try. Admittedly, there are a couple rises involved in making this babka, so it's a bit time-consuming and not as hands-off as some of the other baked goods I've been making. That said, the results are sure to elicit oohs and ahhs from your brunch companions. Babka also makes a splendid rustic dessert.

Chocolate Babka adapted from Peter Reinhart

Note: Reinhart suggests a crumb toping that, while traditional, isn't altogether necessary. I omitted it.

2 tablespoons yeast 3/4 cup lukewarm milk 6 tablespoons butter, melted or at room temperature 6 tablespoons sugar 1 teaspoon vanila 4 egg yolks, broken up slightly 3 1/3 cups unbleached all-purpose flour 1 teaspoon salt 1 egg and 1 tablespoon water for egg wash, if using crumb topping

Filling:

1 1/2 cups frozen semisweet chocolate chips or chunks 1 teaspoon cinnamon 1/4 cup cold butter

Streusel Topping:

1/4 cup cold butter 1/2 cup flour 1/2 cup brown sugar pinch salt 1/4 teaspoon cinnamon

In a small bowl, whisk yeast into milk until dissolved and let proof for 5 minutes.

In a large bowl or the bowl of a stand mixer, cream butter and sugar on medium until combined, about 1-2 minutes. Add vanilla to egg yolks, and add to dough in four portions, mixing until combined each time. Once mixed, turn mixer to medium high and continue mixing until uniform and fluffy, scraping down as you go. If using a hand mixer or a spoon, mix as powerfully as possible.

Stop mixing, add flour and salt, and pour in milk mixture. Continue mixing on low until well-incorporated, about 2-3 minutes, until dough is soft and somewhat sticky. If mixer struggles, switch to dough hook or mix by hand.

Transfer dough to floured work surface and continue kneading by hand another 2 minutes, until dough is no longer sticky, but still soft and pliable. Form dough into a ball. Place in lightly oiled bowl, cover tightly with plastic wrap, and let rise at room temperature about 2.5 hours. Dough will rise some, but not double in size.

Meanwhile, prepare filling: grind chocolate in food processor, then add cinnamon. Cut butter into small pieces and add to food processor, mixing until butter is evenly dispersed into the chocolate.

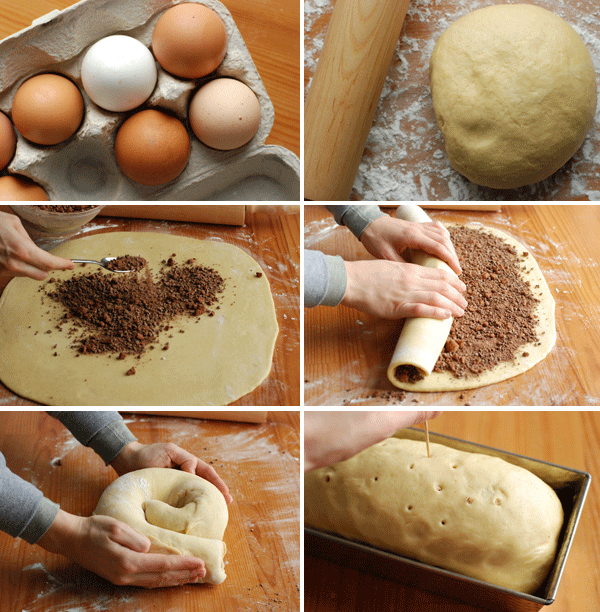
Roll risen dough into 15x15 inch square on lightly floured work surface. Dough should be between 1/4 and 1/8 inch thick. Be sure to lift the dough regularly in between rolls and add flour as necessary to prevent sticking.

Sprinkle filling evenly over dough, leaving 1/4-inch border. Roll up dough and place it seam-side down on work surface. Rock dough back and forth gently to extend roll to about 20 inches long.

Wrap dough around itself to form coil shape. Stand coil on its side, compress lightly to form a loaf shape, and transfer to greased loaf pan. Cover loosely with plastic and let rise at room temperature for 2-3 hours until babka fills out the pan. At this point, either bake babka immediately or refrigerate overnight. BE SURE TO BRING TO ROOM TEMPERATURE BEFORE BAKING!

Preheat oven to 350 degrees. Poke a few holes in top of babka.

If using streusel, combine all ingredients in processor or mix in bowl with pastry blender until it is in small bits. Brush top of babka with egg wash, then sprinkle streusel over top. Bake 25 minutes, then rotate pan and bake until top and sides are dark brown and loaf sounds hollow when thumped, about 25 minutes more. Dough will quickly turn brown, but won't burn; don't panic if it's dark, just check the hollowness and the sides for doneness. Total baking time shouldn't be more than 60 minutes (though depending on your oven, I suppose it may be; trust the dough -- if it sounds hollow and looks deep deep brown, it's probably done).

Let cool at least 90 minutes before serving.

Thin Crust Pizza

I've tried making pizza on several occasions. Every time, as I bite into a not-quite-crunchy crust and get a lick of too-thick tomato sauce on my tongue, I wonder why we didn't just hop on the 96 bus and get off at Two Amys, the best pizza in town. Well, all that's changed. Armed with not one, but two excellent pizza recipes, I'm here to assure you that homemade pizza really is within reach.

I recently indulged in a couple new cookbook purchases. Peter Reinhart's Artisan Breads Everyday" and Jim Lahey's My Bread have joined the party on my cookbookshelf, and I've spent the better part of the last several weekend mornings tucking into their recipes, devouring their advice. I've been making Lahey's No Knead Bread for quite some time now, both plain and with all sorts of add-ins. His book offers all that and more: imagine his bread dough, studded with fruit and infused with spices, then baked wrapped in banana leaves. Or the same dough, flavored with coconut and chocolate, baked in that hot oven so that some of the chocolate crusts on the outside of the bread. The pictures in this book animate already-delicious-sounding recipes. I'm thrilled to have it on my shelf, and his pizza recipe is just one more reason. Ditto Reinhart, who offers many solid recipes for sandwich breads, challah, and even a cinnamon chocolate babka, sitting on my counter now and the subject of a future post. But I'm getting carried away: let's talk about pizza.

Last Sunday, we watched the oscars with a few friends, so I decided to put all this learning to use, and make a bunch of pies for dinner. After reading both pizza recipes through thoroughly, I opted for Reinhart's "popular" pizza dough recipe, which calls for honey or agave nectar to flavor the dough.

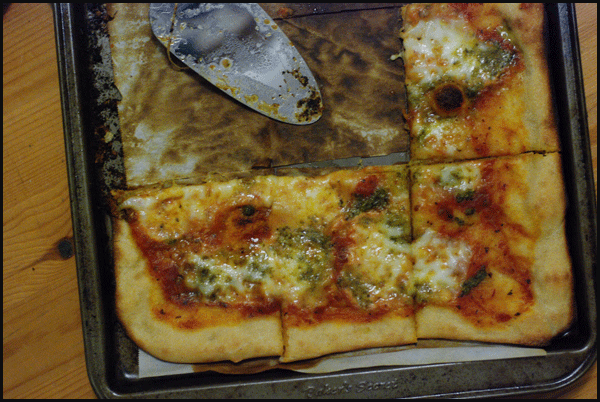
While I had grand plans for toppings, including a white pie loaded with mushrooms and a yuppie pie with raw arugula on top, I ended up (wisely) sticking to the standard sauce-and-cheese combo, always a crowd pleaser. I used some buffalo mozzarella from the farmers' market and a jar of good Italian pizza sauce. I added mushrooms and caramelized onions on one pie and snuck some pesto onto another, but that was it.

If you're wondering whether you need any special tools to bake these pizzas, the answer is a definitive NO. I have neither a pizza stone nor a peel, and I baked these pies to crispy perfection on a couple of ordinary baking sheets, no sweat. The key is to crank that oven up as high as it will go, and really give it time to heat up completely before sticking the pizzas inside.

What else can I tell you? Once you make this dough, you will never again question the value proposition of sitting on your couch, holding a plate of your own homemade pizza. Even when faced with the alternative of heading out to your nearest pie place, homemade pizza is worth the trouble.

Thin Crust Pizza based on Peter Reinhart's recipe in Artisan Breads Everyday

5 1/3 cups bread flour 2 teaspoons salt 1 teaspoon yeast 2 tablespoons sugar, honey, or agave nectar (I used agave) 2 cups plus 2 tablespoons water, room temp 2 tablespoons olive oil

Combine everything in stand mixer or large bowl and mix, using wooden spoon or paddle attachment, for 1 minute or until blended. Let rest 5 minutes.

Switch to dough hook and mix on medium-low speed 2-3 minutes (or continue mixing by hand) until dough is soft, and somewhere between tacky and sticky.

Spread 1 tablespoon olive oil on kneading surface and turn dough out onto surface. Stretch dough out and fold over itself. Do the same from the opposite end, then from side to side, for a total of four stretch-and-folds. Divide dough into the number of pies you plan to make: I initially divided into 5, as Reinhart recommends, then later realized I wanted 3 big pies instead of 5 personal ones. Form each piece into a ball and either put each into an oil-sprayed plastic bag, or set them atop parchment-lined baking sheets and cover tightly with plastic wrap. Refrigerate overnight or upto 4 days, or freeze upto several months.

90 minutes before making the pizzas, remove dough balls from refrigerator. With oiled hands, stretch and fold each piece into a tight ball, then let rest on lightly oiled baking pan loosely covered with plastic wrap.

1 hour before baking, turn oven as high as it will go. If you have a pizza stone, heat it in the oven. Those with stones will prepare pizzas on a peel (a large, spatula-shaped surface used to transfer pizzas in and out of the oven). The rest of us will just use baking sheets.

Coat your peel or baking sheet and your hands with flour. Choose one dough ball, sprinkle a bit of flour on top, then flip over onto peel or baking sheet and use your thumbs to slowly coax the edges of the dough into a larger circle. Work from the edges, not from the middle; the middle will spread as the edges are drawn out. Keep turning and stretching, turning and stretching, about 13 times (according to Jim Lahey), until dough is quite thin. If dough resists or shrinks back, let it rest a few minutes, then return.

At this point, you're ready to top your pizzas. I like a spoonful of tomato spread thinly, several pieces of fresh mozzarella, a couple pieces of basil or drops of pesto, and a swirl of olive oil. Do as your stomach commands.

Bake about 4-7 minutes, depending on heat of the oven, rotating halfway through. Let cool for one minute before serving.