Shana Tova!

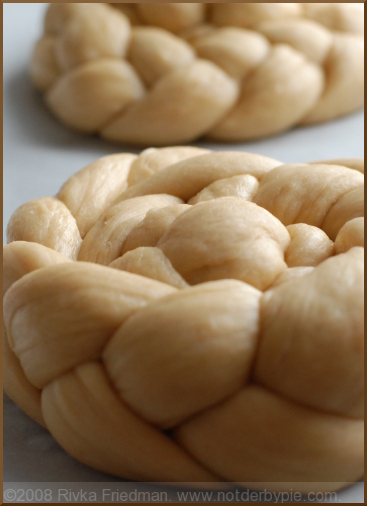
roundchallah1.jpg To all those celebrating the Jewish New Year (and to all of you, regardless of whether or not this happens to be the start of a New Year for you)...

May this be a year of happiness,

a year in which we take time out to enjoy the small pleasures,

a year in which we do not hesitate to try many new things,

a year in which we find new ways to love our families, friends, and significant others,

a year in which we use our strength to help those more in need than we,

and of course, a year in which we eat wonderful, wonderful food.

Shana Tova, Bria, U'Metuka: a happy, healthy, and sweet new year!

(Also, between my recent foot surgery and the upcoming holidays, I actually missed the first anniversary of NDP!! I can promise a celebratory post after all these holidays pass and my foot heals...but for now, happy blogiversary to NDP!)

roundchallah2.jpg

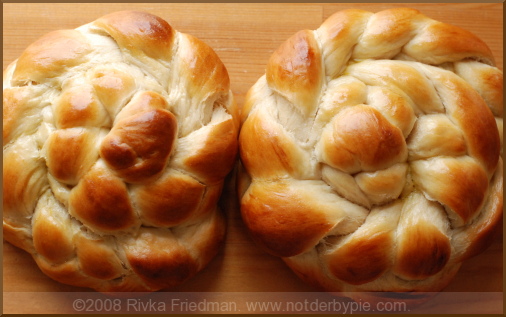
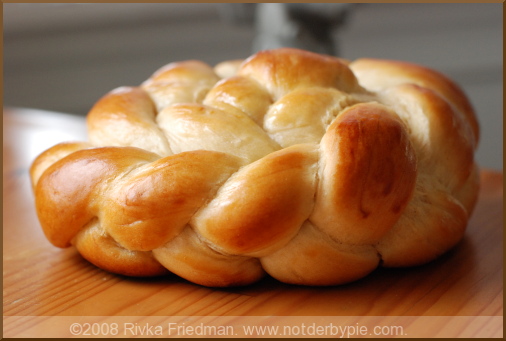
Ima's Challah link to recipe On Rosh Hashana, the Jewish New Year, we have a custom of making the challot round, to symbolize the cycle of the year that renews on this day. Braid each loaf extra long, then, starting at one end, wrap the braid around itself, lifting the braid slightly on top of itself as you go. Tuck the end under, brush with eggwash, and bake as normal.

roundchallah3.jpg

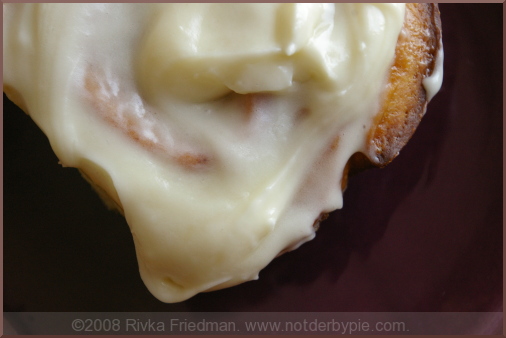
Sticky, Gooey Cinnamon Buns

cinnabuns3.jpg If you've gone this long without making cinnamon buns (which, shockingly, I have), it's likely not because you're skeptical that they'll be worth it. What other foods smell ridiculously appetizing, even when what you smell is usually a corporate chain version loaded with high fructose corn syrup and other delicacies? No doubt they taste fantastic and are worth the effort, so that's not the cause of hesitation. More likely, you're just a bit daunted by the task. To me, cinnamon buns have always sounded like a very work-intensive, time-intensive project, possible only for those with half a day to devote to the task. I just figured that with a project as seemingly complex as cinnamon buns, I should hold off until I had an occasion to do them. Perhaps you did, too.

Such an occasion arrived last Sunday, when a bunch of us threw a bridal shower for our friend D, who's getting married in November. D's not so into the gush-gush-rip-the-wrapping-paper-ohh-ahh stuff, so when B suggested a book shower, D readily agreed. It's really right up her alley. We pitched the shower as a chance to get D a book that belongs on every shelf, a book you especially love, or a book that you thought D would love -- and, considering we got lots of oohs and ahhs and no doubles, I think it was a success! cinnabuns1.jpg
Anyway, B suggested that we make cinnamon buns for the shower (yes, she's full of good ideas, that B!) and I'd been meaning to make them for a while, so I jumped at the chance. We both just assumed they'd take a while, so I started them early at my house, the plan being that I'd bring the risen dough over to her place and we'd fill, roll, and bake them together.

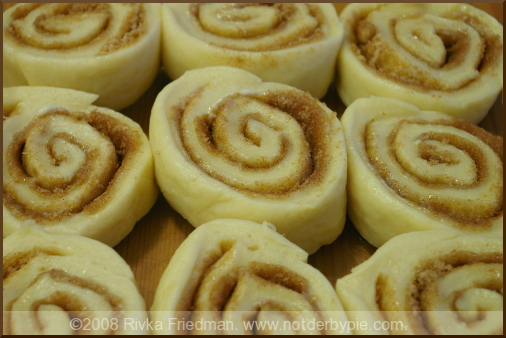
Well, I started a little earlier than planned, and before I knew it, it was time to roll out the buns but it wasn't time to go over to B's. Sorry, B -- I owe you cinnamon-bun-round-two! Needless to say, I managed on my own. In fact, I more than managed -- I practically cranked out the buns with little to no effort, and they looked totally gorgeous, if I dare say so myself. Let my experience demystify this ostensibly massive undertaking. It's no biggie, small beans, piece-a-cake. Get my drift? Time does most of the work -- all you really need is enough patience to not jump out of your chair before they're ready.
cinnabuns2.jpg

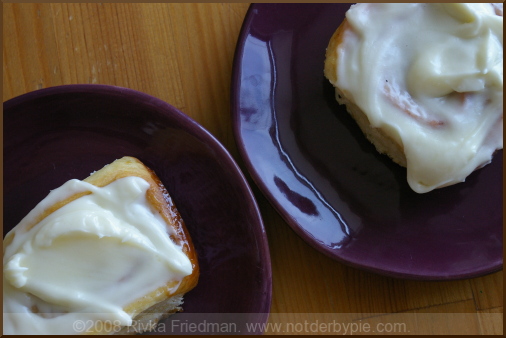
B made the cream cheese glaze. Her report: so easy, and it took only 2 minutes. What are you waiting for?? And in case it's not screamingly obvious: the cream cheese glaze is the best part. By far. If you're like me, always worried that you won't get enough of the goo on your cinnamon bun, don't fret: this recipe made enough for me to really slather it on and still have some left over to lick. mmmm.
cinnabun4.jpg

Cinnamon Rolls with Cream Cheese Glaze from Bon Appetit

Dough: 1 cup whole milk 3 tablespoons unsalted butter 3 1/2 cups (or more) unbleached all purpose flour, divided 1/2 cup sugar 1 large egg 2 1/4 teaspoons rapid-rise yeast (from 2 envelopes yeast) 1 teaspoon salt Nonstick vegetable oil spray

Filling: 3/4 cup (packed) golden brown sugar 2 tablespoons ground cinnamon 1/4 cup (1/2 stick) unsalted butter, room temperature Glaze: 4 ounces cream cheese, room temperature 1 cup powdered sugar 1/4 cup (1/2 stick) unsalted butter, room temperature 1/2 teaspoon vanilla extract

For dough: Combine milk and butter in glass measuring cup. Microwave on high until butter melts and mixture is just warmed to 120°F to 130°F, 30 to 45 seconds. Pour into bowl of stand mixer fitted with paddle attachment. Add 1 cup flour, sugar, egg, yeast, and salt. Beat on low speed 3 minutes, stopping occasionally to scrape down sides of bowl. Add 21/2 cups flour. Beat on low until flour is absorbed and dough is sticky, scraping down sides of bowl. If dough is very sticky, add more flour by tablespoonfuls until dough begins to form ball and pulls away from sides of bowl. Turn dough out onto lightly floured work surface. Knead until smooth and elastic, adding more flour if sticky, about 8 minutes. Form into ball.

Lightly oil large bowl with nonstick spray. Transfer dough to bowl, turning to coat. Cover bowl with plastic wrap, then kitchen towel. Let dough rise in warm draft-free area until doubled in volume, about 2 hours.

For filling: Mix brown sugar and cinnamon in medium bowl.

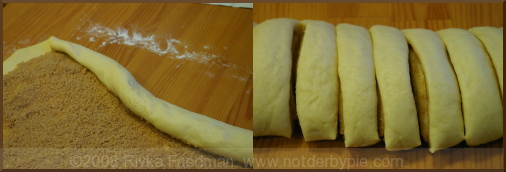
Punch down dough. Transfer to floured work surface. Roll out to 15x11-inch rectangle. Spread butter over dough, leaving 1/2-inch border. Sprinkle cinnamon sugar evenly over butter. Starting at 1 long side, roll dough into log, pinching gently to keep it rolled up. With seam side down, cut dough crosswise with thin sharp knife into 18 equal slices (each about 1/2 to 3/4 inch wide).

Spray two 9-inch square glass baking dishes with nonstick spray. Divide rolls between baking dishes, arranging cut side up (there will be almost no space between rolls). Cover baking dishes with plastic wrap, then kitchen towel. Let dough rise in warm draft-free area until almost doubled in volume, 40 to 45 minutes.

Position rack in center of oven and preheat to 375°F. Bake rolls until tops are golden, about 20 minutes. Remove from oven and invert immediately onto rack. Cool 10 minutes. Turn rolls right side up.

For glaze: Combine cream cheese, powdered sugar, butter, and vanilla in medium bowl. Using electric mixer, beat until smooth. Spread glaze on rolls. Serve warm or at room temperature.
LocalSeasonal Take 1: Caponata

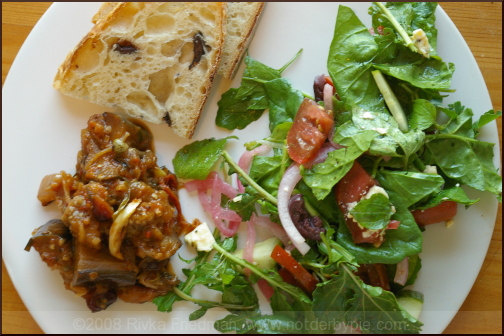
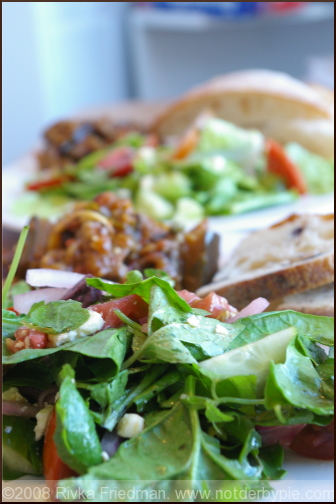
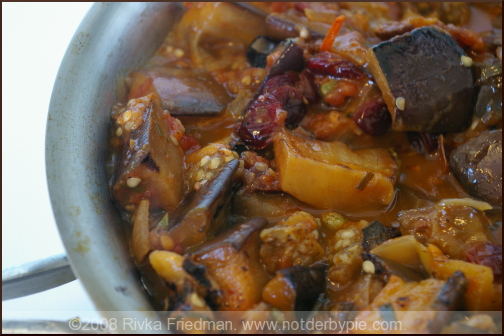
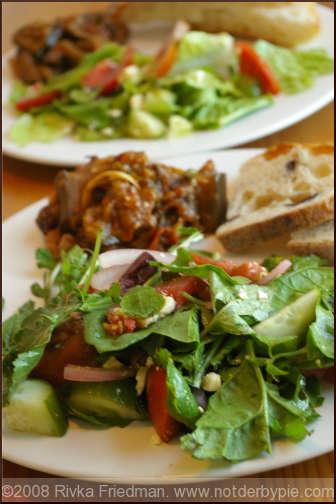
caponata1.jpg If I may say so myself, tonight was a smashing success. A whole day into my challenge and I'm still thrilled that I took it on! On the menu this evening was kalamata olive sourdough bread from the market, homemade eggplant caponata, and greens with heirloom tomatoes, feta, and red onions that I pickled in fresh-squeezed lime juice till they turned a beautiful shade of purple.

caponata2.jpg

Some thoughts on preparing and eating tonight's dinner:

  • This is really the clincher, I think -- everything just tasted so fresh. The heirlooms were bursting with juices, like perfect summer tomatoes should. The greens -- a mixture of spinach and arugula, also from the market -- were beautiful and quirkily shaped, not like th uniformly-chopped salad greens you can by at the store. They were also super fresh, the arugula nice and spicy. Even the caponata, which I made with tomato sauce that I cooked up this weekend, tasted fresh. It doesn't take much to sell me on the virtues of maximizing fresh produce in my cooking, now does it?
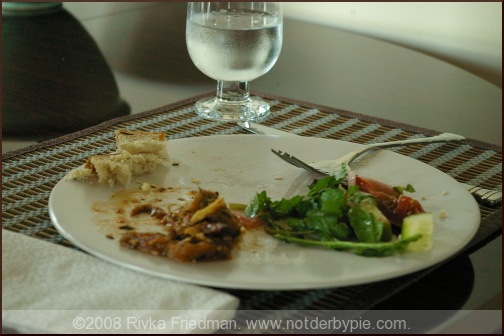
  • The irony about cooking and preparing such fresh produce is that while my mouth waters at the site of my farmers market bounty far more than it does with the contents of a Safeway grocery run, I also eat so much more slowly when what's on my plate smacks with fresh-homemade-ness. When the food isn't fresh, or isn't in season, or for some other reason doesn't taste its best, I tend to just shovel it in and scarf it down mindlessly. When dinner is as fantastic as it was tonight, I find myself savoring every bite, thus feeling full earlier and eating less. I made like the French tonight -- I ate 1 slice of bread, 1 ladleful of caponata, and 1 helping of salad; and I didn't go back for seconds.
  • caponata3.jpg

  • There's something sensual about cooking with local, seasonal ingredients. For one thing, they're more delicate. I wash them, dry them, chop them, and generally handle them with far more care then when I'm chopping up a couple winter tomatoes (which I hope to buy less, by the way). Time with myself in the kitchen has always been therapeutic and restorative for me; all the more so when I'm working with the best produce summer has to offer.
  • Some of you no doubt are thinking that I picked a mighty convenient time to do this -- at the height of summer's produce boon. And you'd be right! No way around that. But I will say that there are few things I love more than a good winter stew -- and there are few things more comforting to cook as well. So without making any promises, I imagine that I might take away from this experience a desire to eat seasonally even when the season has limited produce to offer.

caponata4.jpg

Are any of you out there trying this or something like it? If so, do share your stories! For now, here's a blueprint for the caponata I made tonight. As I made it by taste-and-adjust, there's no precise recipe. You'll just have to get in there and try it yourself. :)

caponata5.jpg

Caponata

Olive oil (at least 1/4 cup) 1 medium to large eggplant, firm and shiny, in 1-inch cubes 1 1/2 cups tomato sauce or crushed tomatoes 1 small red or yellow onion, chopped 1 stalk celery, chopped very fine 4 cloves garlic, peeled and kept whole 2 Tbsp capers 1/3 cup raisins, dried cranberries, cherries, or currants 1 cup white wine 1/4 cup white wine or cider vinegar several sprigs of mint dried marjoram, oregano, tarragon, or other herbs salt and pepper chili flakes

In a heavy bottomed large saute pan, heat a healthy dose (a few Tbsp) olive oil on medium-high. Add eggplant and toss around the pan, allowing to scorch in places, about 4 minutes. After the eggplant is browned and softened a bit, remove and place into a bowl off the heat. Add a few more Tbsp of oil, turn heat to medium-low, and add onions and garlic, allowing to cook just until they start to brown. When that happens, add the celery, brown a bit, then add eggplant back into the pan, and add a bit of the wine, just to deglaze the bottom of the pan. Add the tomato sauce, and toss or stir to coat. Add the herbs, the capers and the dried cranberries/raisins/whatever, as well as a bit more of the wine (total about 2/3 cup). Cover the pan and allow to simmer, on low heat, for at least 20 minutes until the garlic is soft and mushy, the raisins/cranberries are plumped a bit, and the eggplant is soft. From here on out, it's a game of taste and adjust. If needed, add more wine. If the flavoring tastes right to you, just add water if you need to thin it out. Add salt and pepper to taste.

Serve room temperature, hot, or cold, with sliced [I like toasted] crusty bread, and perhaps a few cheeses.

caponata6.jpg

Price Information: eggplant from the farmers market, 1.69 per pound 1.67 per eggplant at the store beefsteak tomatoes from the market, 2.50 per pound 1 dollar each at the store greens from the market, 5 dollars for half a pound 6 oz. for 3.79 at the store -- about equal heirloom tomatoes from the market, 3.99 per pound not available at my store herbed feta cheese, 9.75 per pound at the market 8.58 per pound and nowhere near as good! half a kalamata sourdough at the market, 2.50 price varies -- can you get half a loaf at your store?

On balance, I definitely think I came out ahead here, and the price differential is slim to none in most cases. Food for thought...

No-knead Raisin Pecan Bread

*correction appendedraisinbread1.jpg

When it comes to bread, I'm a firm believer in the homemade variety. There's something so therapeutic about the process: in making bread, you create a dough from the humblest of ingredients. Using nothing more than your hands, you establish a complex web of gluten that gives the dough structure and texture; and with some patience, perhaps also a book to pass the hours, you give that dough the time it needs to grow in size and flavor. I'm no stranger to intense kneading and endless rises -- I think I've proven my willingness to hold out for a good loaf.

Good bread has always required a good knead and a good rise; not anymore. Jim Lahey, the genius baker behind Sullivan Street Bakery, developed a recipe for a crusty, flavorful loaf that requires no kneading whatsoever. The secret? Time, and lots of it. Oh yea, and almost no yeast. raisinbread2.jpg

Ever since Mark Bittman, aka the Minimalist, brought No-knead bread into the national spotlight last year, it has been blogged and baked many, many times over. Mix flour, water, the smallest little bit of yeast. Mix. Wait. Bake. Eat. Hard? I didn't think so. Here's why this seemingly odd recipe works (and works so well):

Typical bread recipes have at least a tsp, usually more, of yeast for the same amount of flour as this recipe lists. Their rising times, however, are far shorter; in other words, a lot of yeast has a couple hours to grow a dough. In Lahey's recipe, the dough has just a 1/4 tsp of yeast, but that yeast has a full 18 hours to work. In that time, not only does the yeast prime the dough for a doubling in size, it also ferments the dough, giving it a complex flavor not usually found in breads with shorter rising times. In those first 18 hours, the dough develops flavor; after that rise, you shape the dough (in just a few seconds) and allow it to sit again for a couple hours, during which it will double in size. The instructions are specific, but not at all complicated.

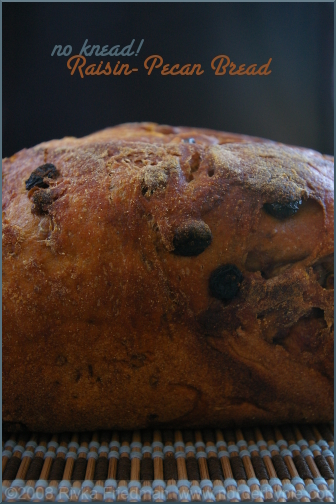
The last wonderful thing I'll mention is that you can add to the dough anything you'd like. Raisins and pecans were a fine choice; the tartness of the raisins and earthy butteriness of the pecans complimented the dough's fermented flavor. Some other flavoring possibilities:

  • cheddar and jalapeno peppers
  • caraway seeds
  • herbs and goat cheese
  • honey and cinnamon
  • gosh, lots lots more!

You should add any extra ingredients when you're first mixing the dough, as they're easier to incorporate that way. I added 2/3 cup of each, but any amount will do, depending on how loaded you like your loaf.

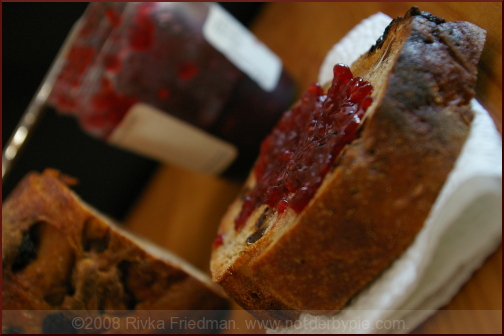
raisinbread3.jpg

Clearly, I need not plug this bread. Its publicity in the blogosphere and in kitchens everywhere speaks for itself. But in case you've managed to avoid hearing about it until now (which is almost impossible as I doubt my blog would be the first you'd find), do make it. The resulting loaf is truly unparalleled.

No-Knead Bread Adapted from Jim Lahey Time: About 1 1/2 hours plus 14 to 20 hours' rising

3 cups all-purpose or bread flour, more for dusting 1/4 teaspoon instant yeast 1 1/4 teaspoons salt Cornmeal or wheat bran as needed.

1. In a large bowl combine flour, yeast and salt. Add 1 5/8 cups water, and stir until blended; dough will be shaggy and sticky. Cover bowl with plastic wrap. Let dough rest at least 12 hours, preferably about 18, at warm room temperature, about 70 degrees. 2. Dough is ready when its surface is dotted with bubbles. Lightly flour a work surface and place dough on it; sprinkle it with a little more flour and fold it over on itself once or twice. Cover loosely with plastic wrap and let rest about 15 minutes. 3. Using just enough flour to keep dough from sticking to work surface or to your fingers, gently and quickly shape dough into a ball. Generously coat a cotton towel (not terry cloth) with flour, wheat bran or cornmeal; put dough seam side down on towel and dust with more flour, bran or cornmeal. Cover with another cotton towel and let rise for about 2 hours. When it is ready, dough will be more than double in size and will not readily spring back when poked with a finger. 4. At least a half-hour before dough is ready, heat oven to 450 degrees. Put a 6- to 8-quart heavy covered pot (cast iron, enamel, Pyrex or ceramic) in oven as it heats. When dough is ready, carefully remove pot from oven. Slide your hand under towel and turn dough over into pot, seam side up; it may look like a mess, but that is O.K. Shake pan once or twice if dough is unevenly distributed; it will straighten out as it bakes. Cover with lid and bake 30 minutes, then remove lid and bake another 15 to 30 minutes, until loaf is beautifully browned. Cool on a rack.